Document
View document list
Create document
Import and Create
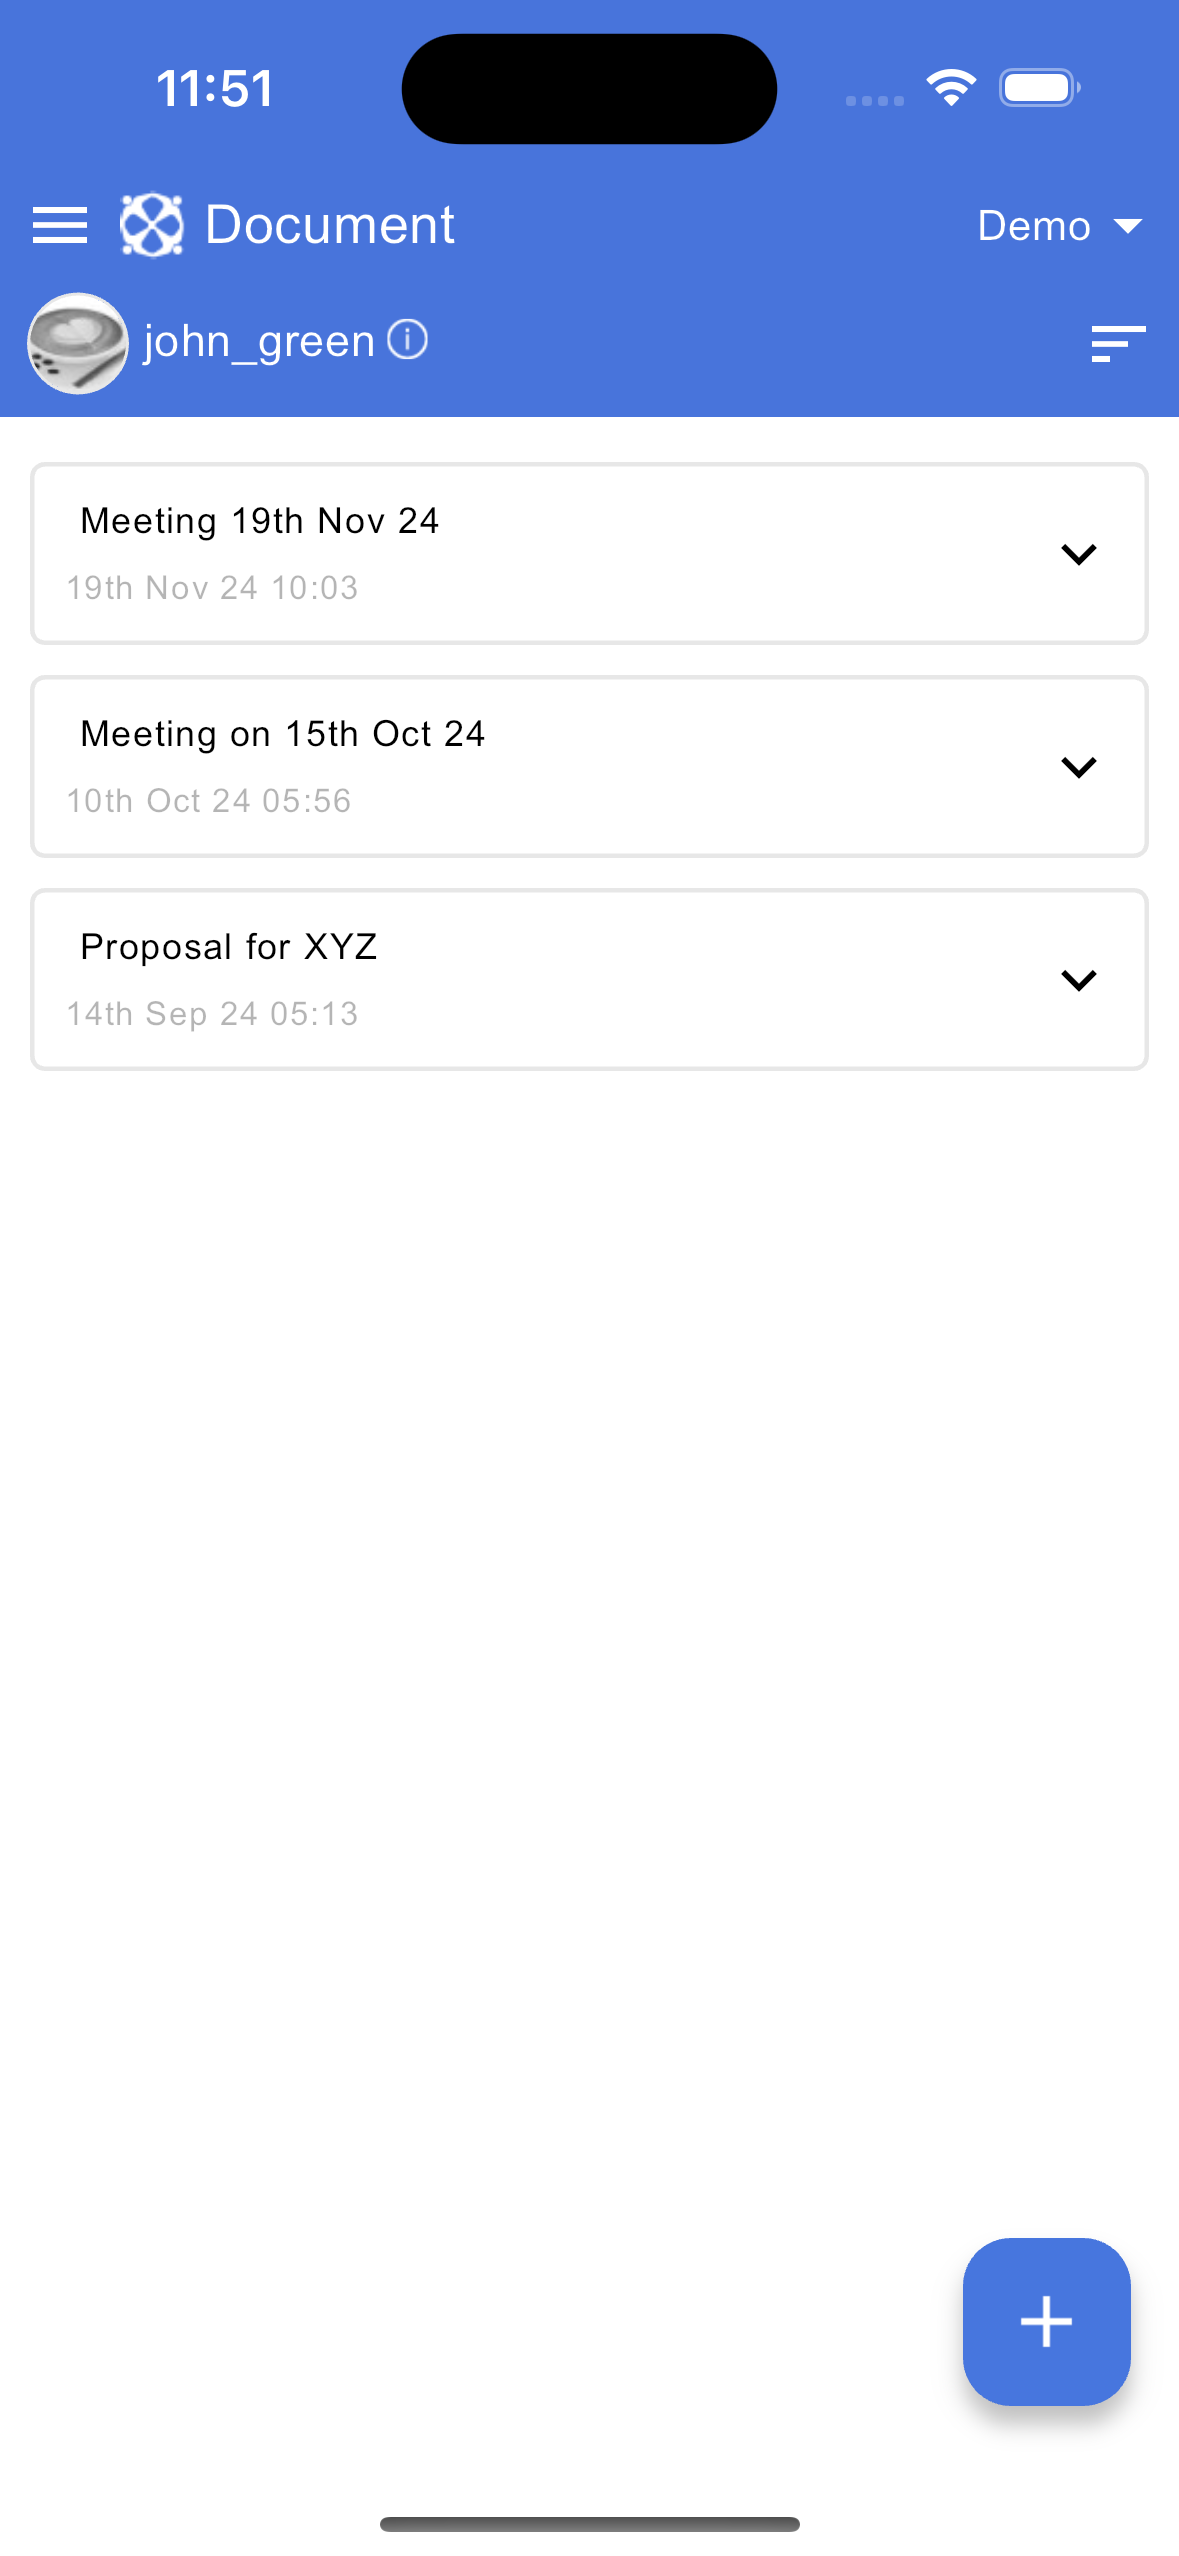
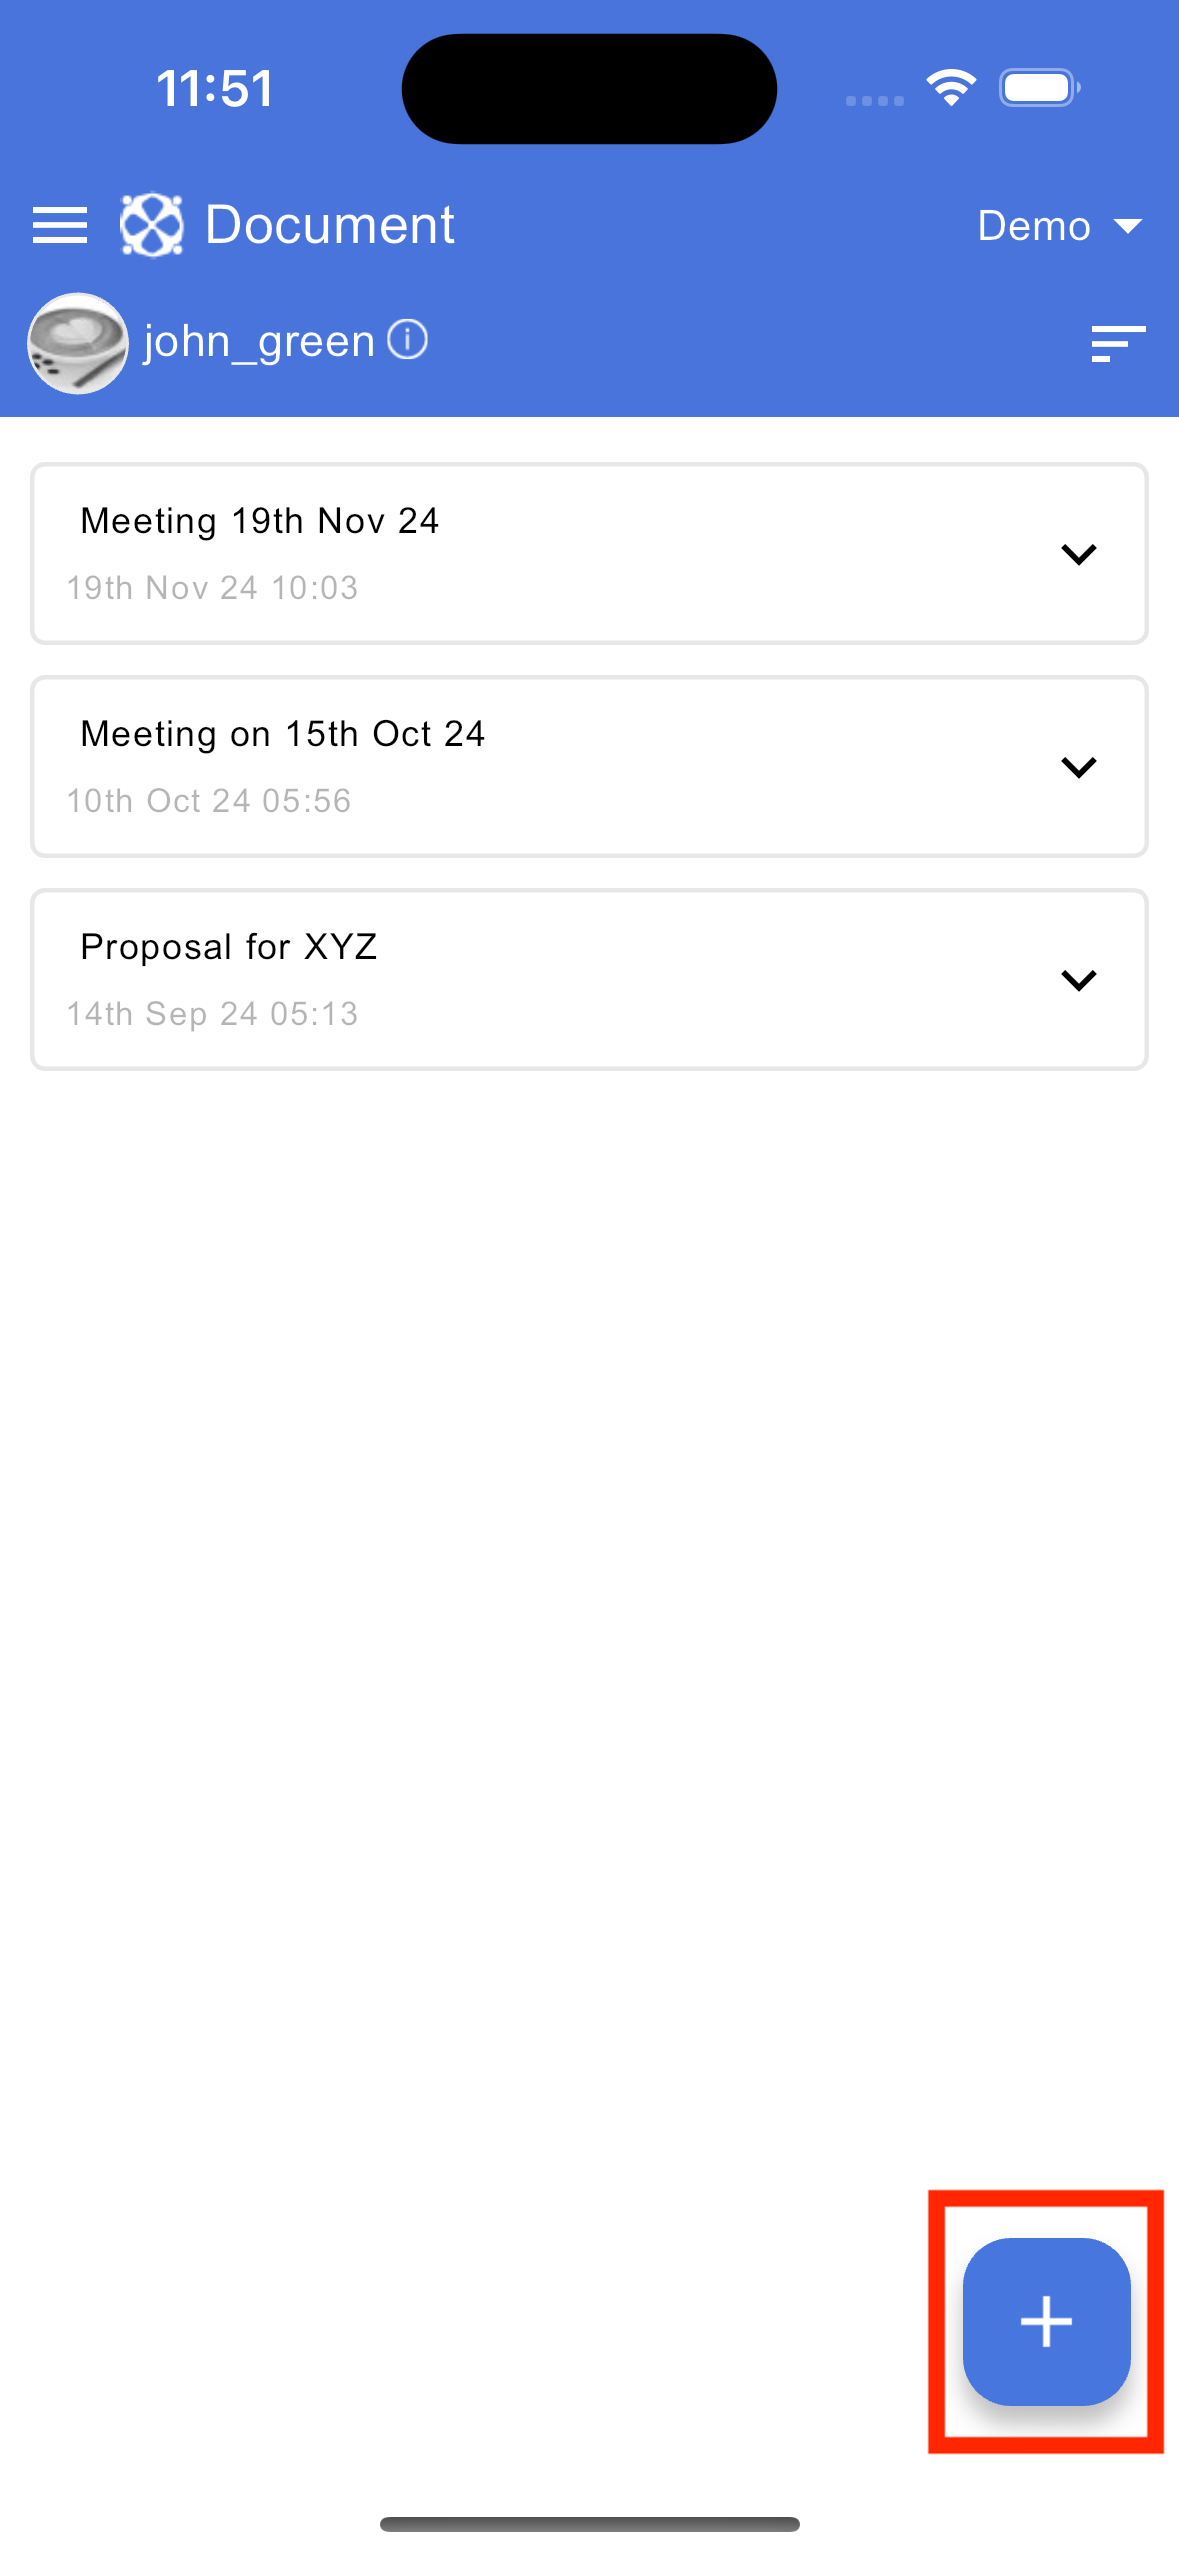
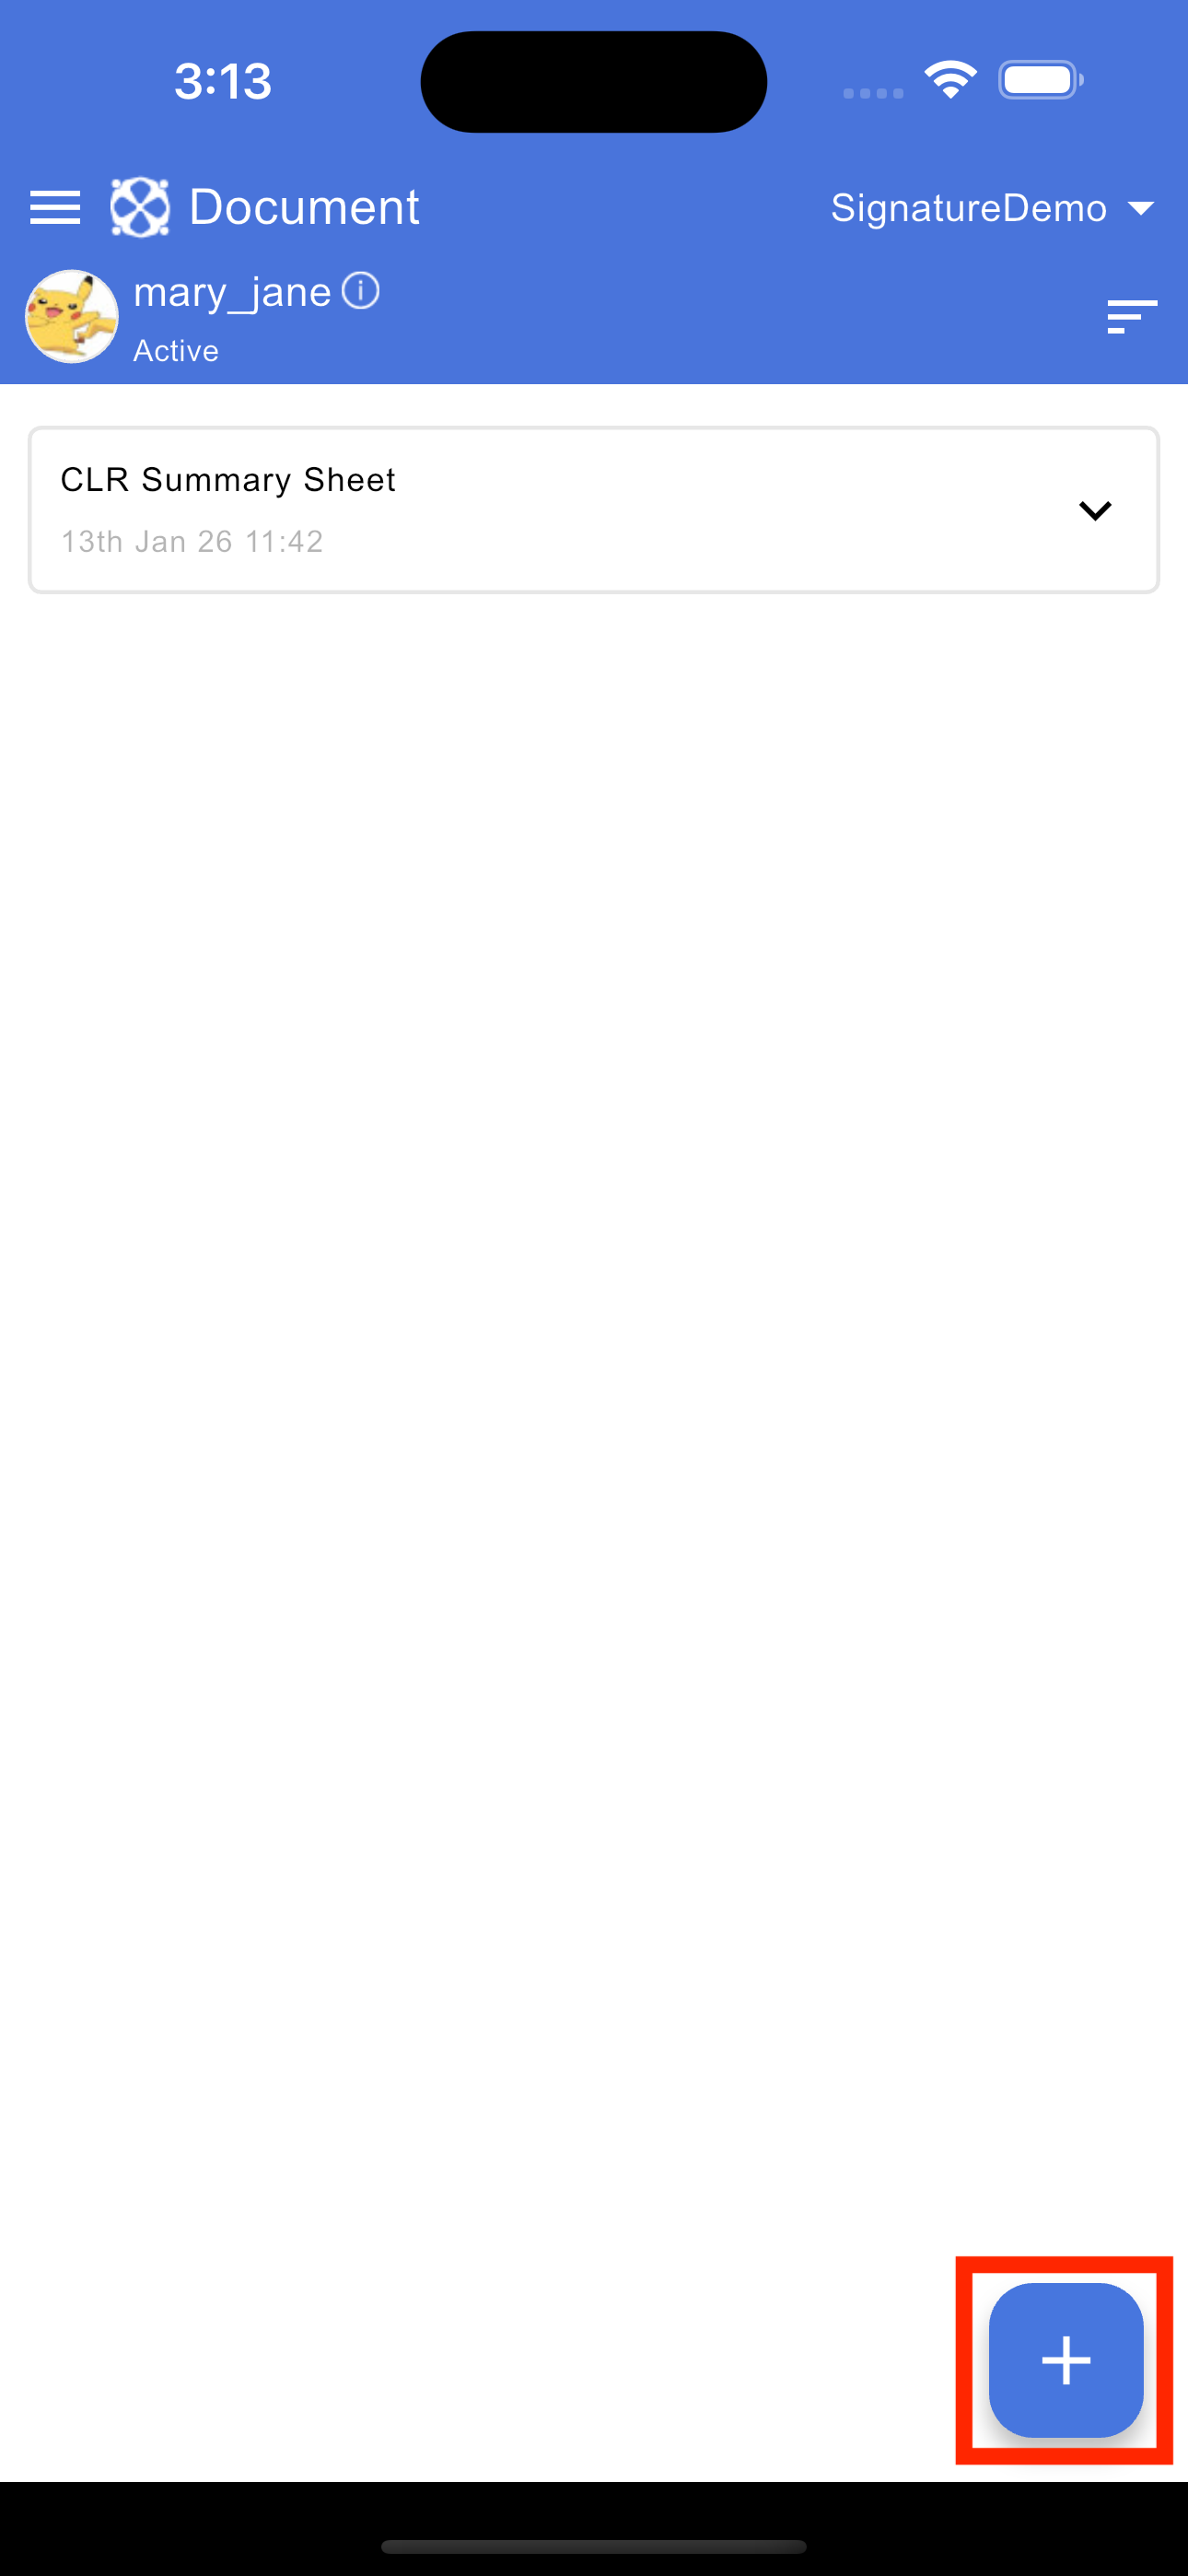
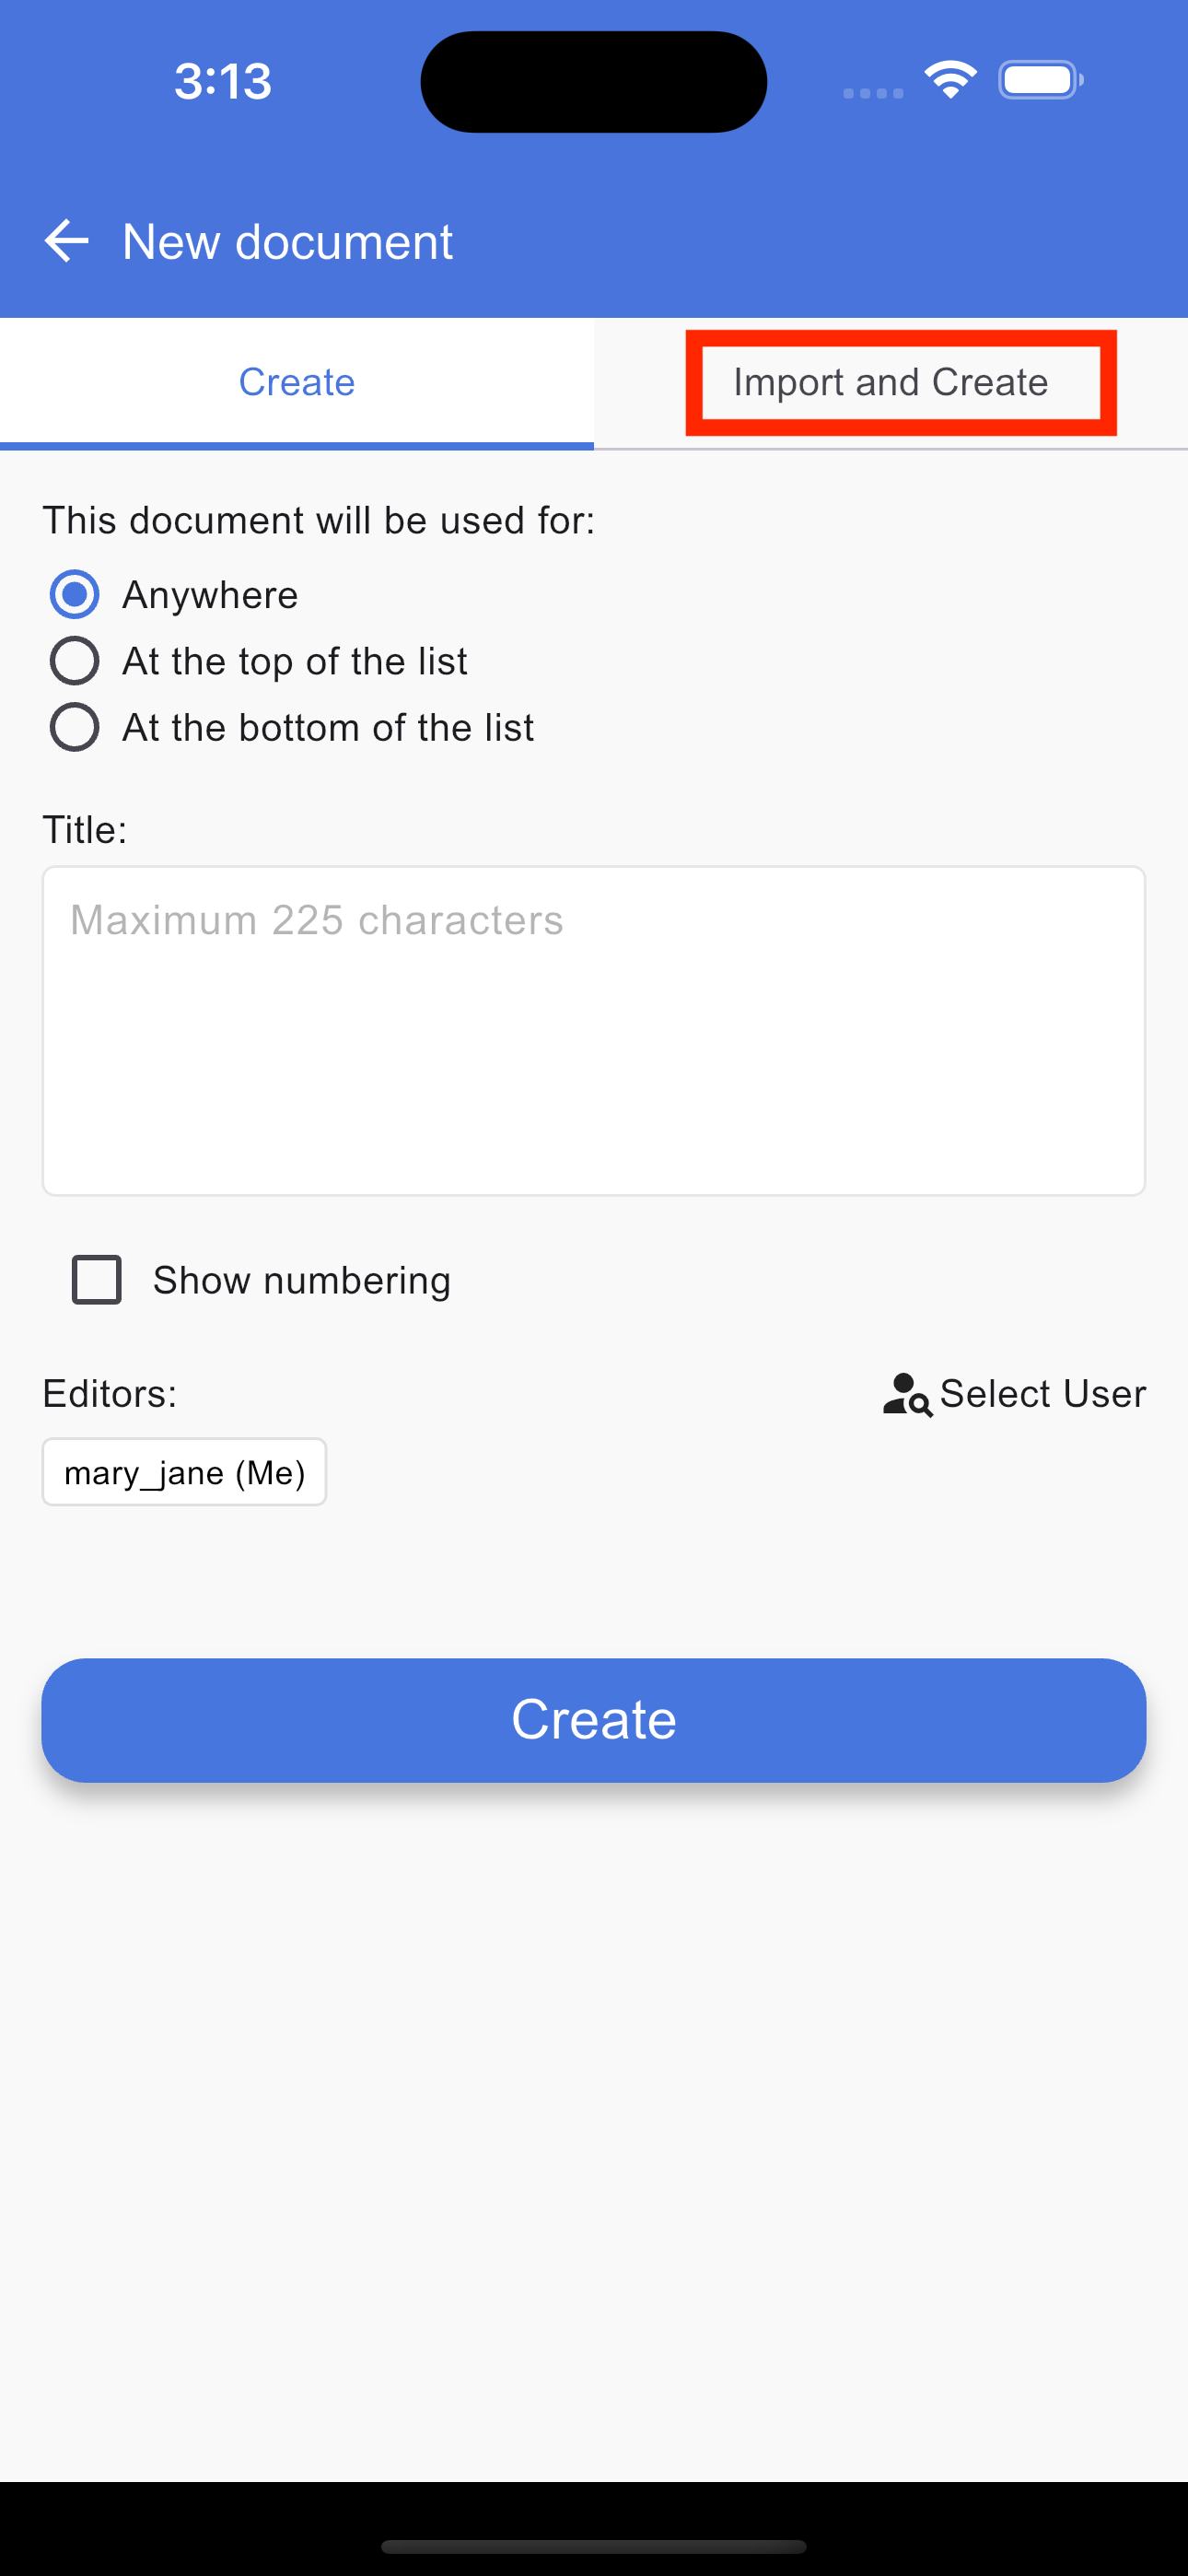
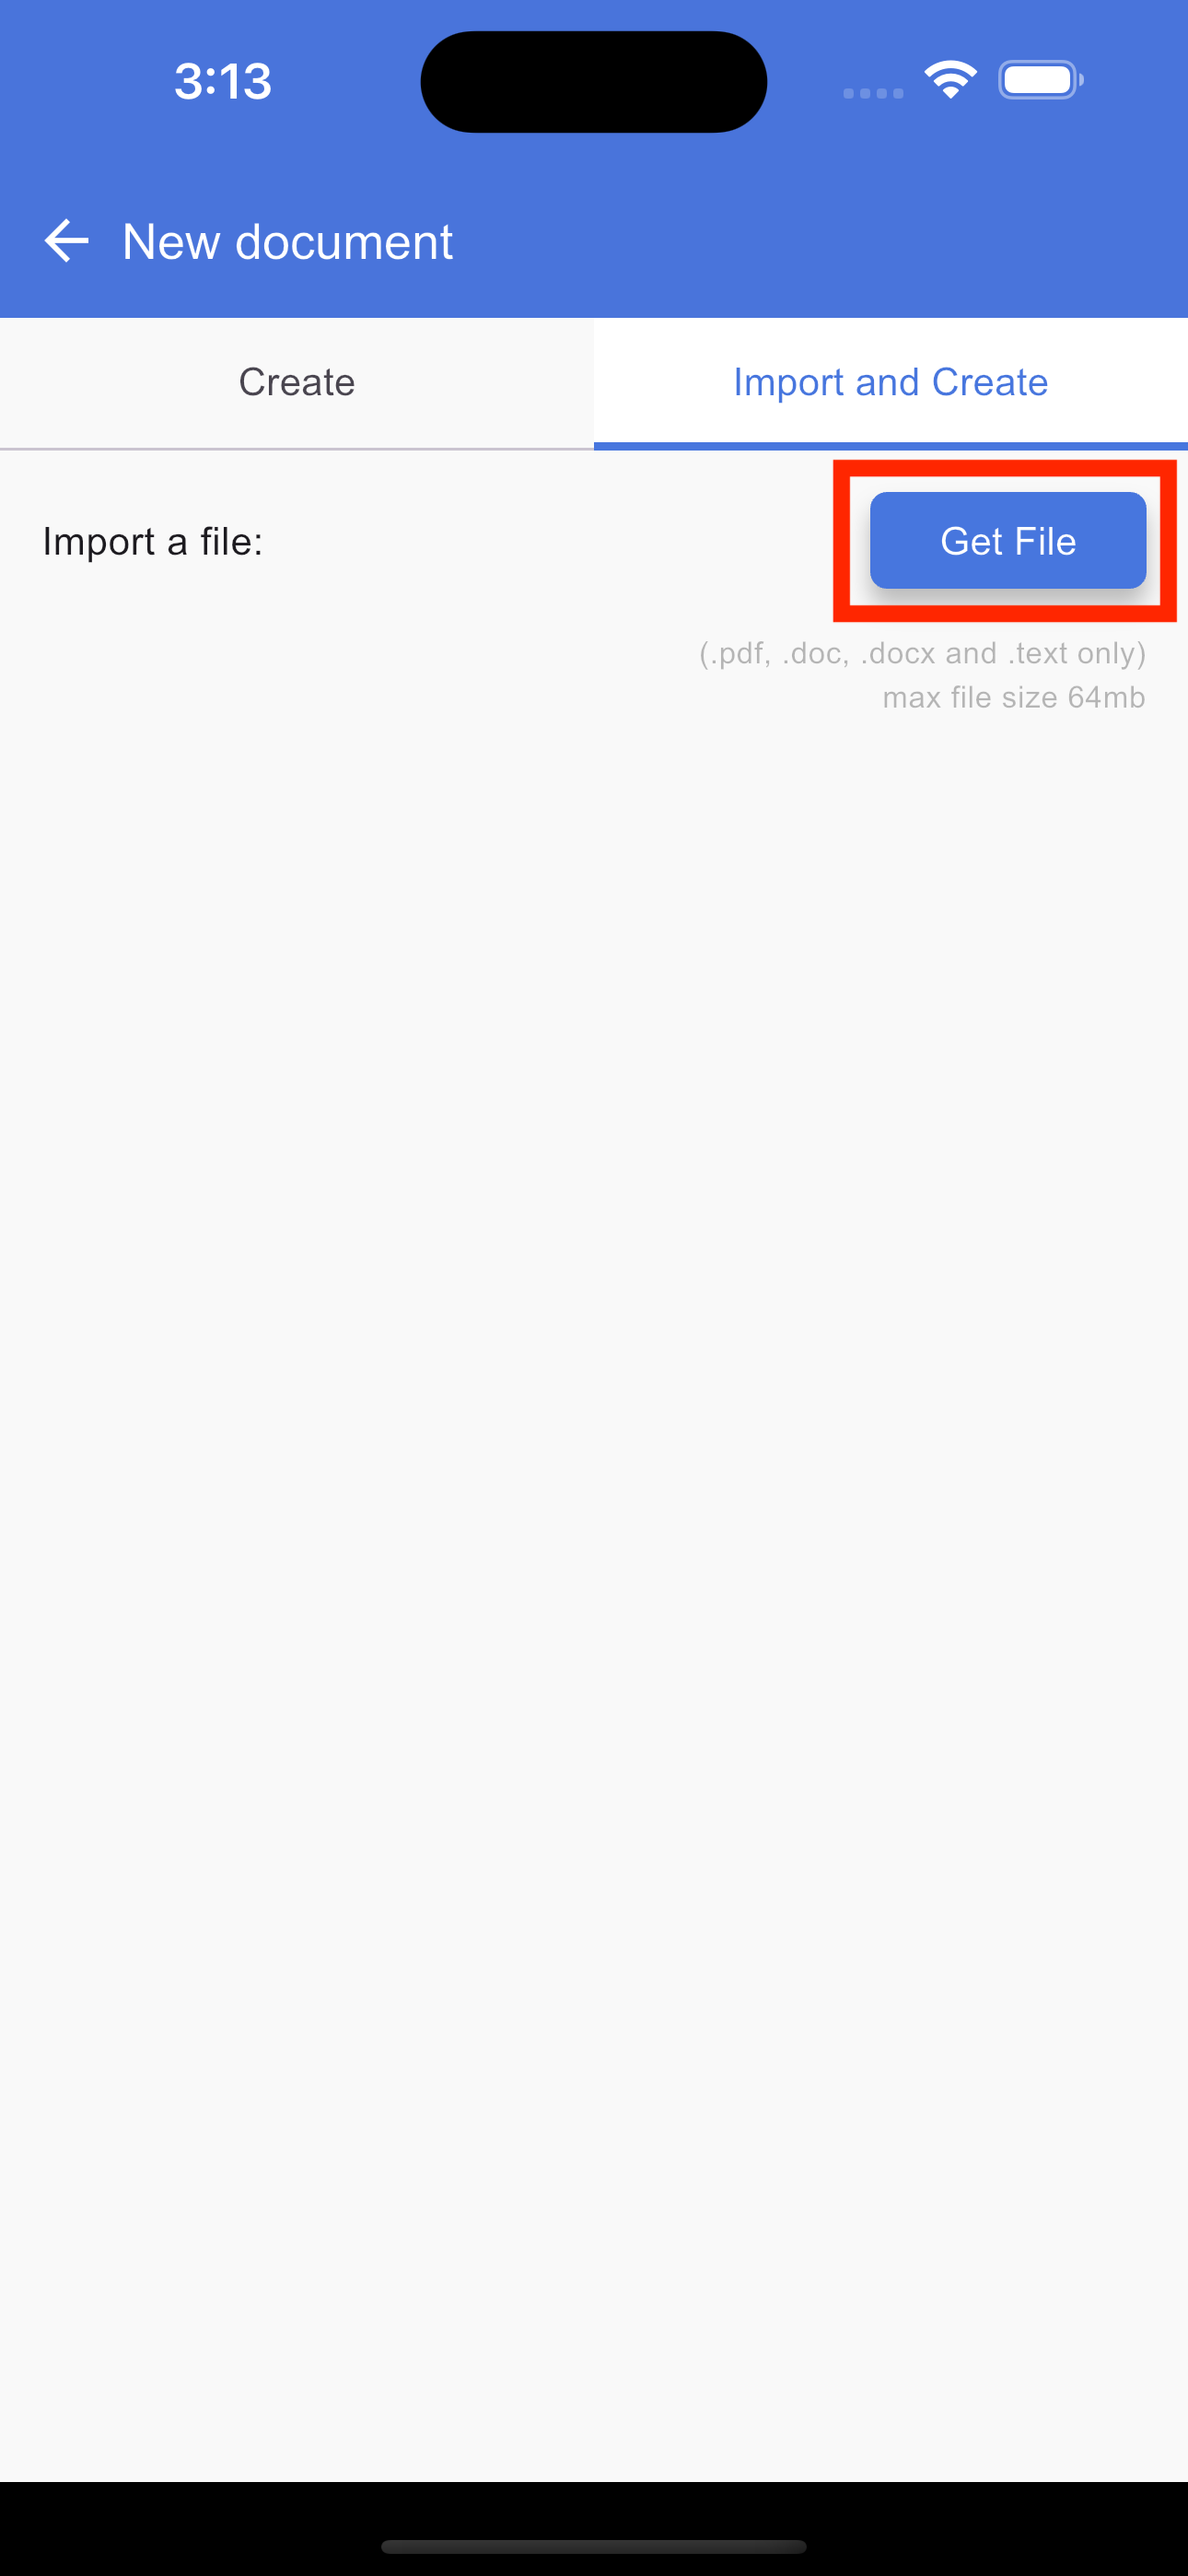
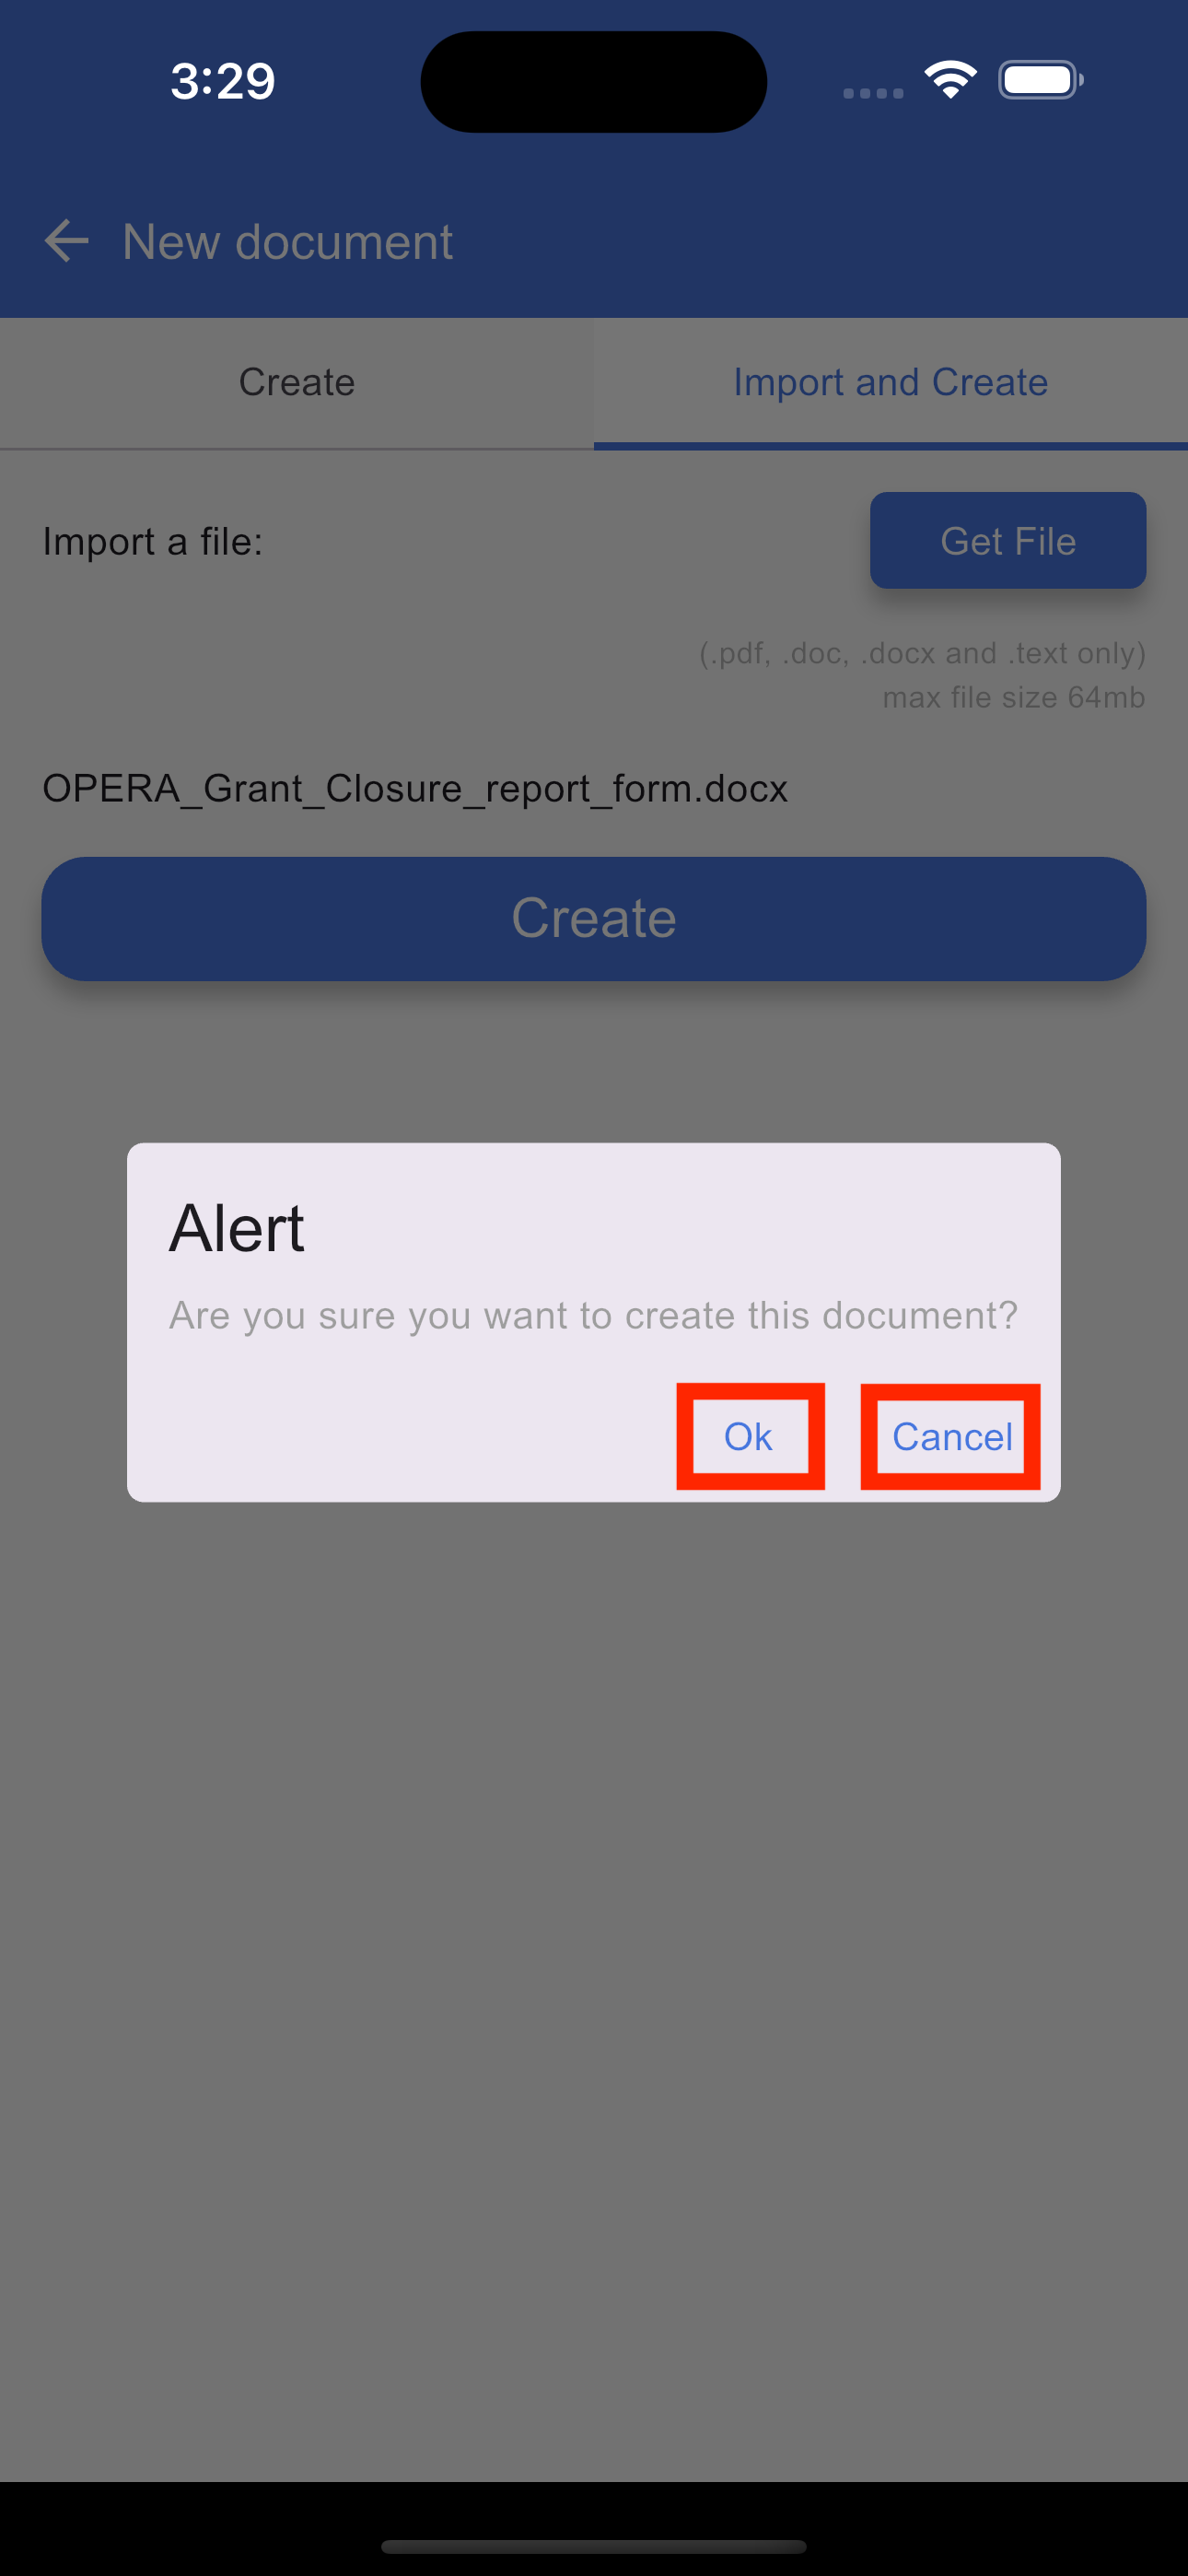
To create a new document using the import feature, open the document application to load the Home page, which serves as your document list. On this page, tap the "+" (Plus) button and select the Import and Create tab. This will open the upload screen where you can tap the Browse button to select a PDF, DOC, DOCX, or text file from your device. Once your file is uploaded, tap the Create button to generate a document from the file. After the document is successfully created, you will be automatically redirected to the document list page where your new document will appear.

View single document
Edit title
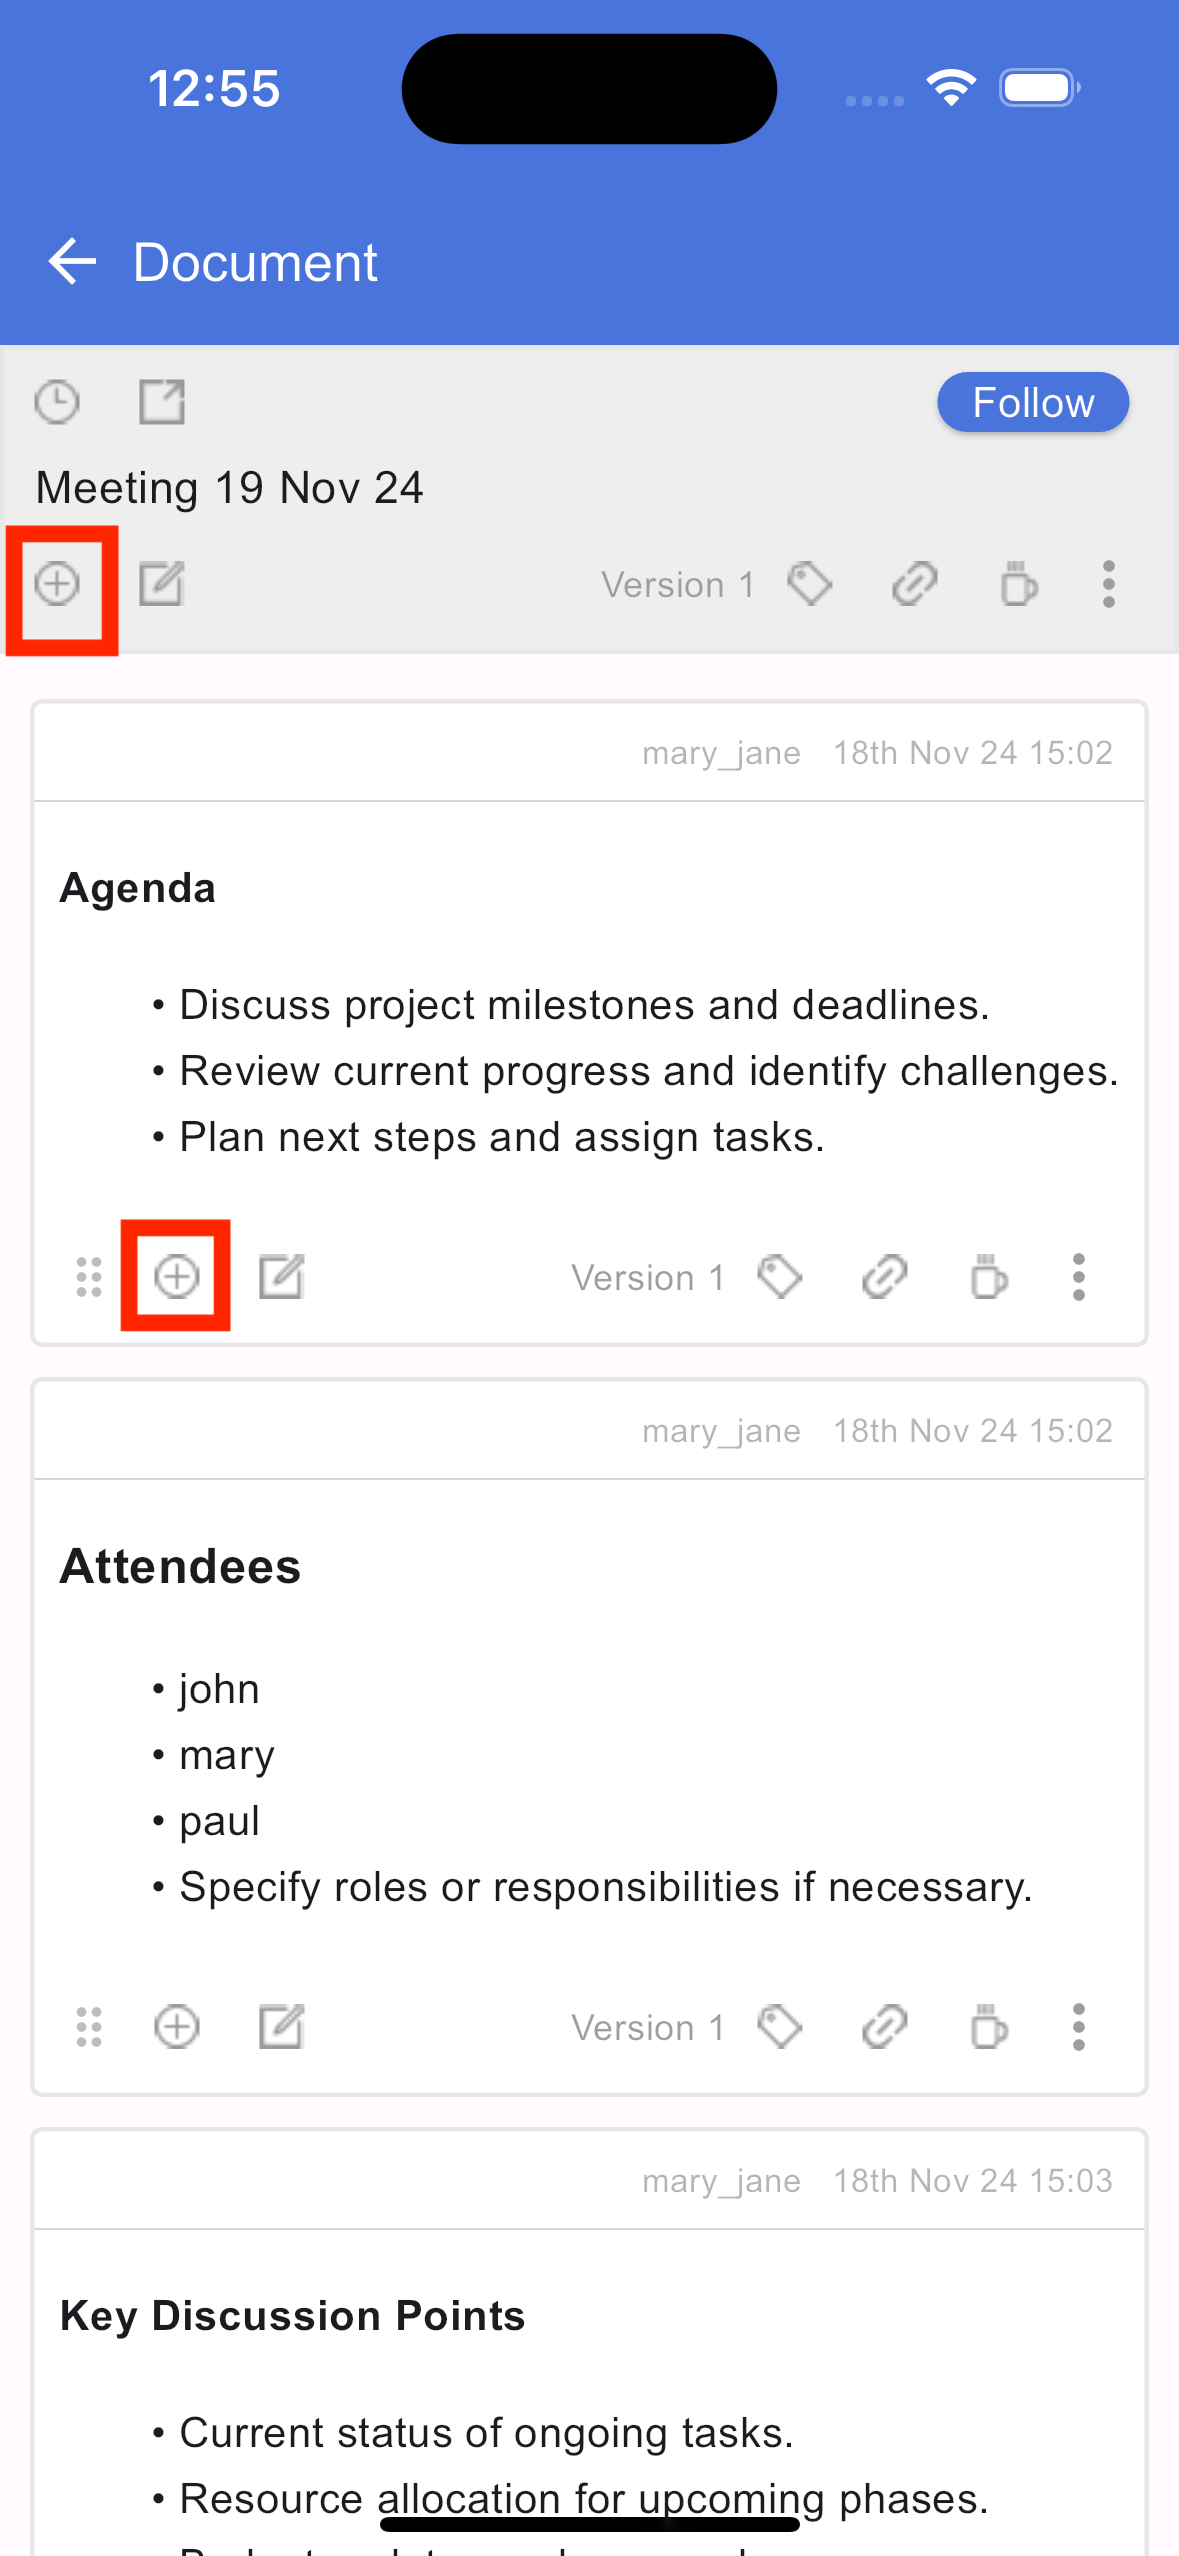
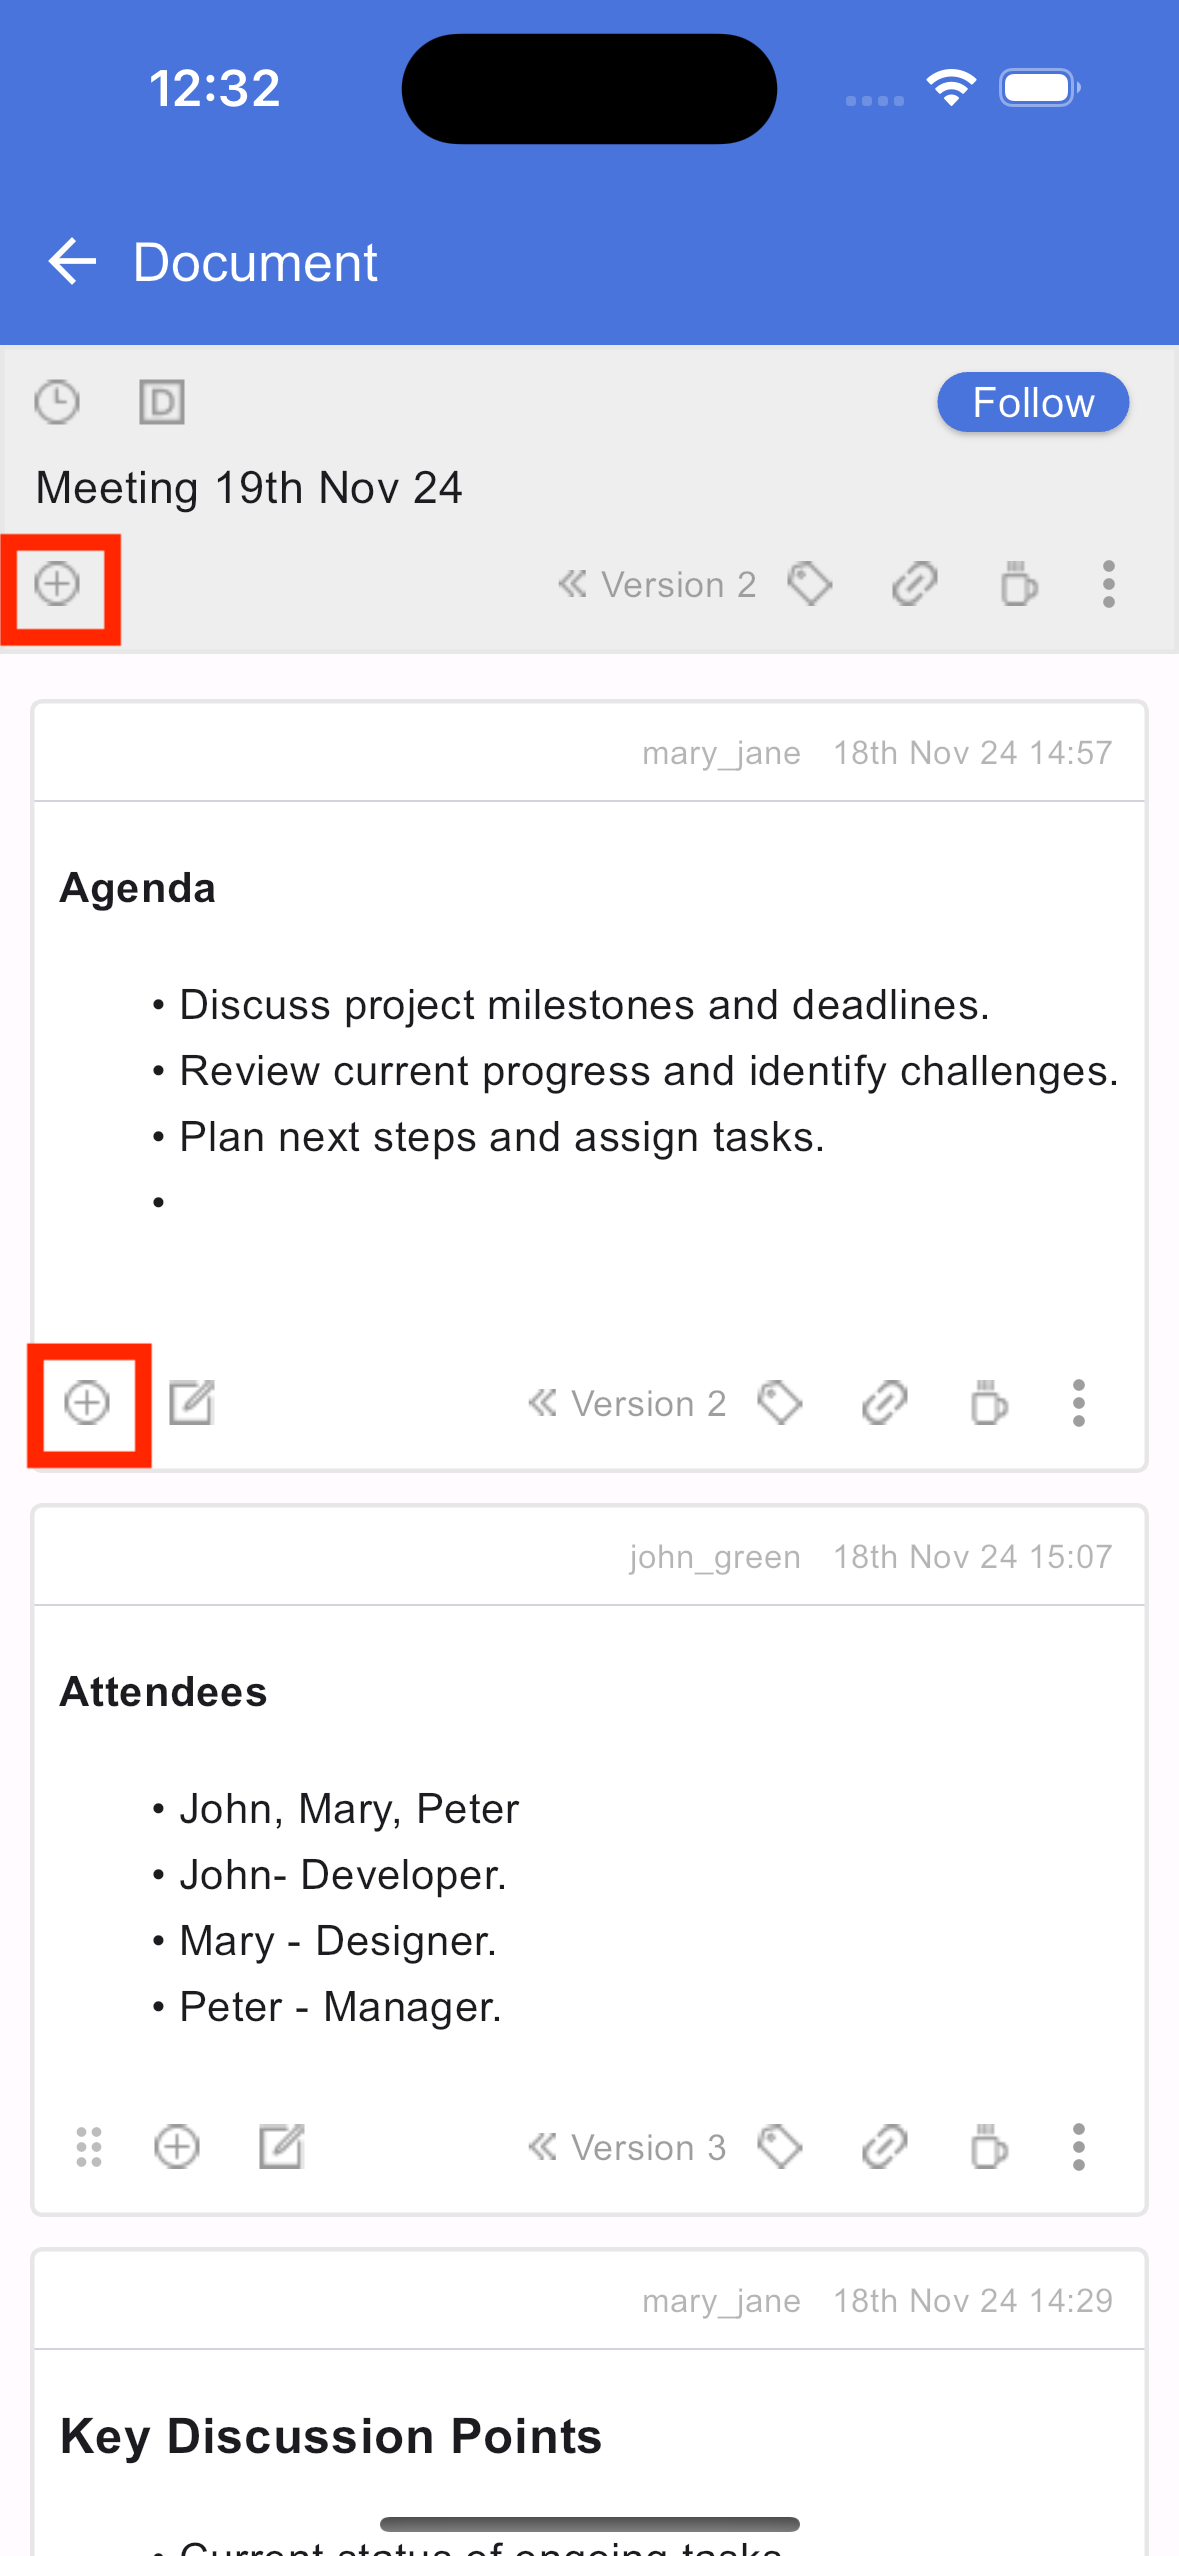
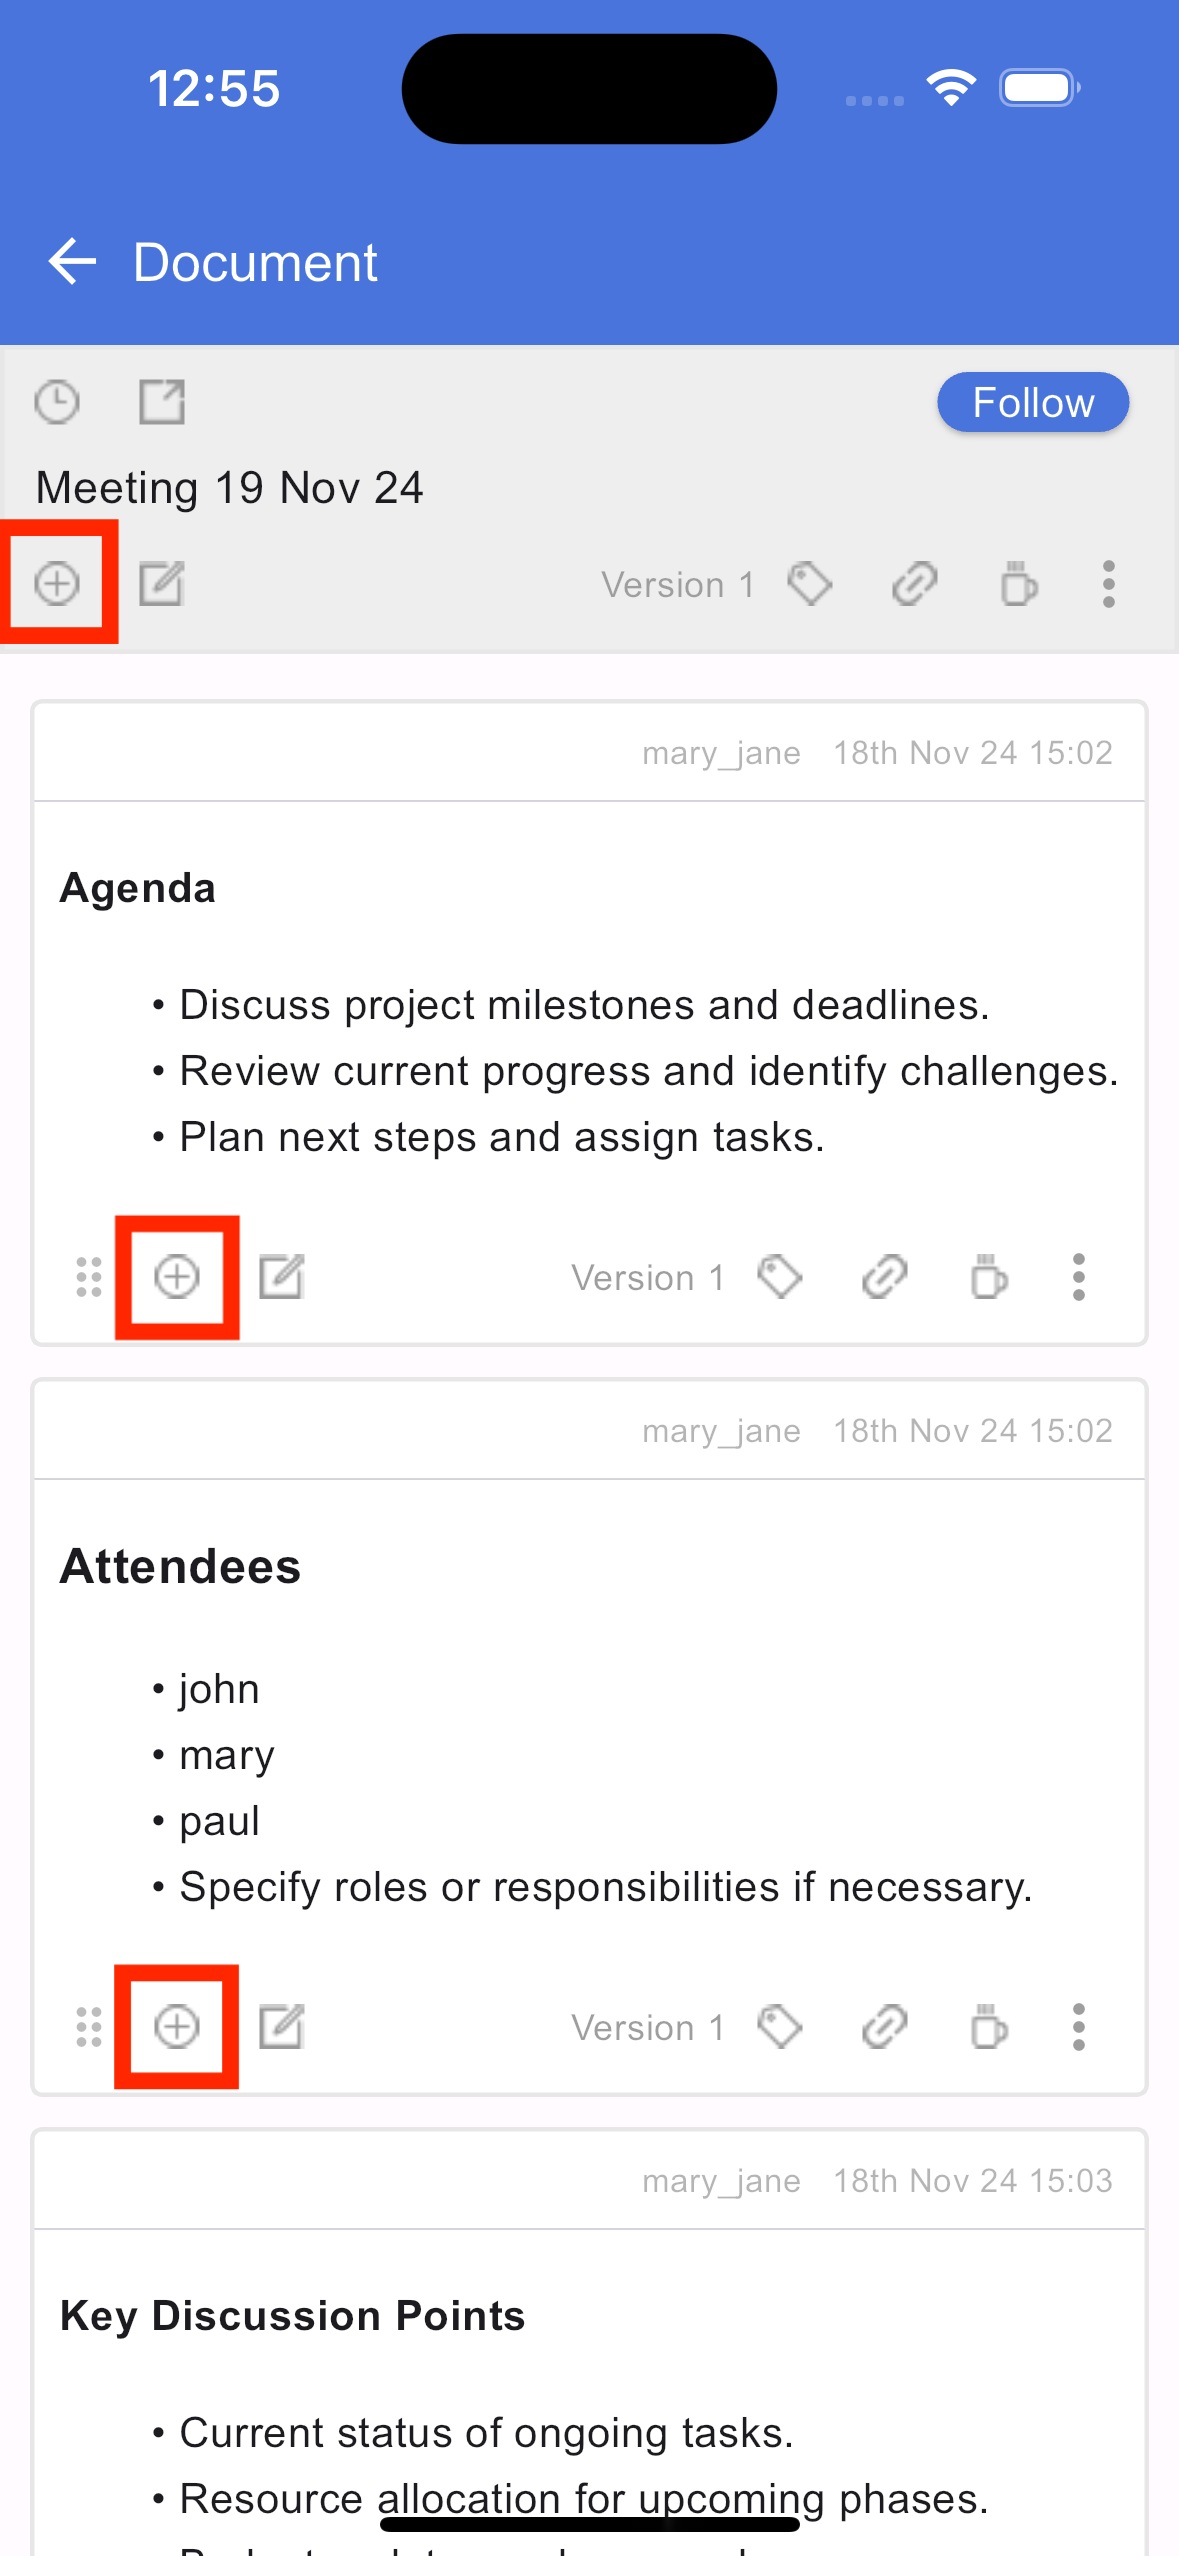
Add section

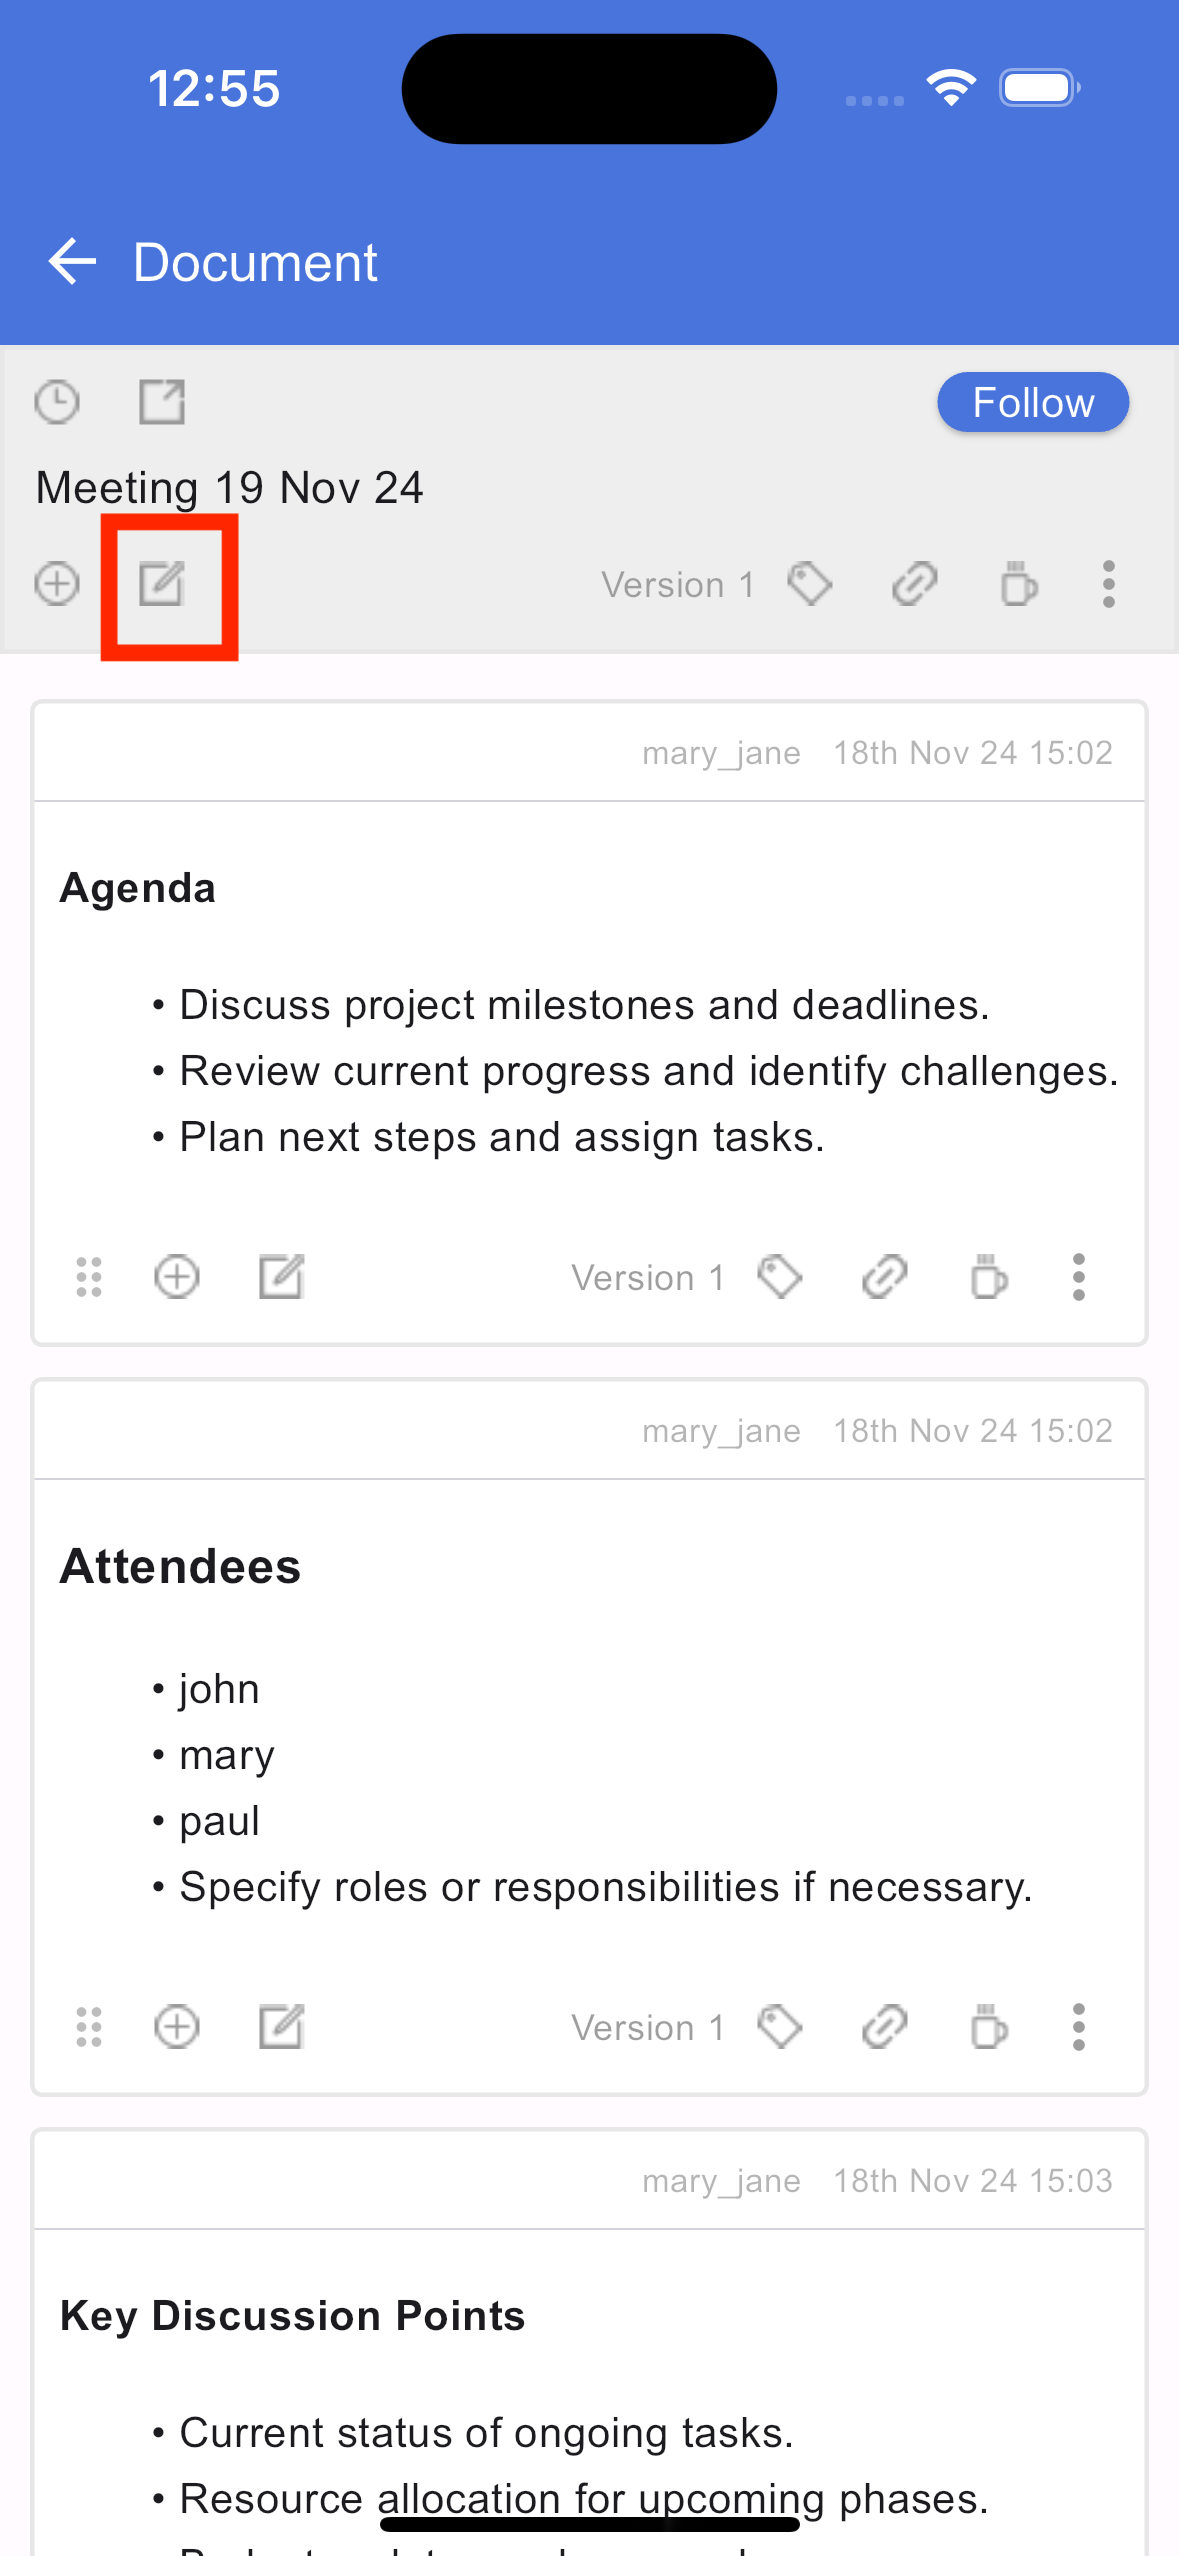
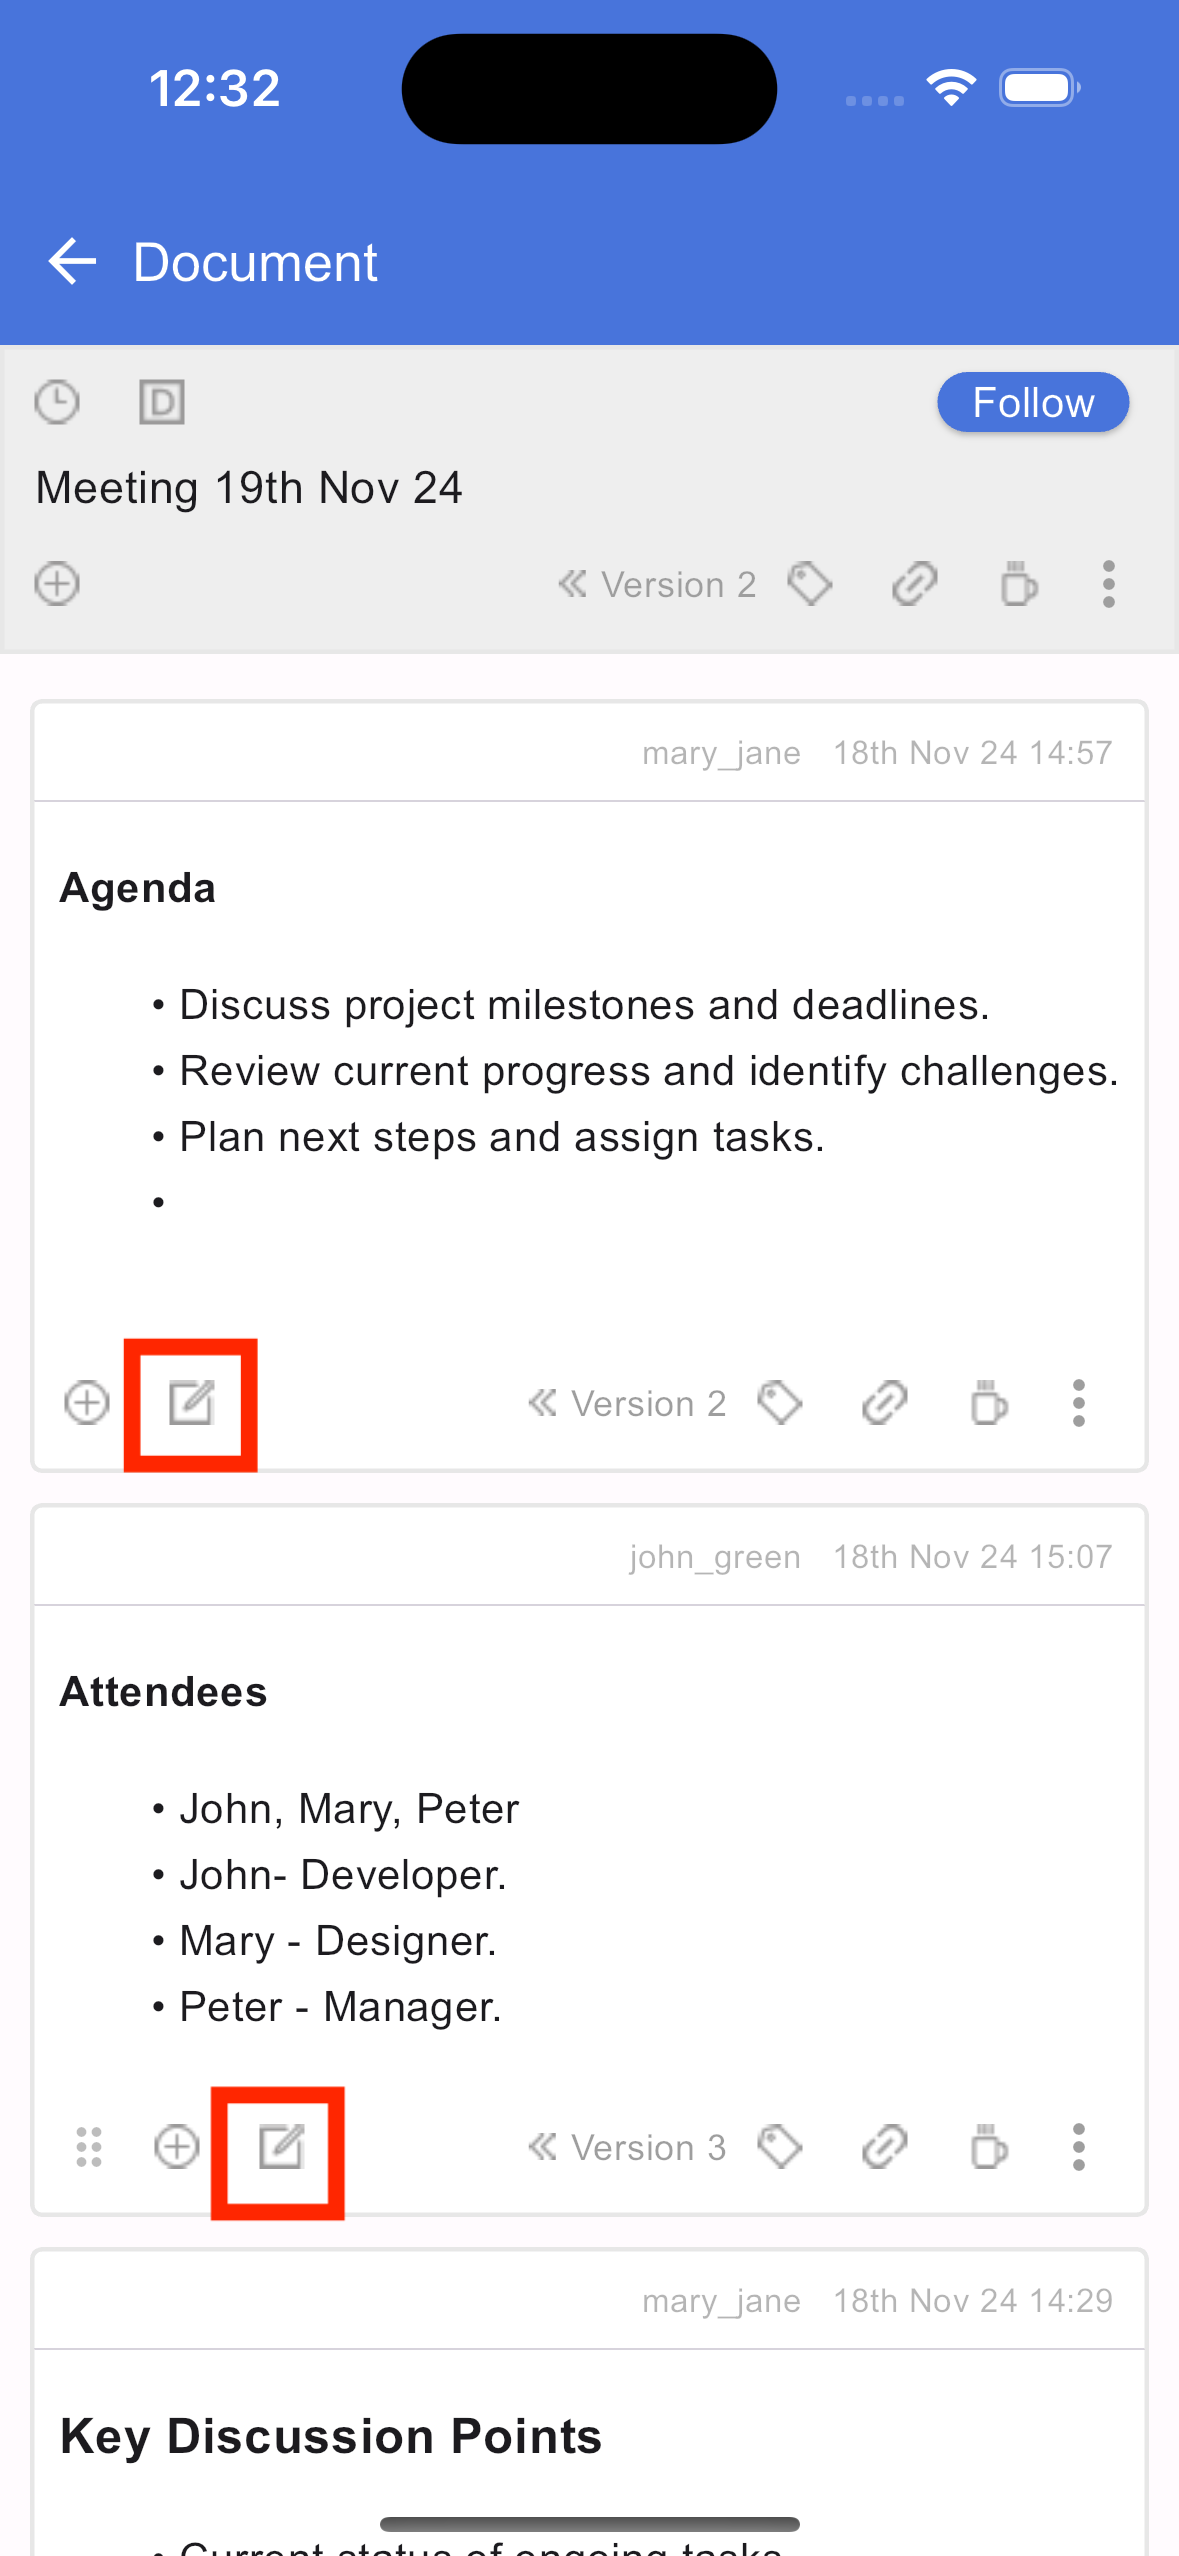
Edit section
View section versions

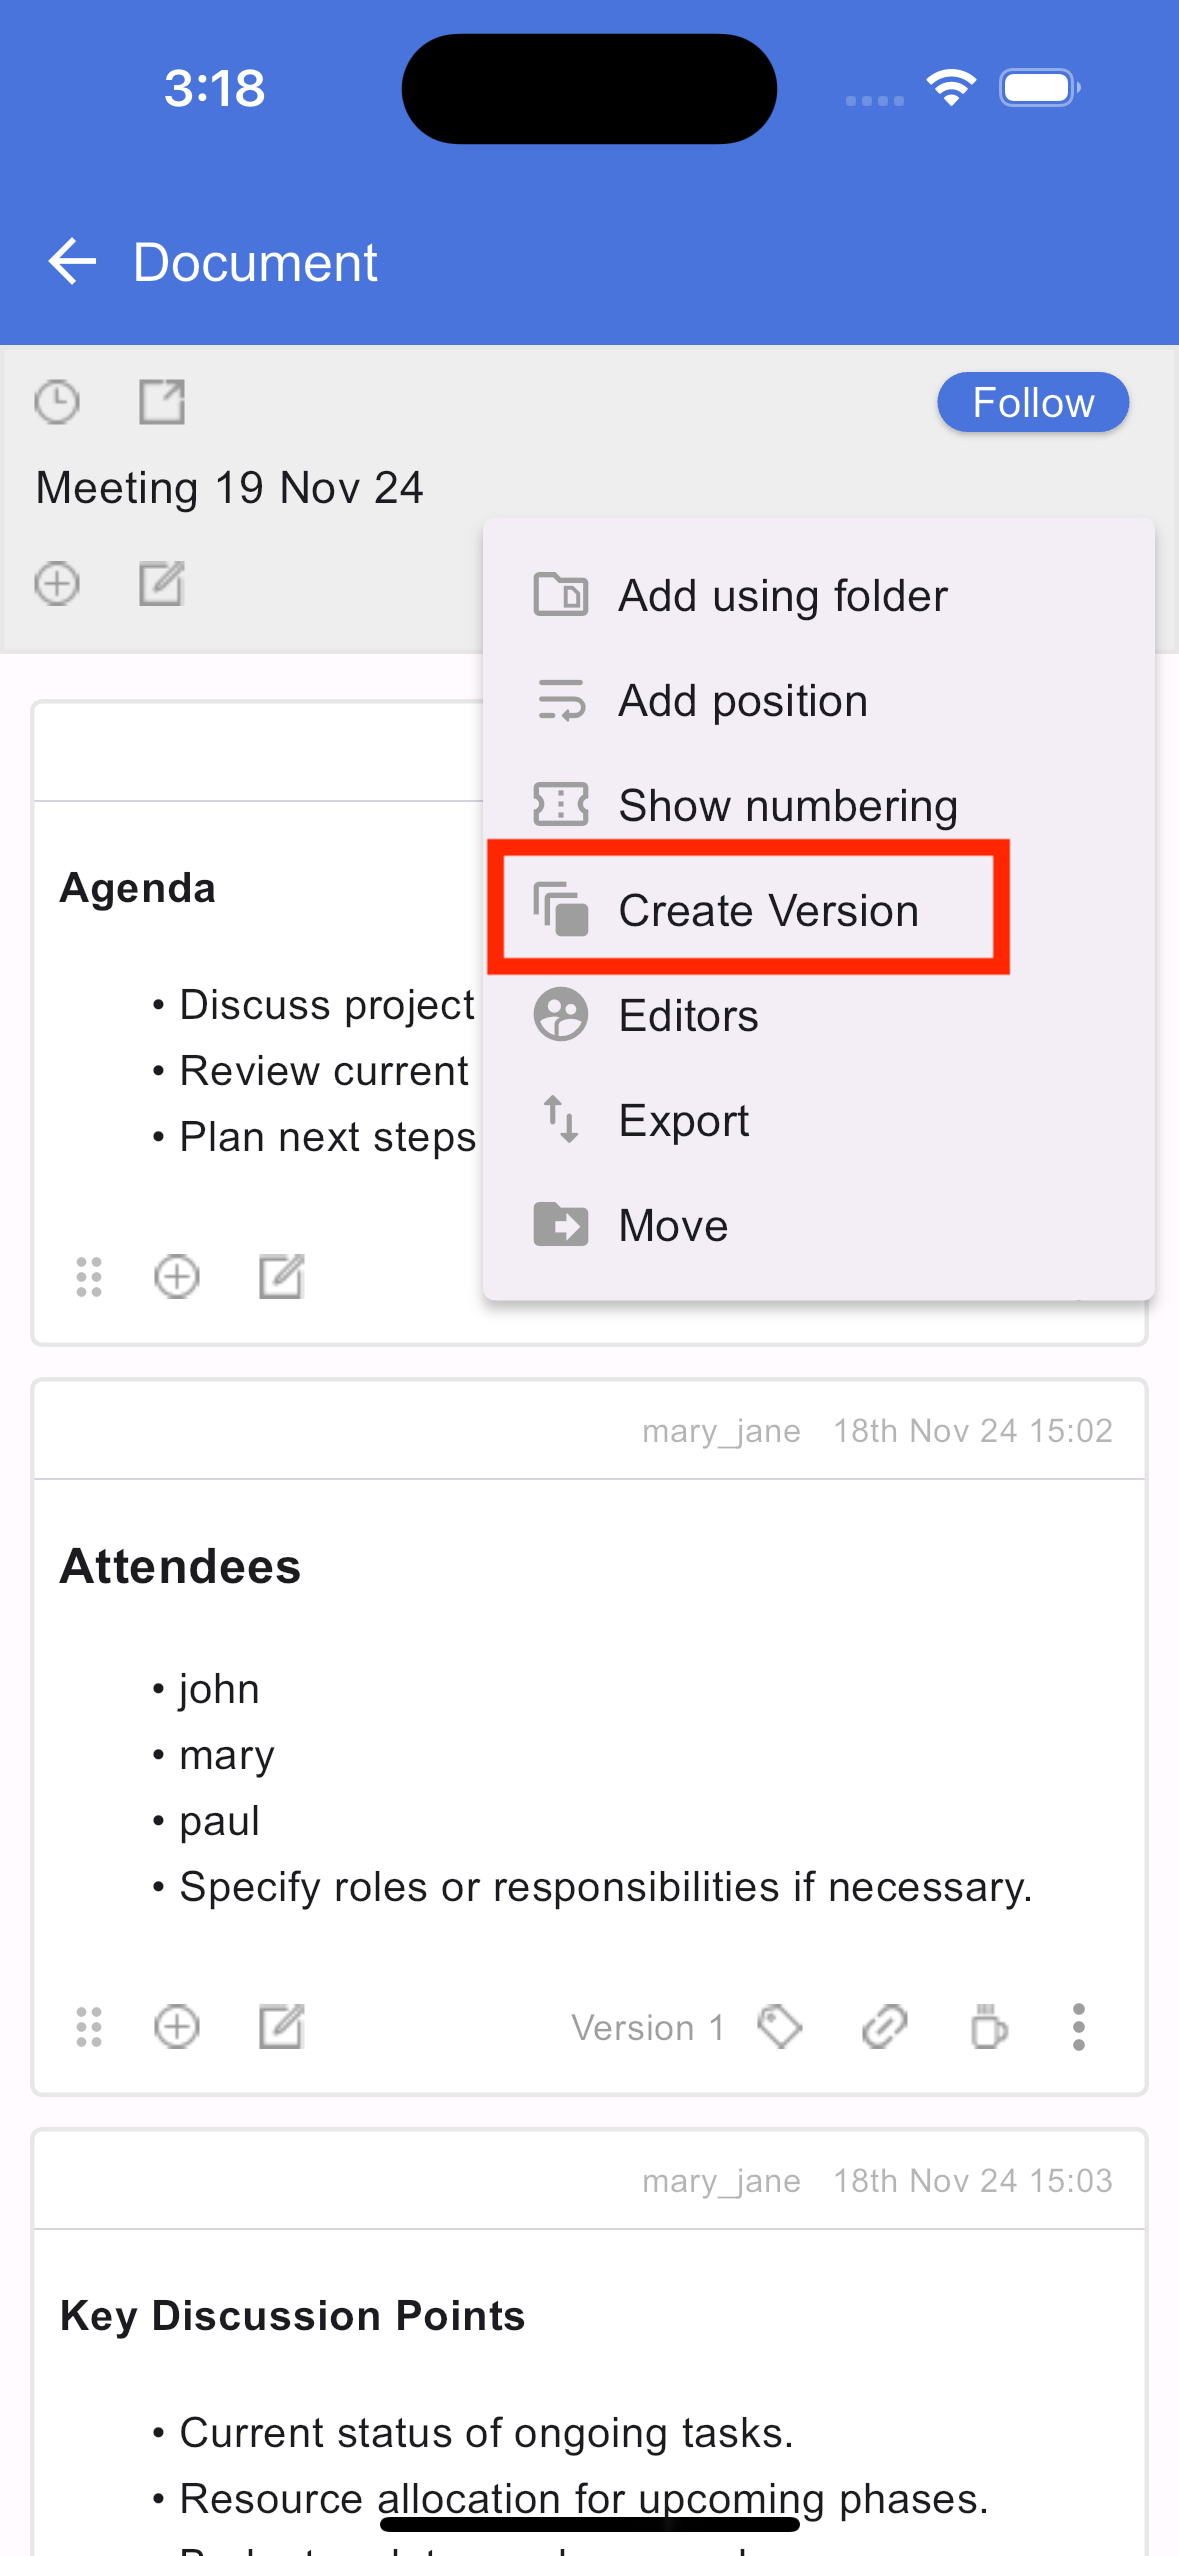
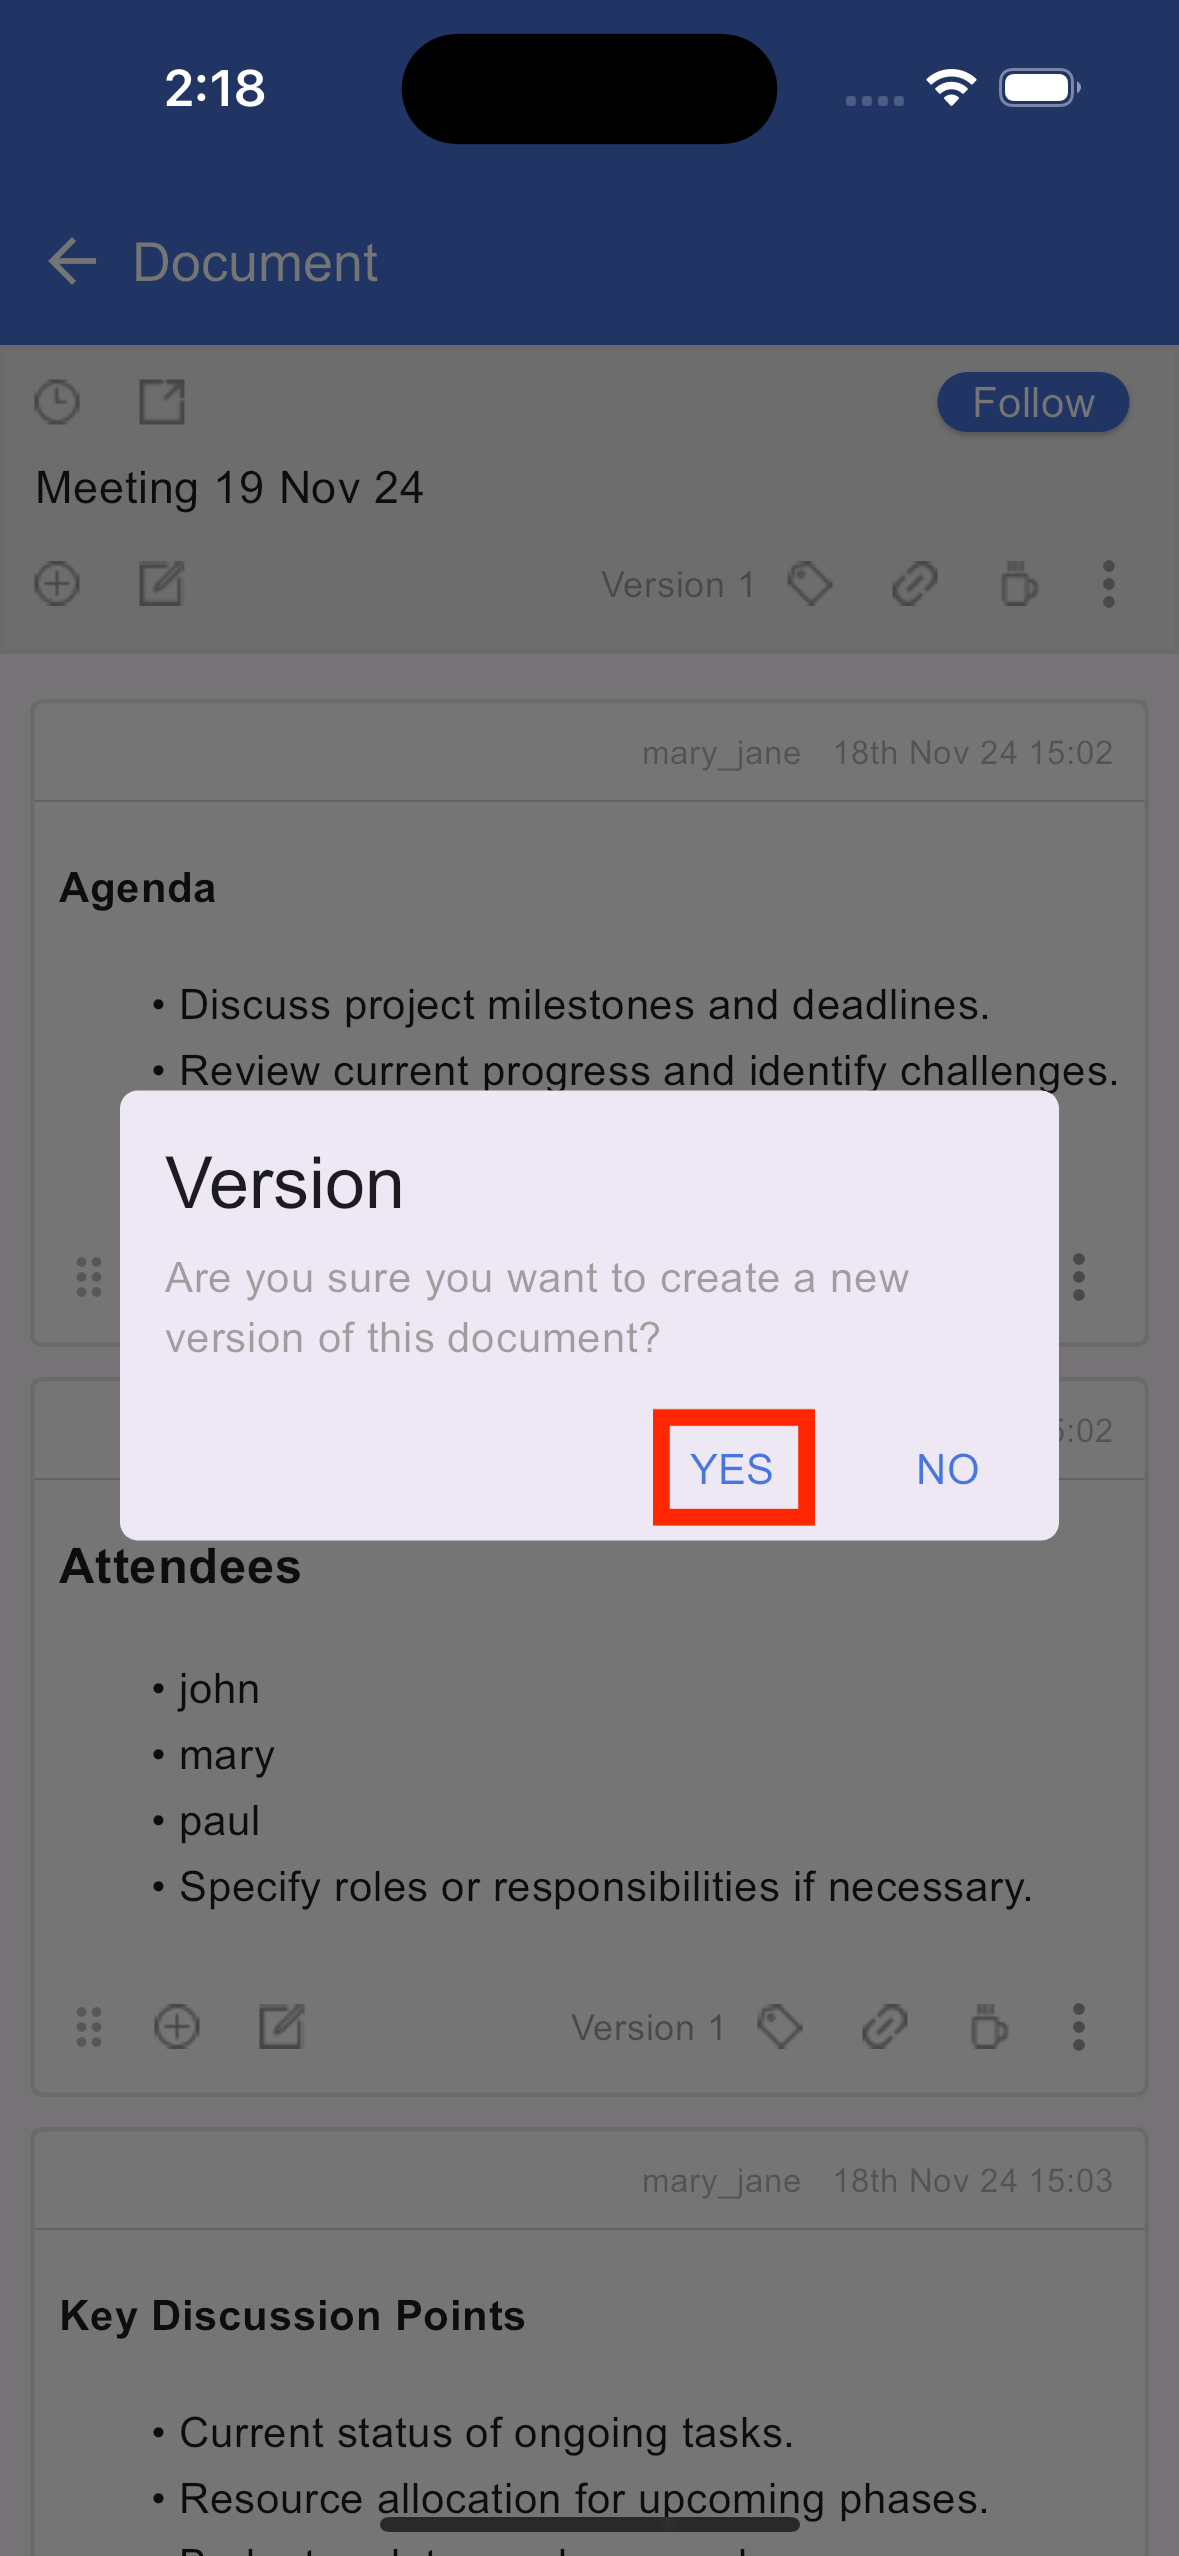
Create document version
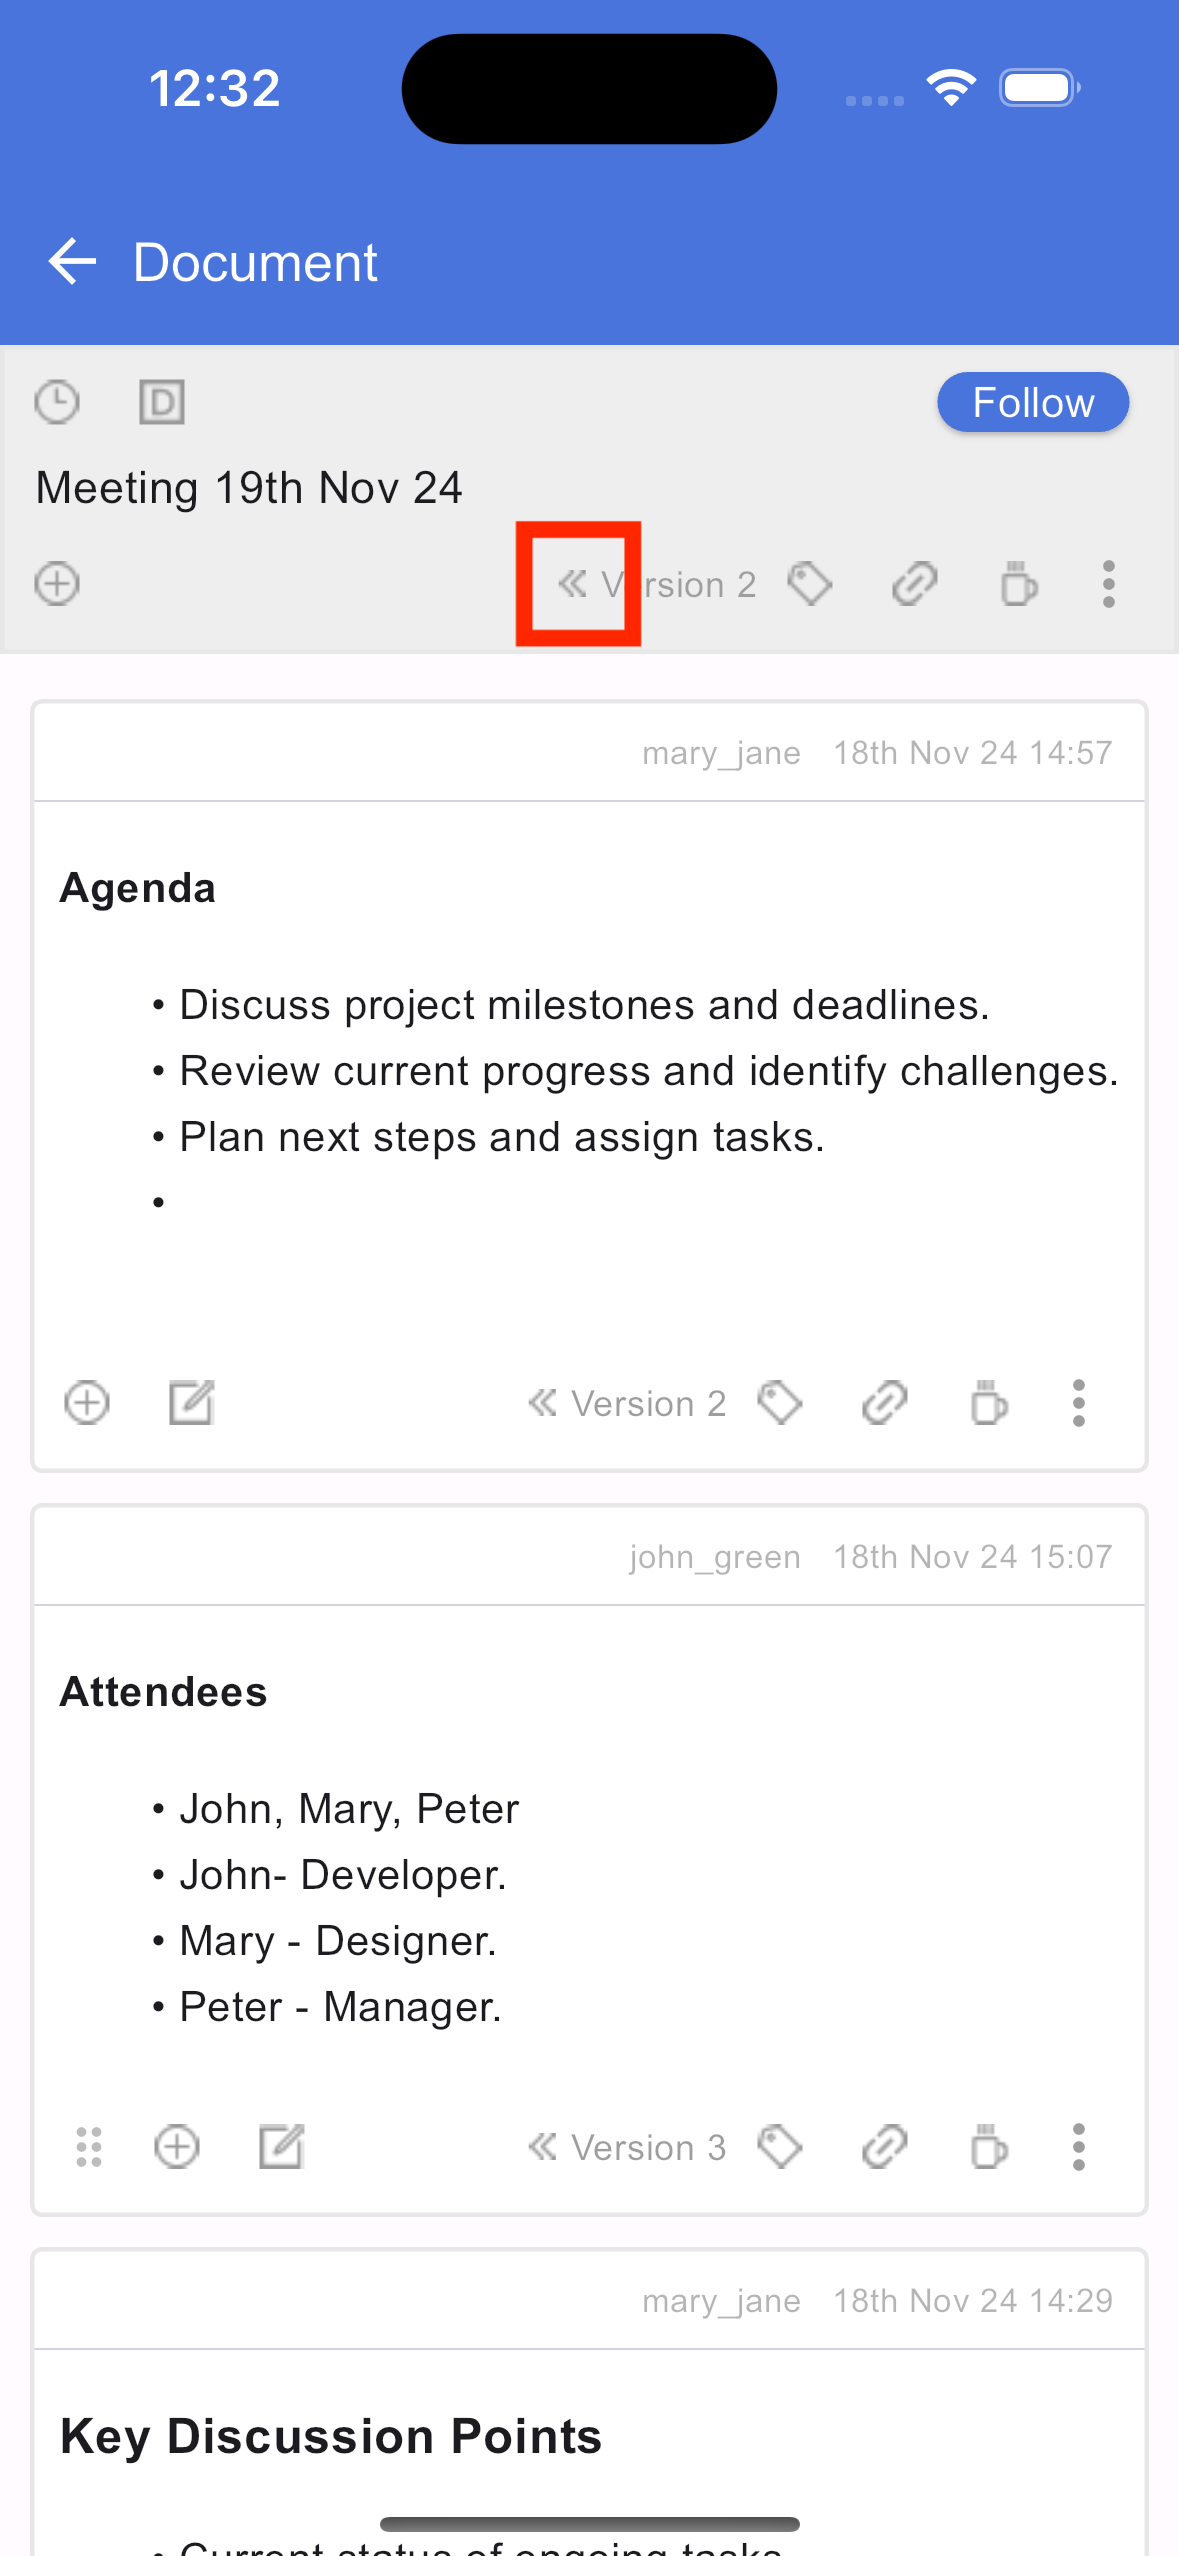
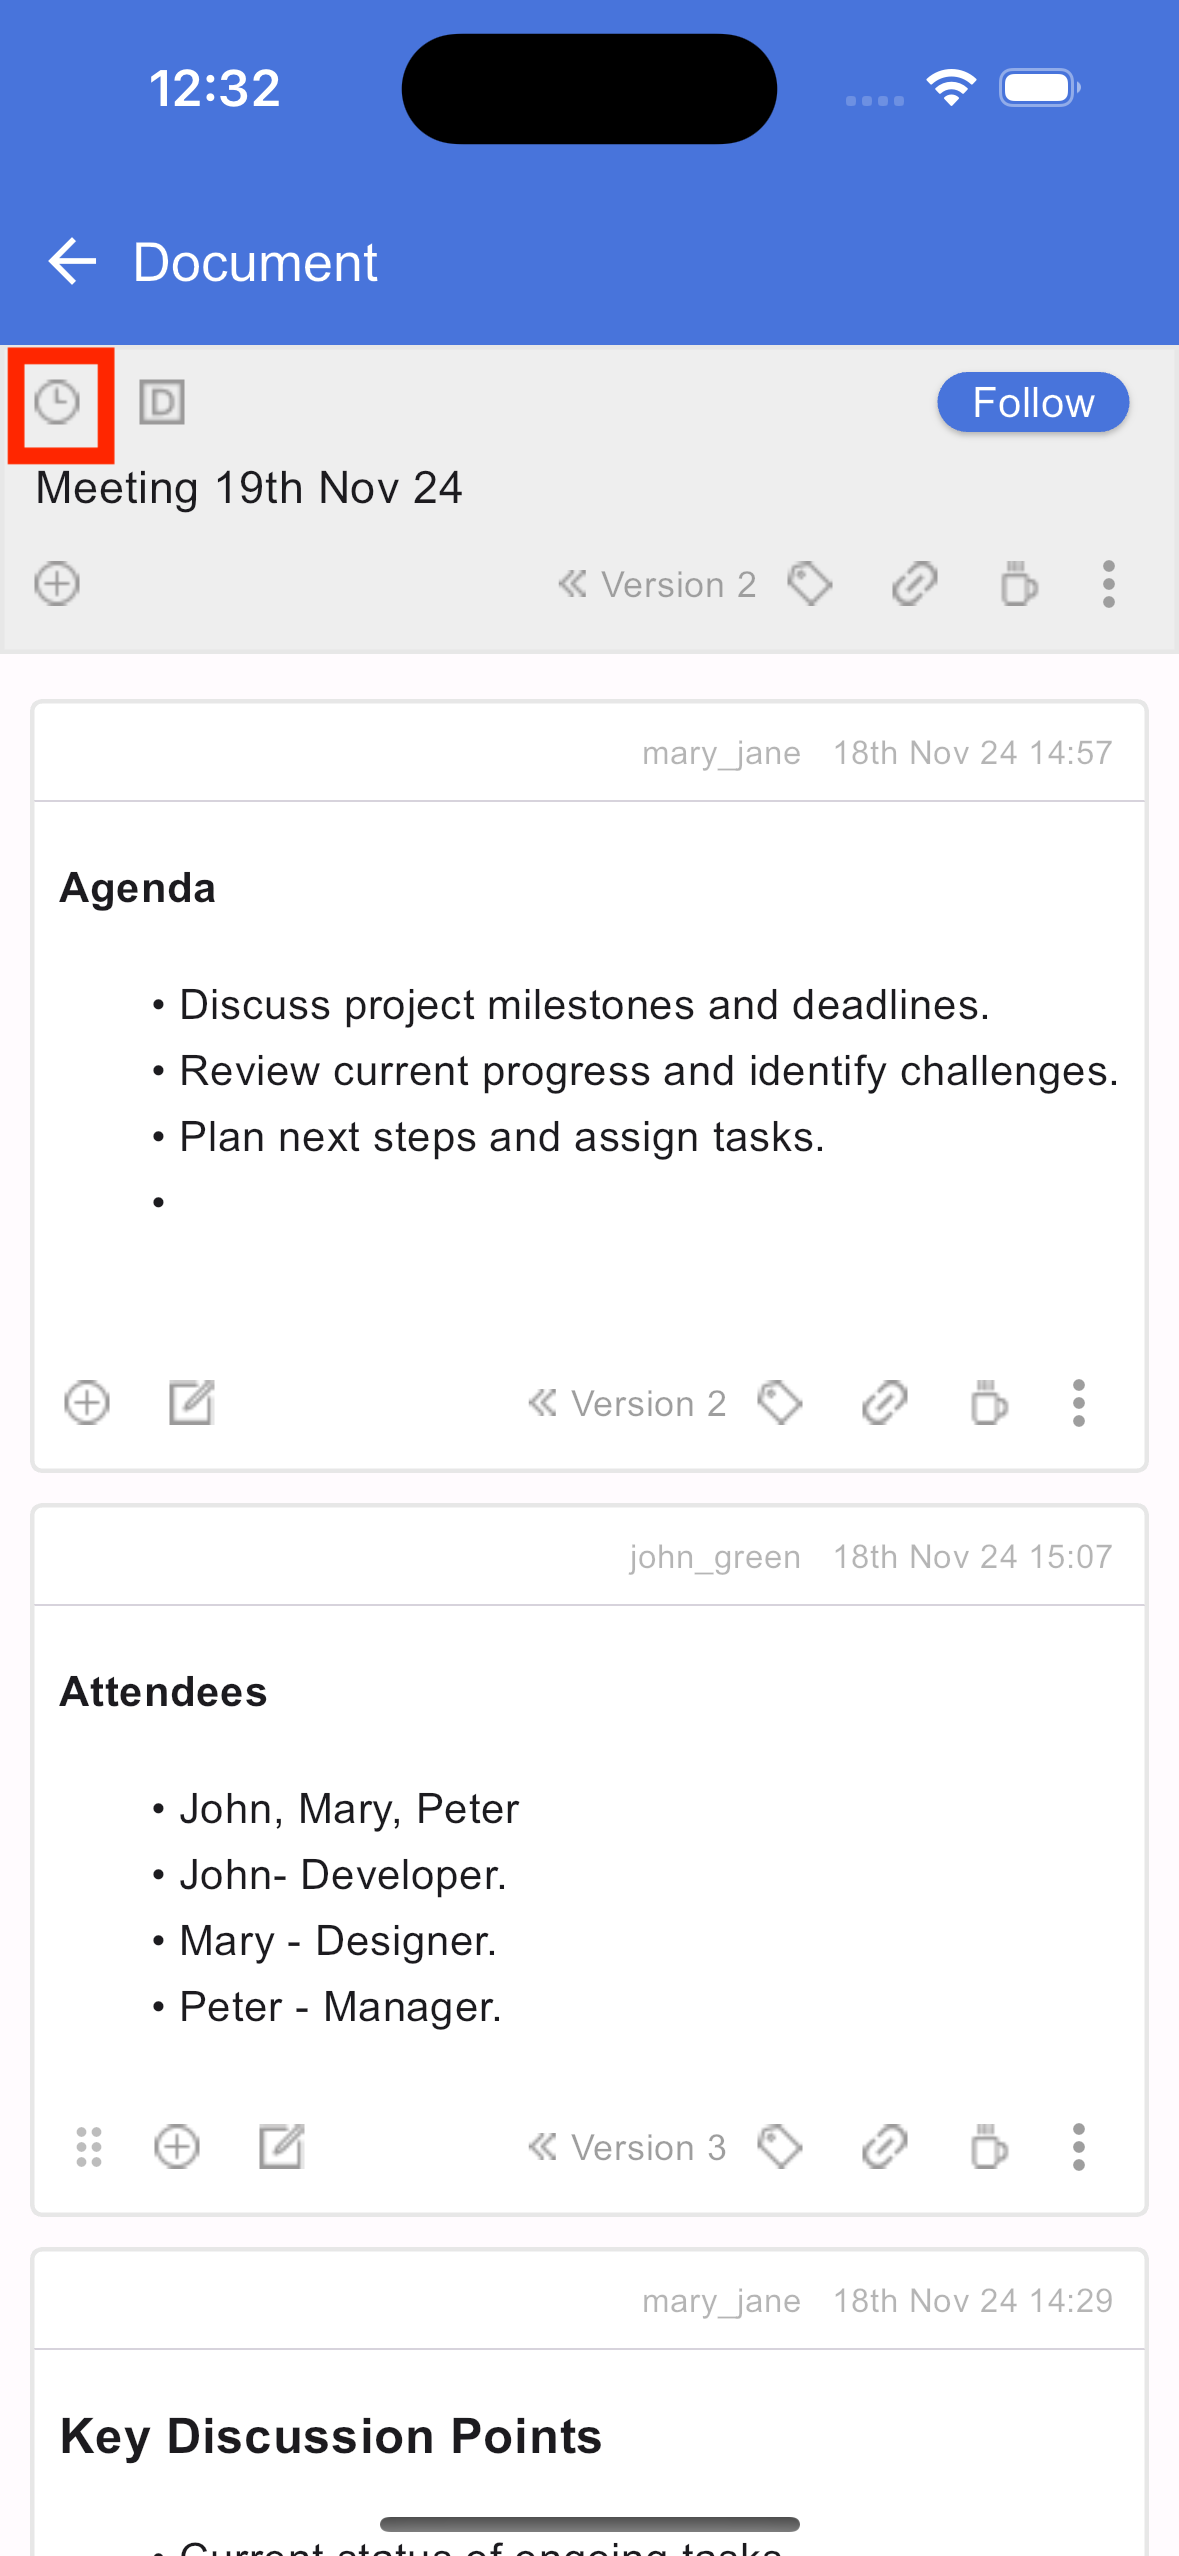
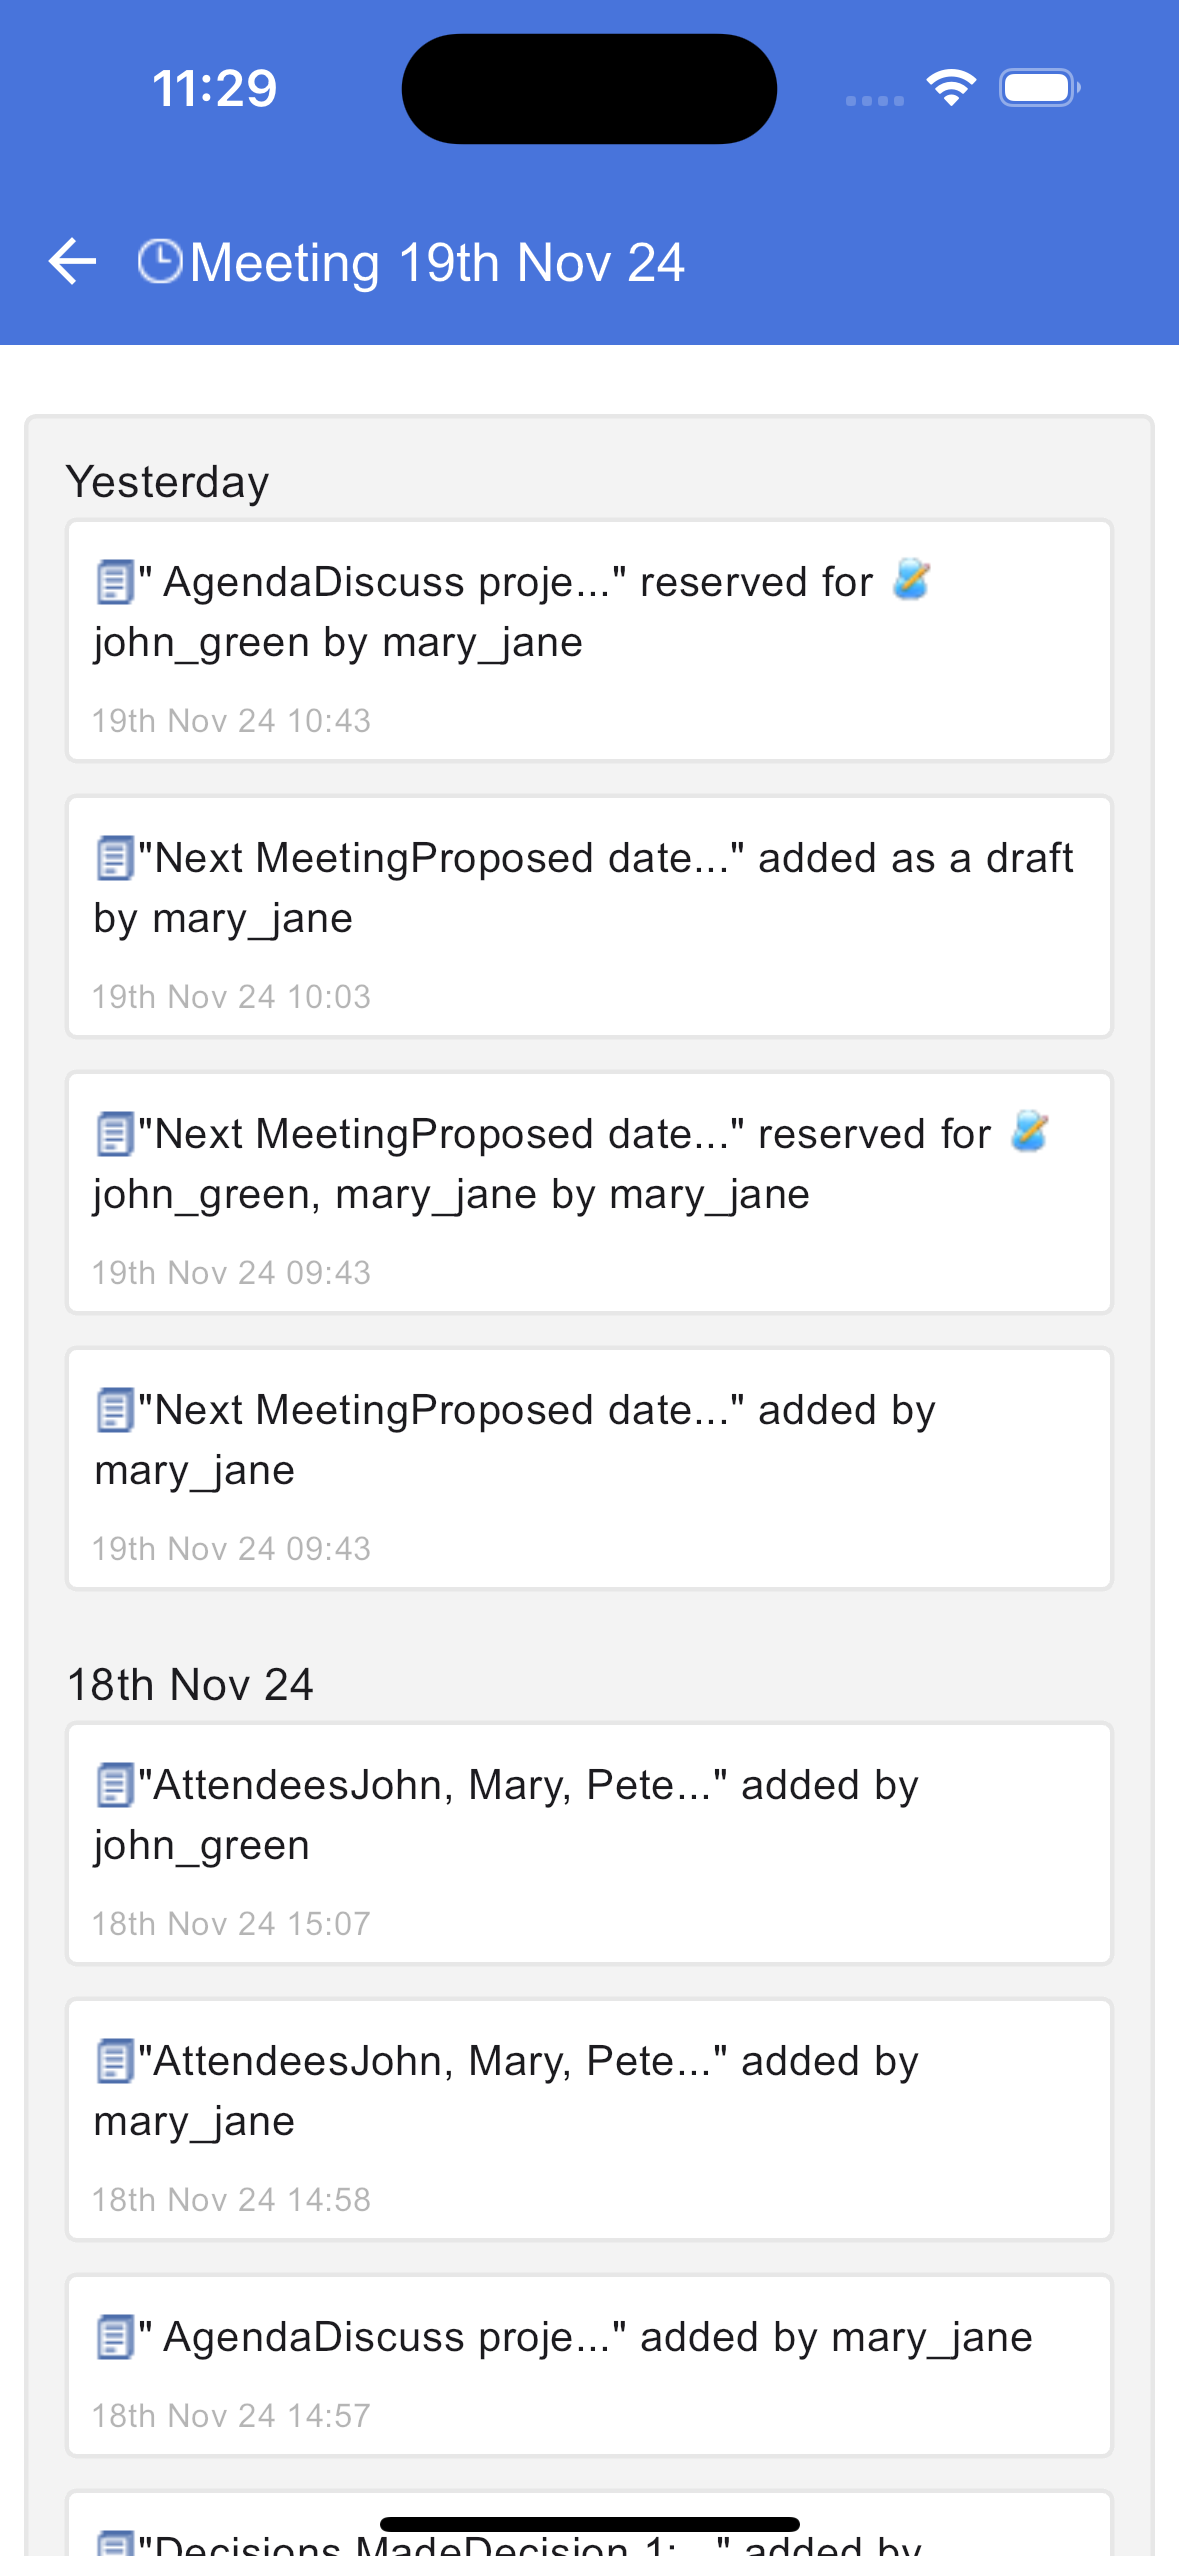
View document versions
Timeline view
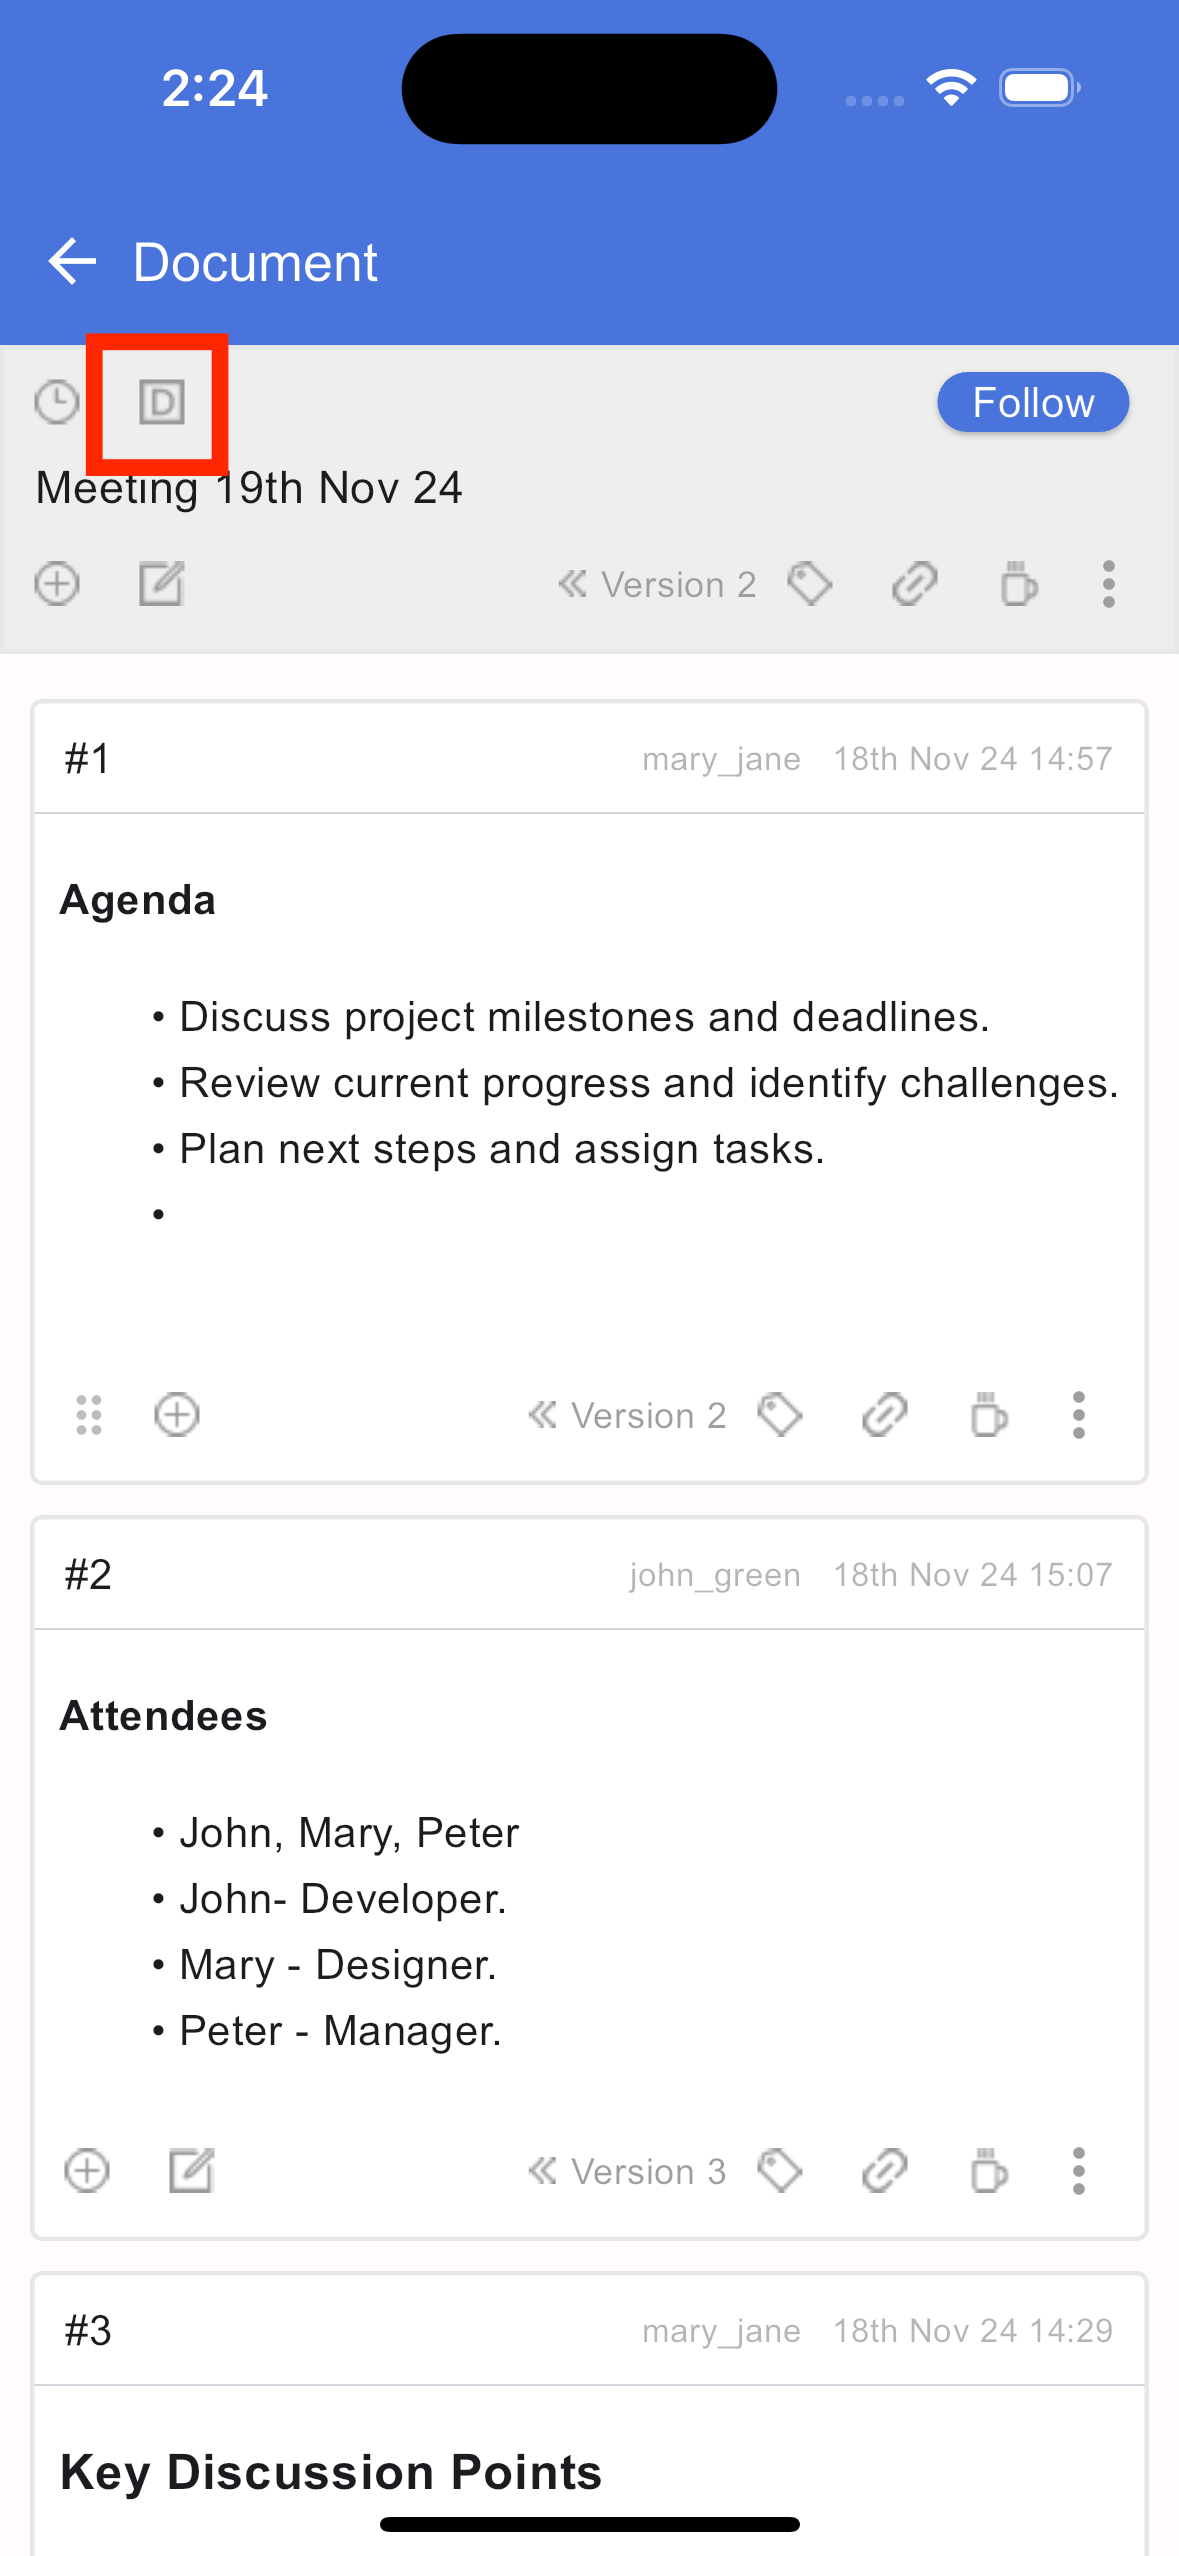
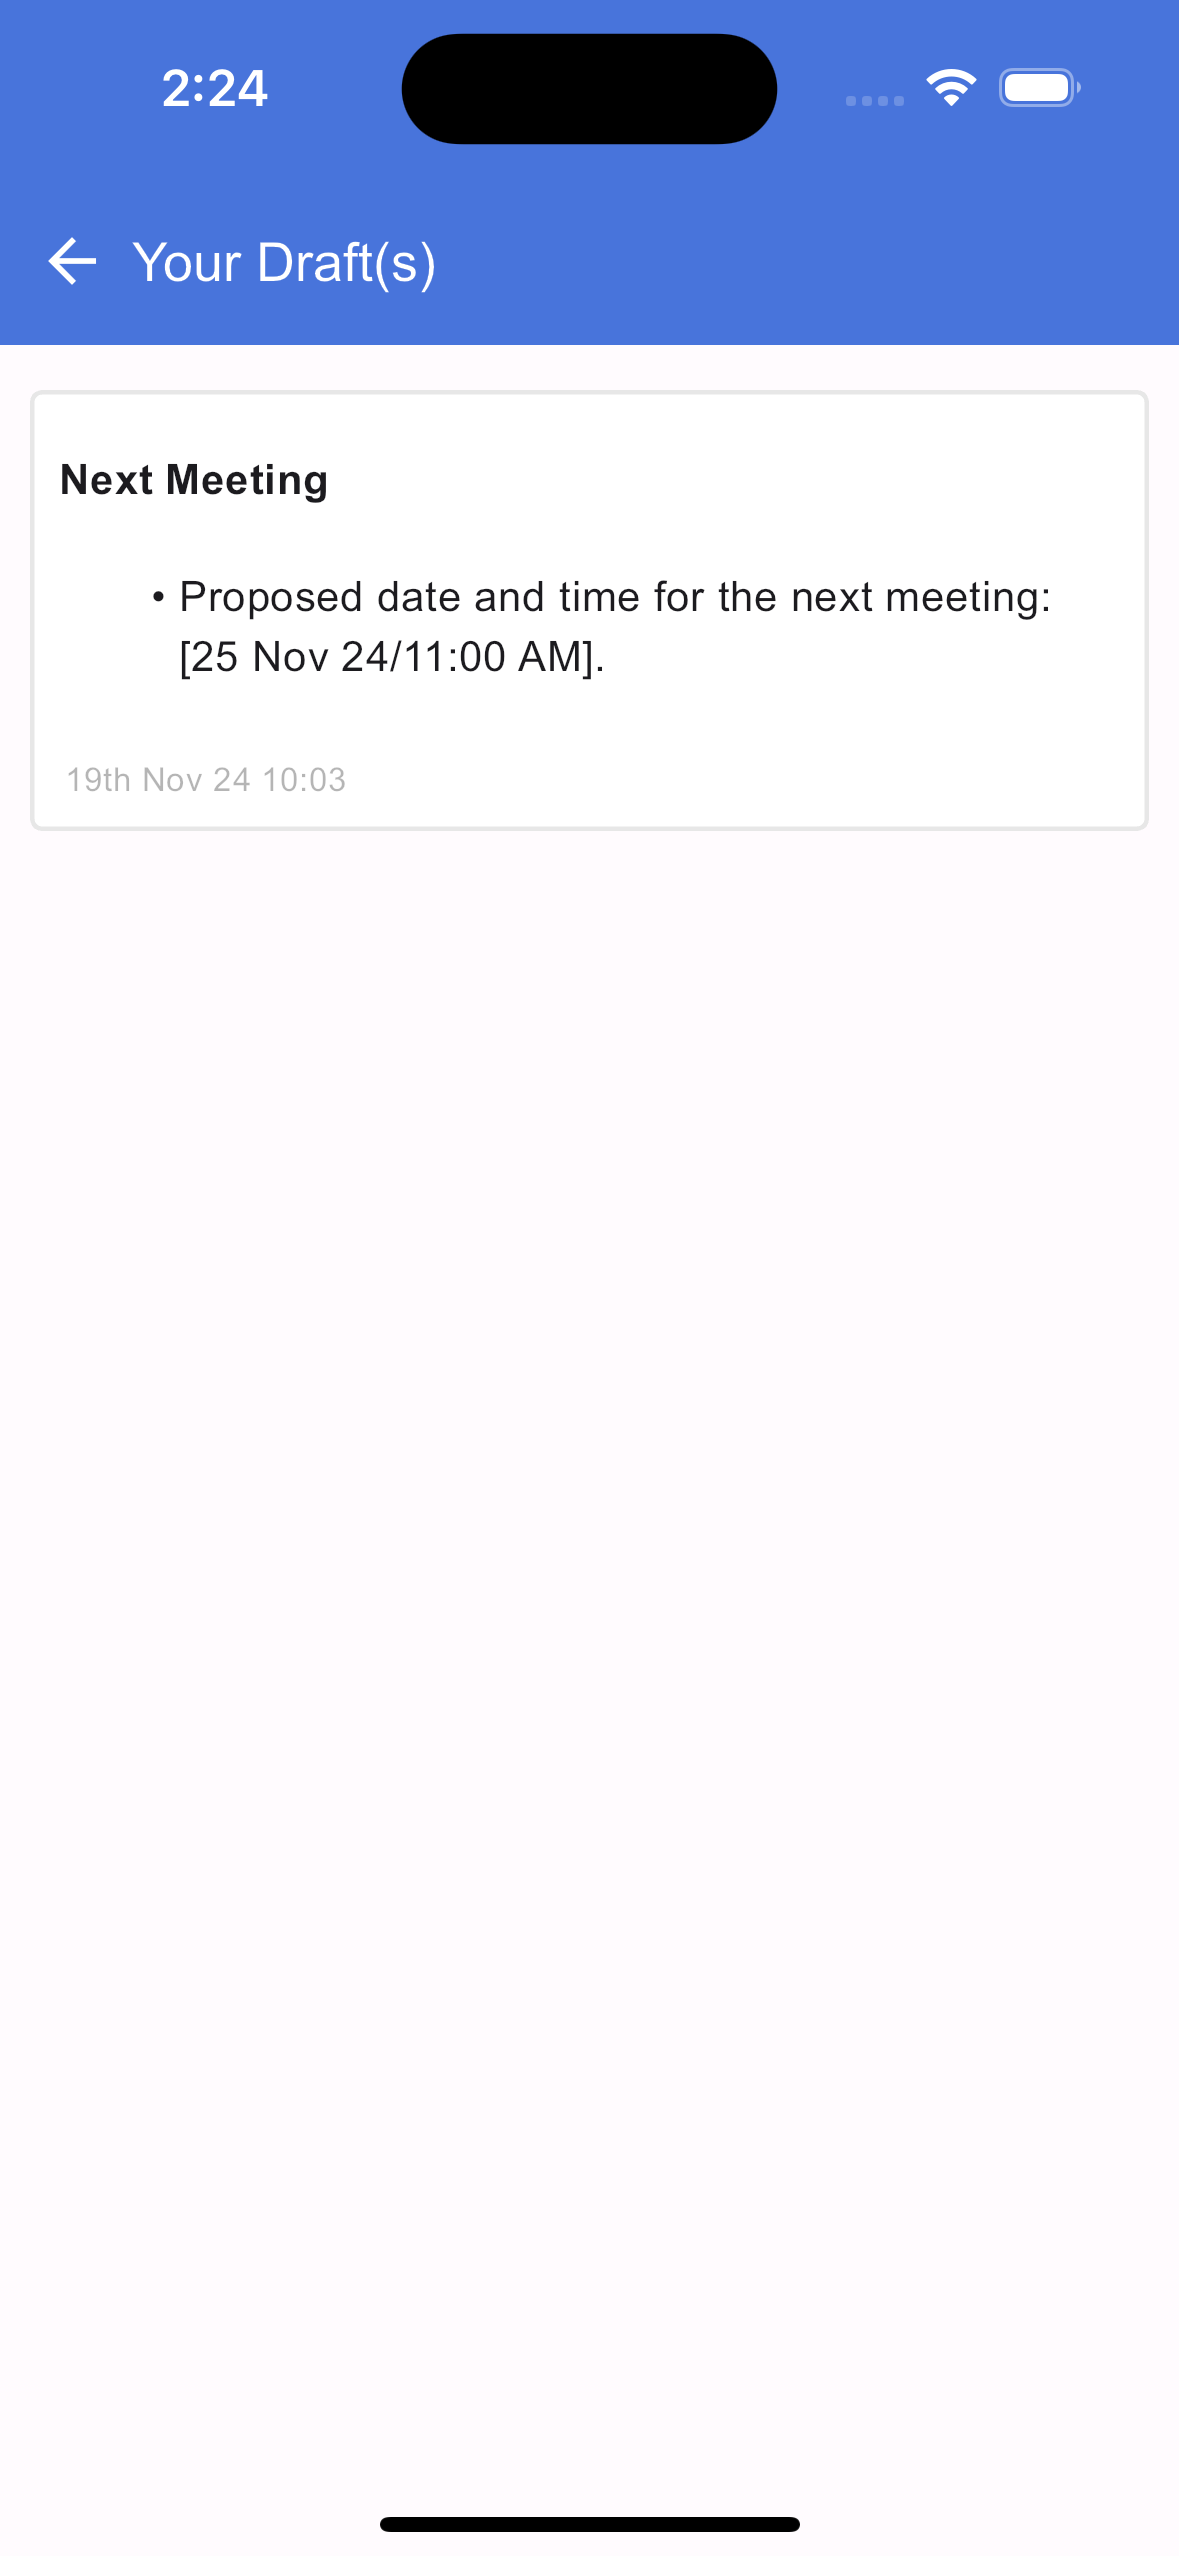
View all drafts
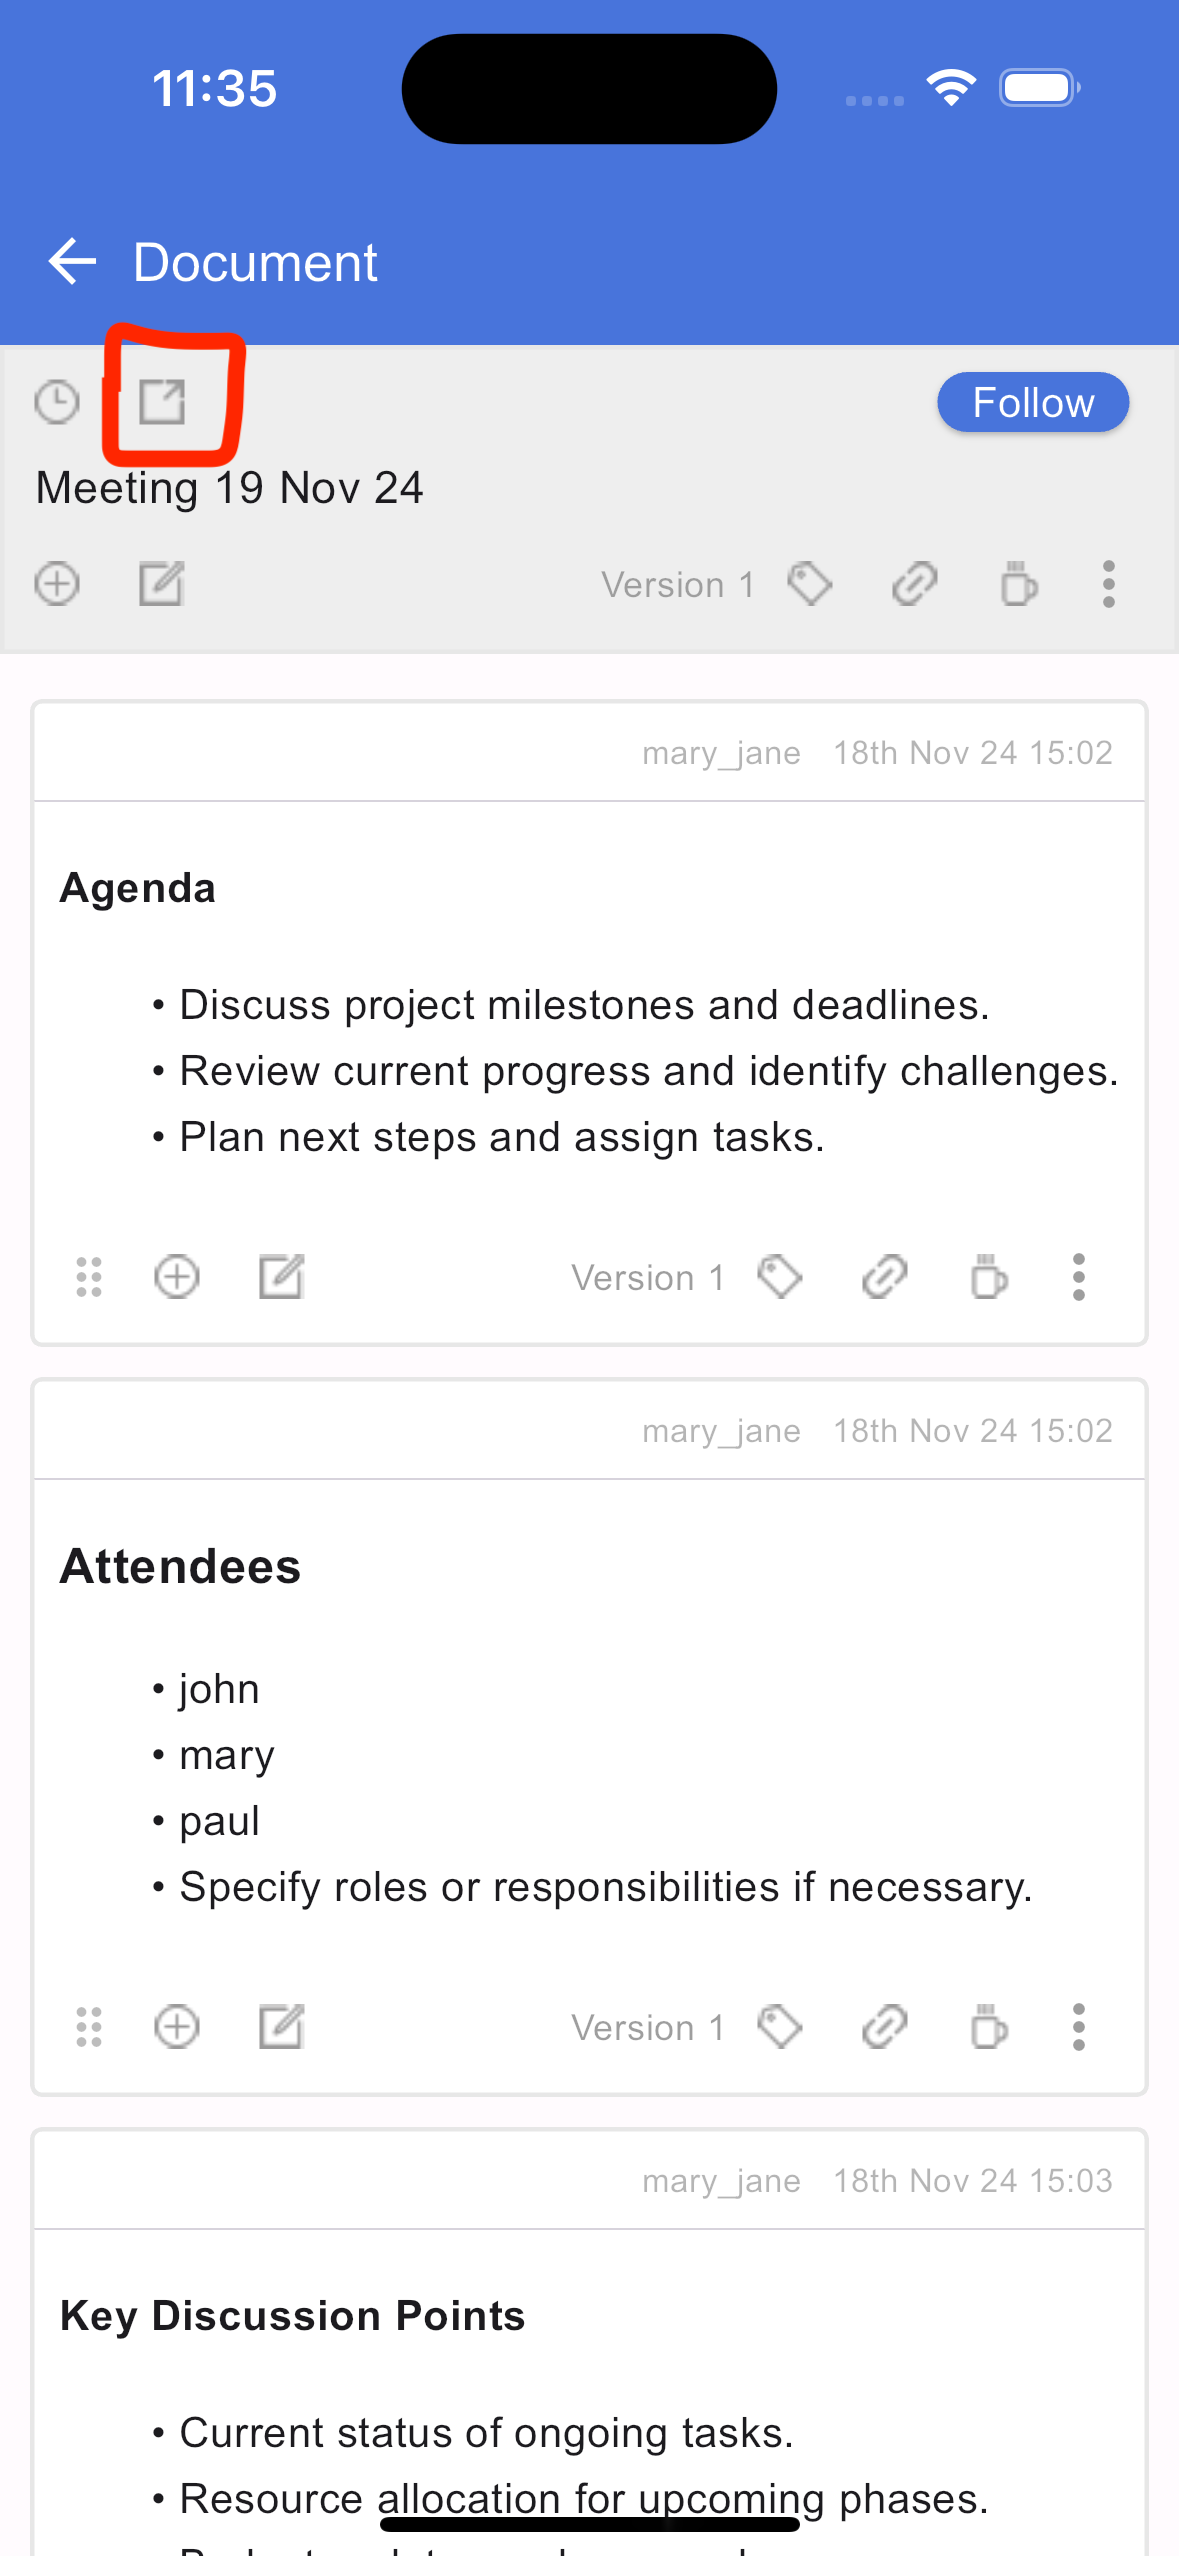
Sharing a document
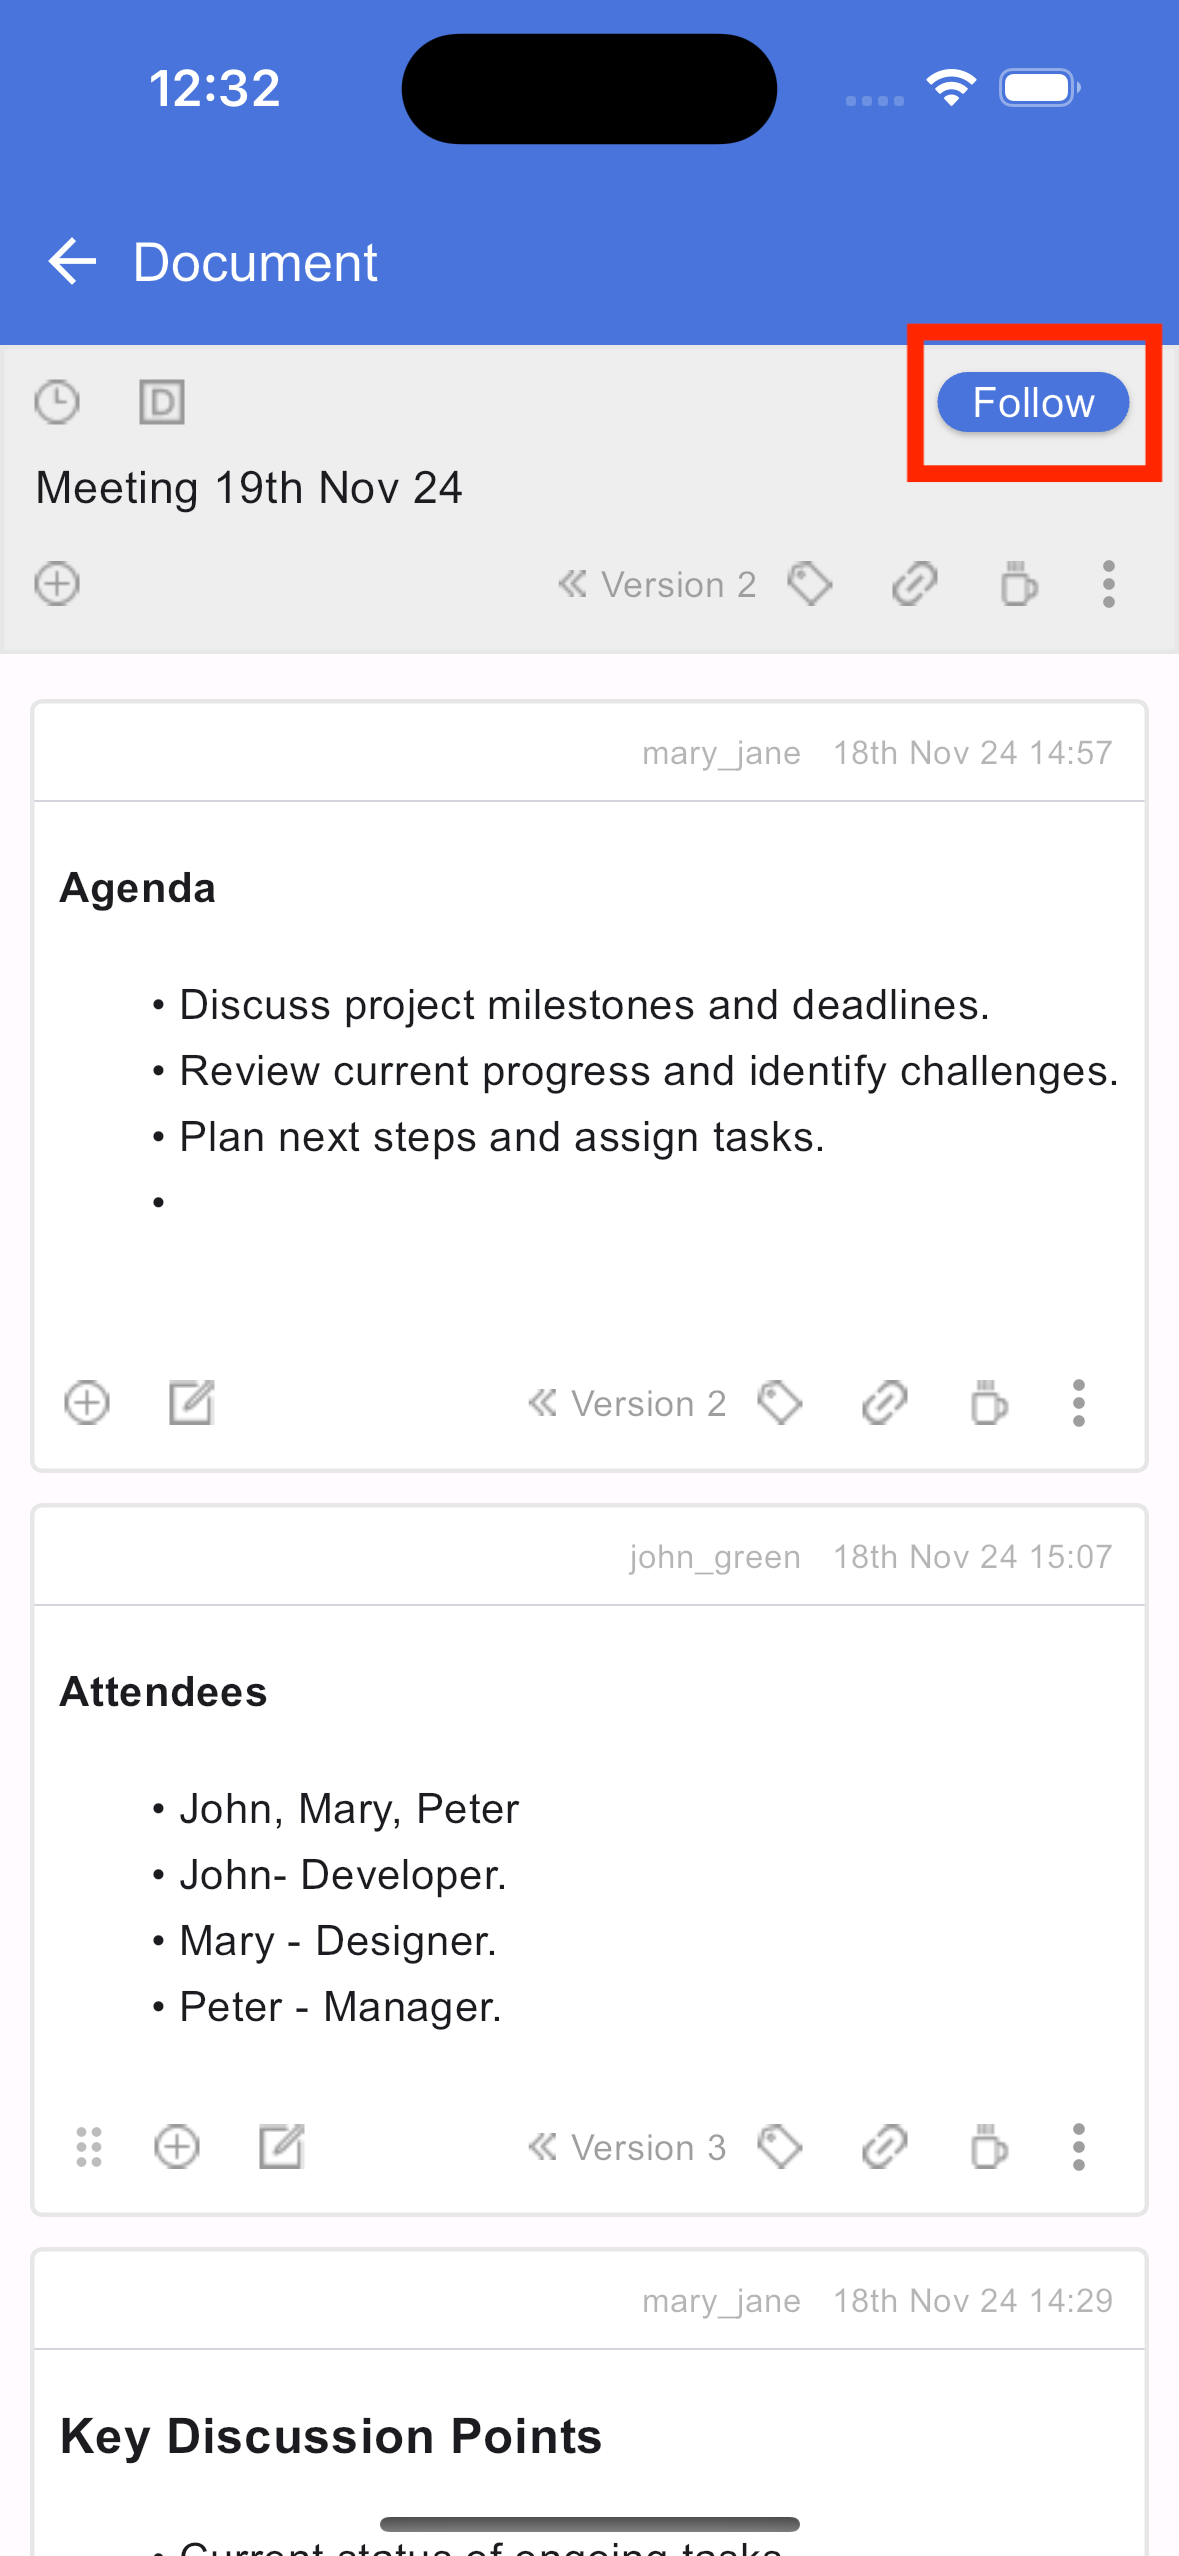
Following a document

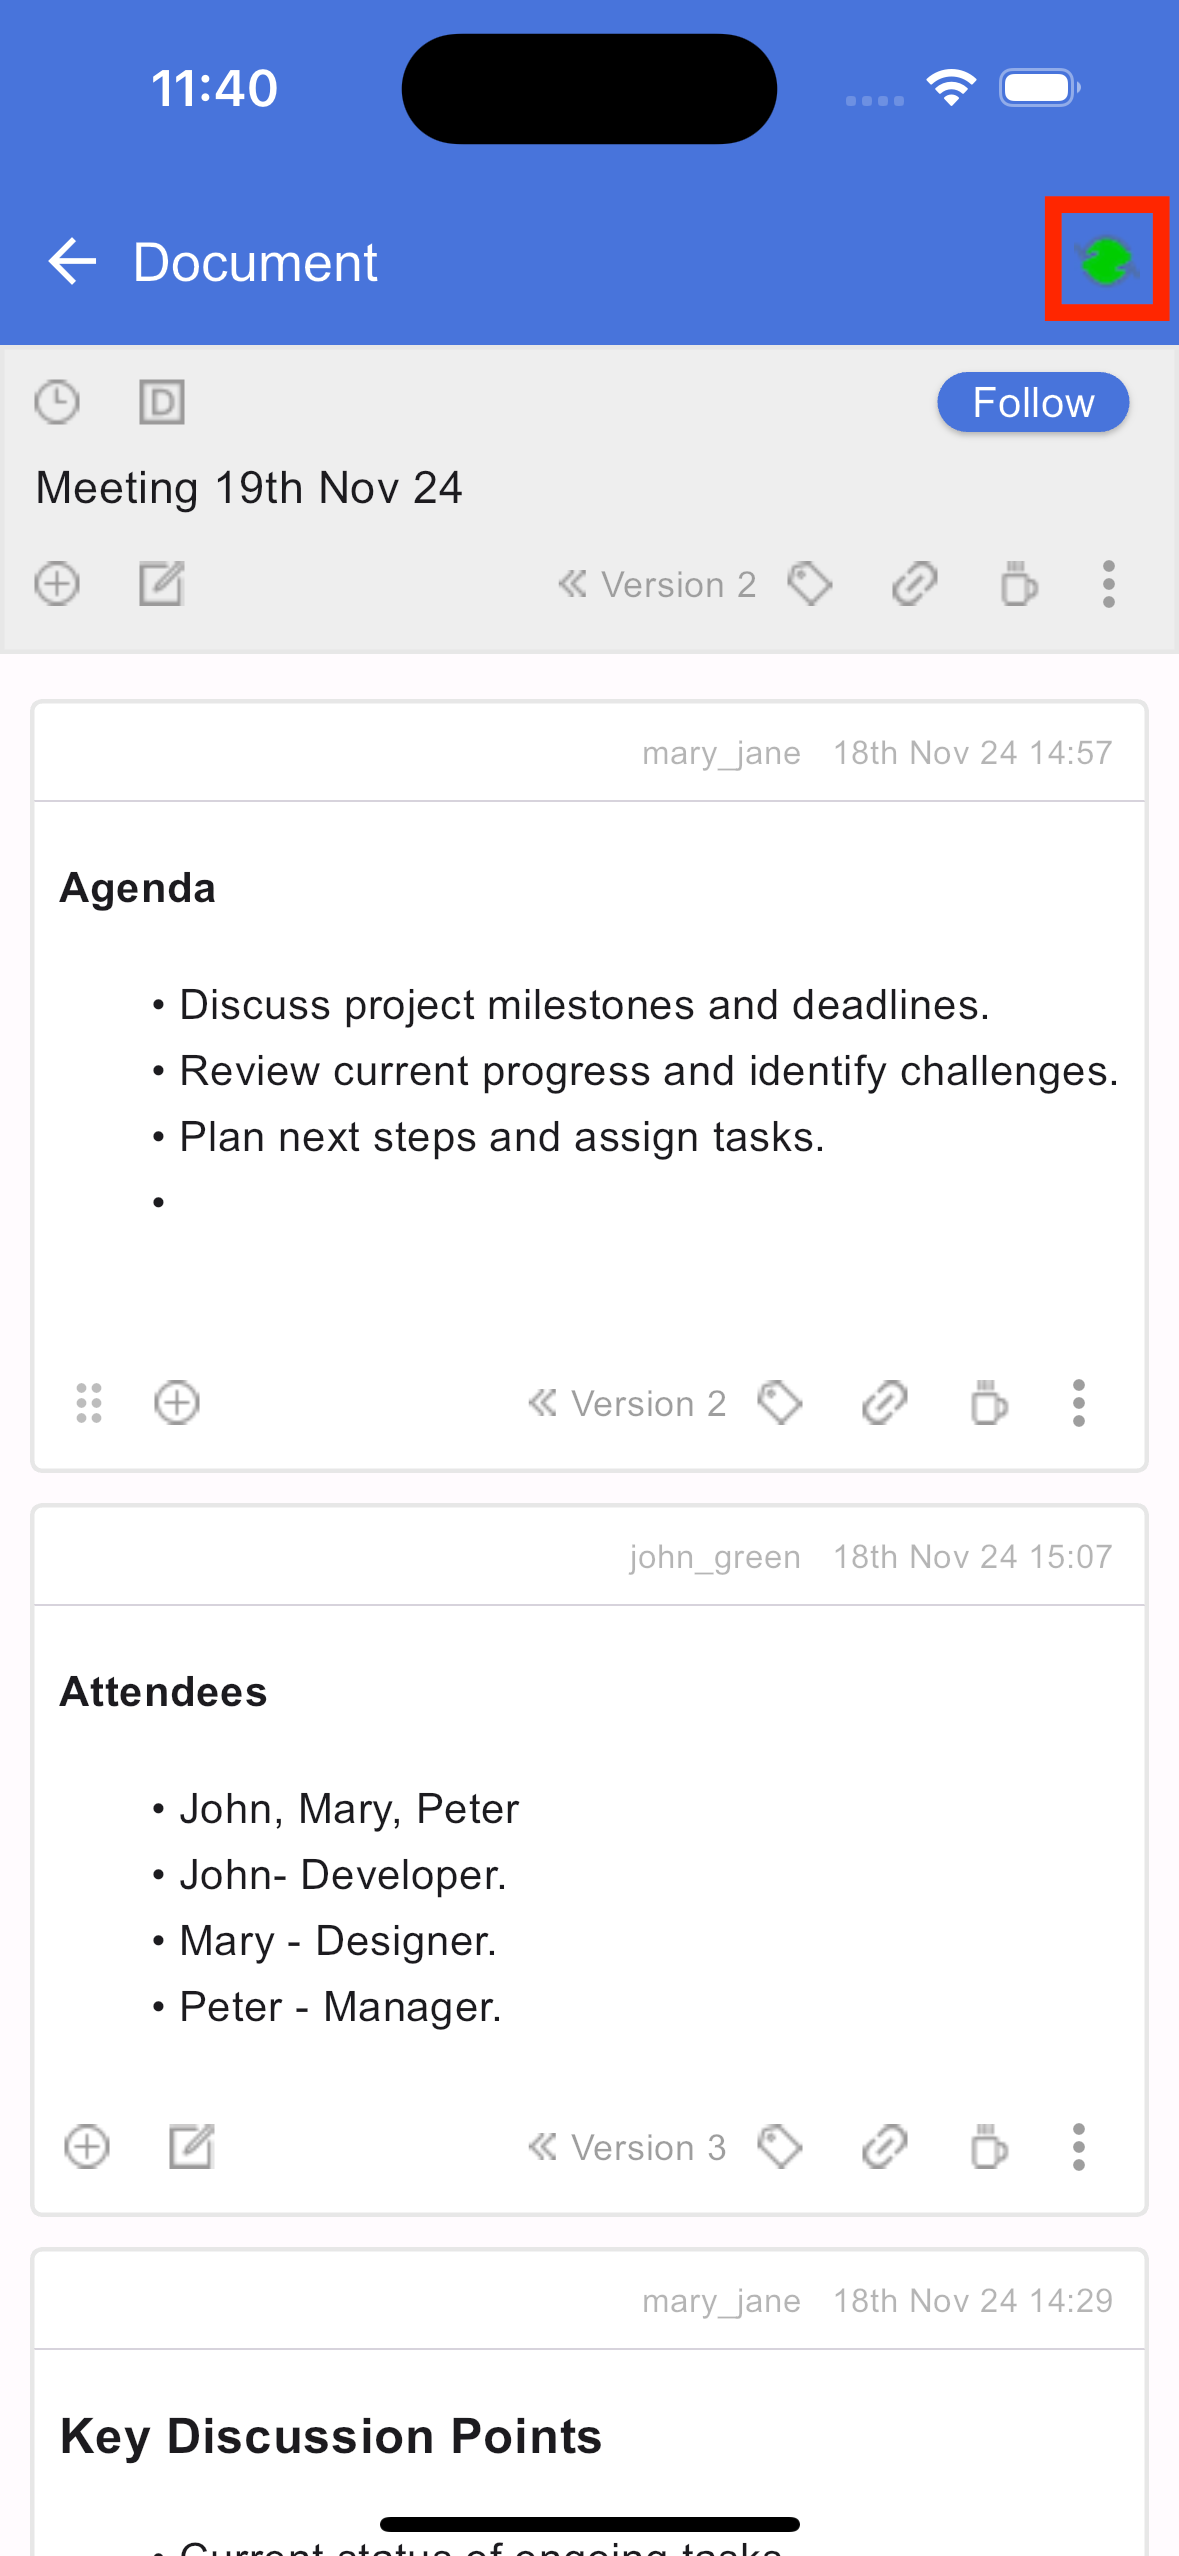
Syncing a document
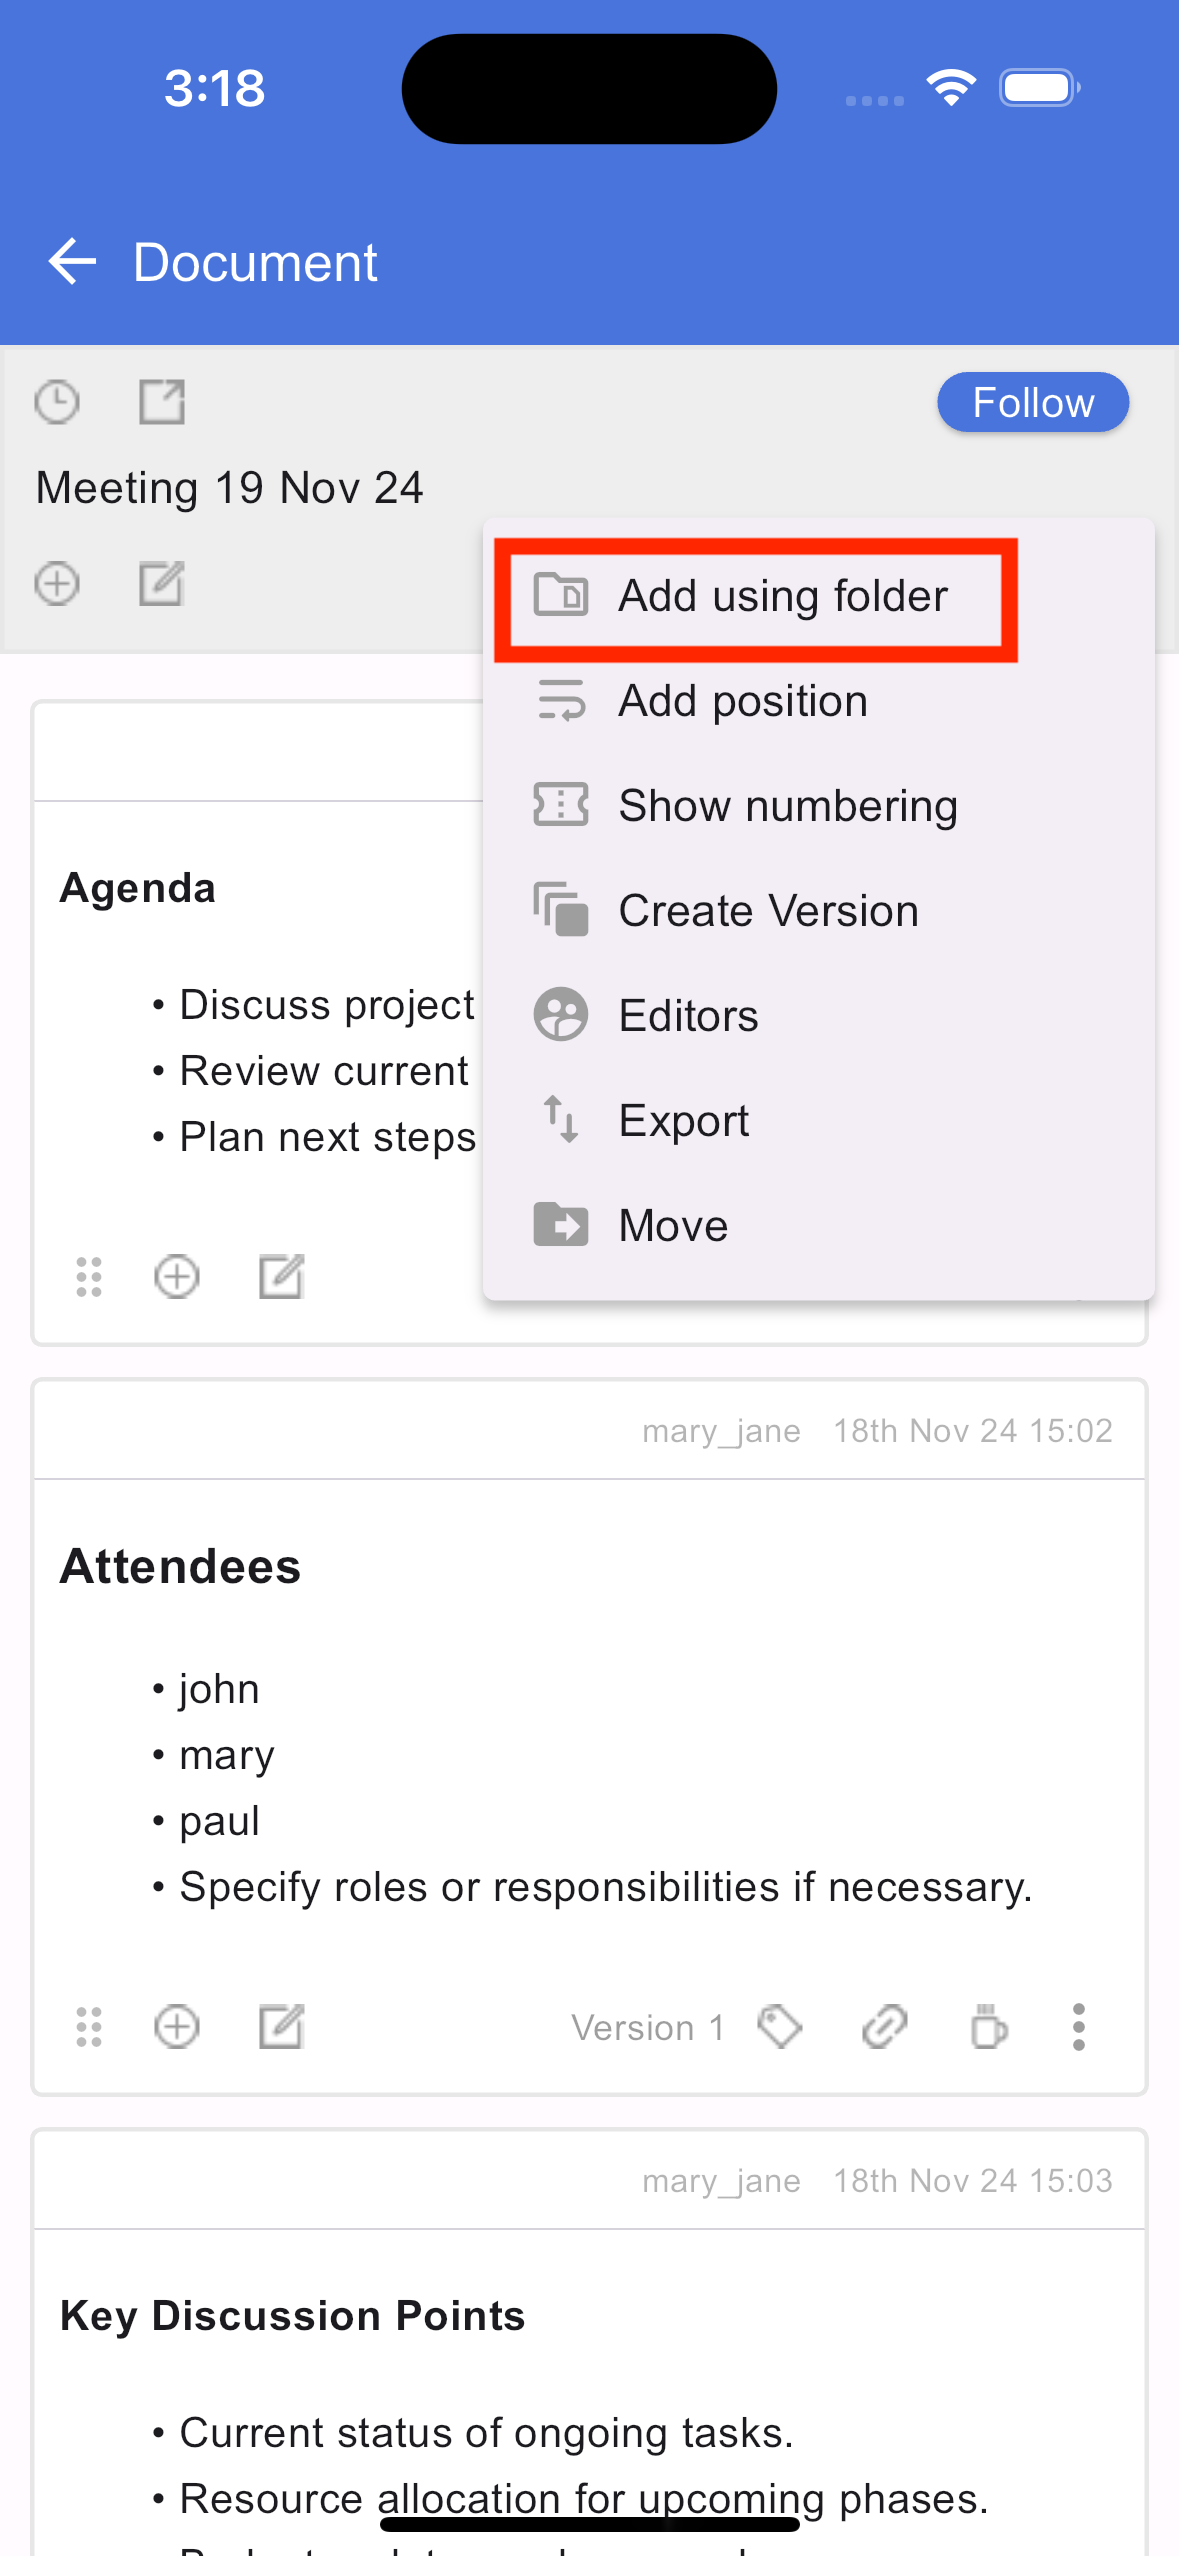
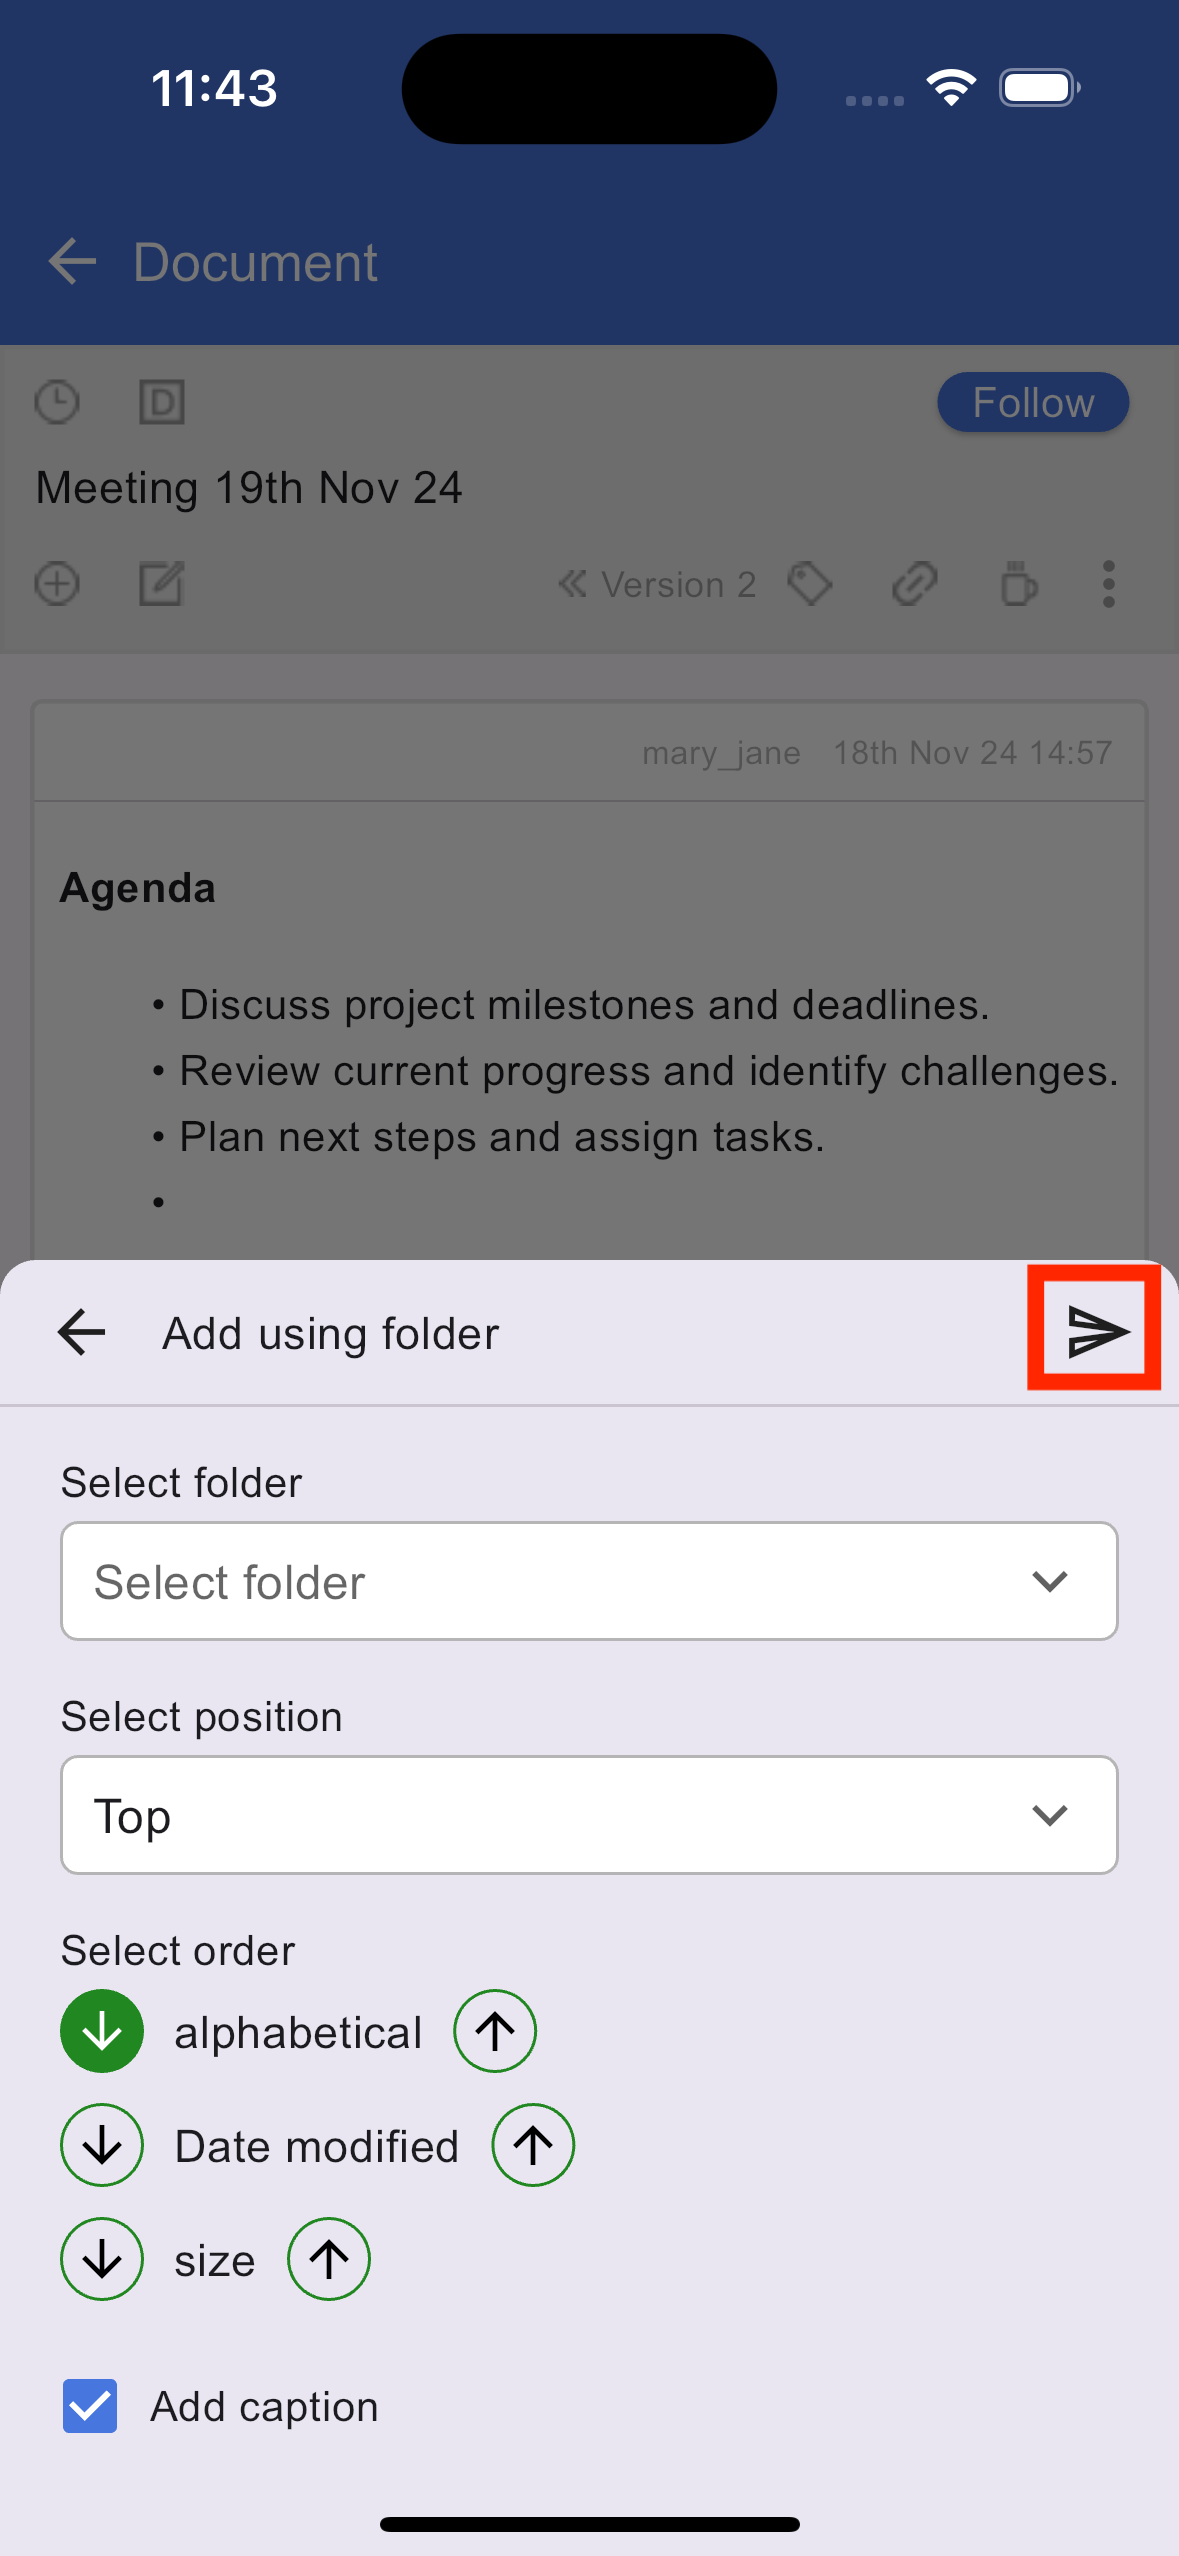
Adding section using folder
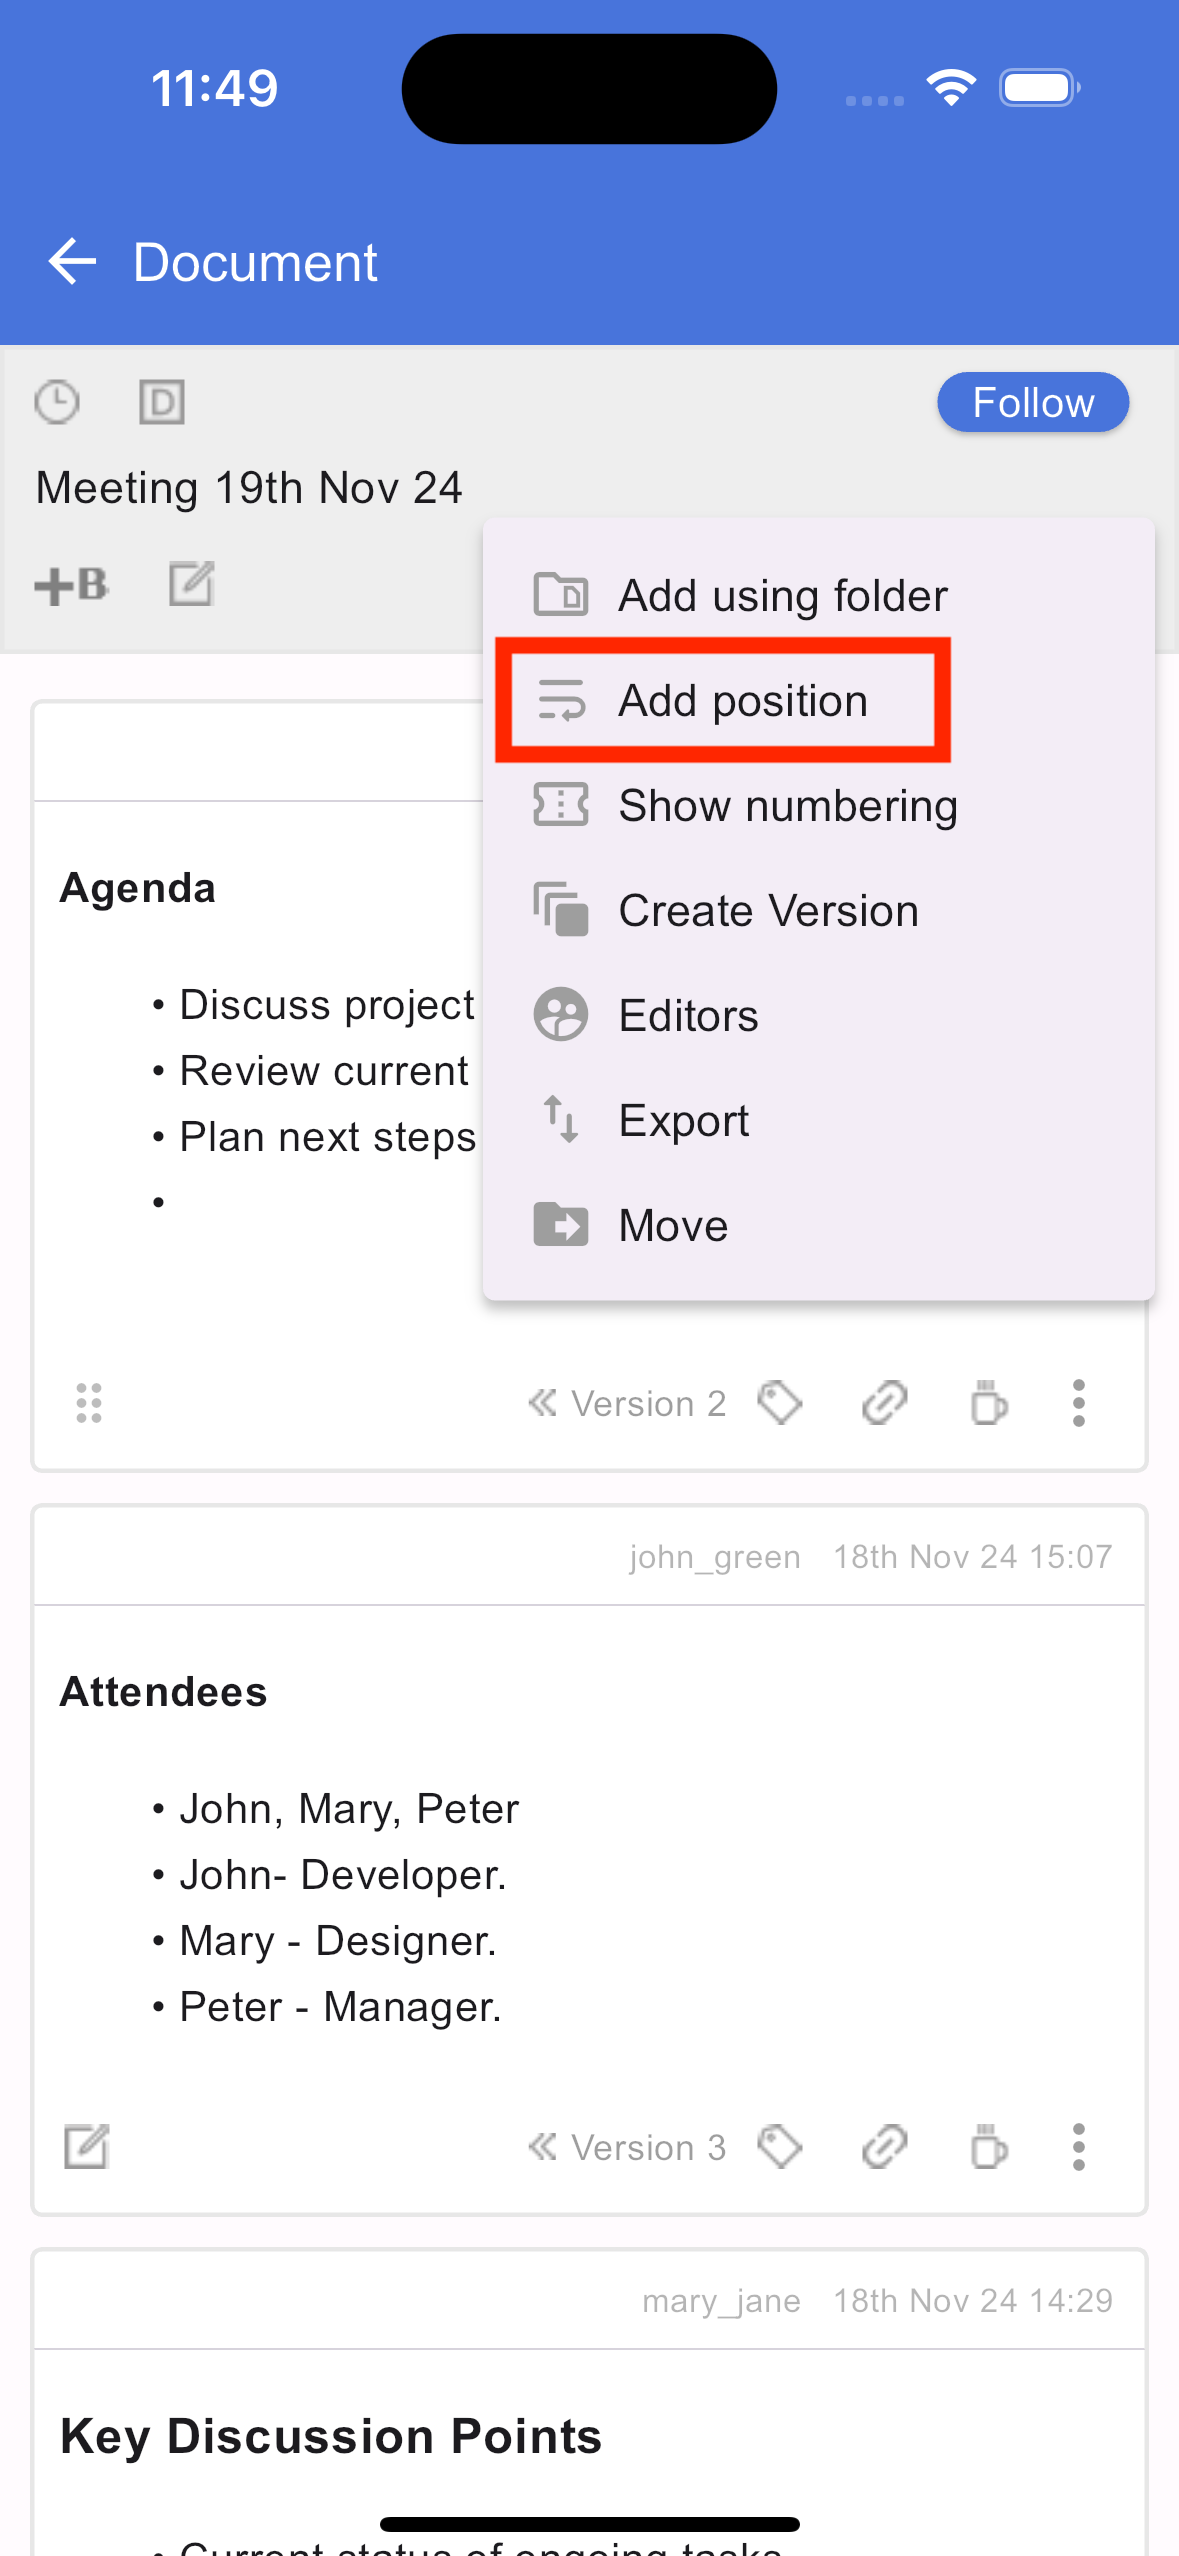
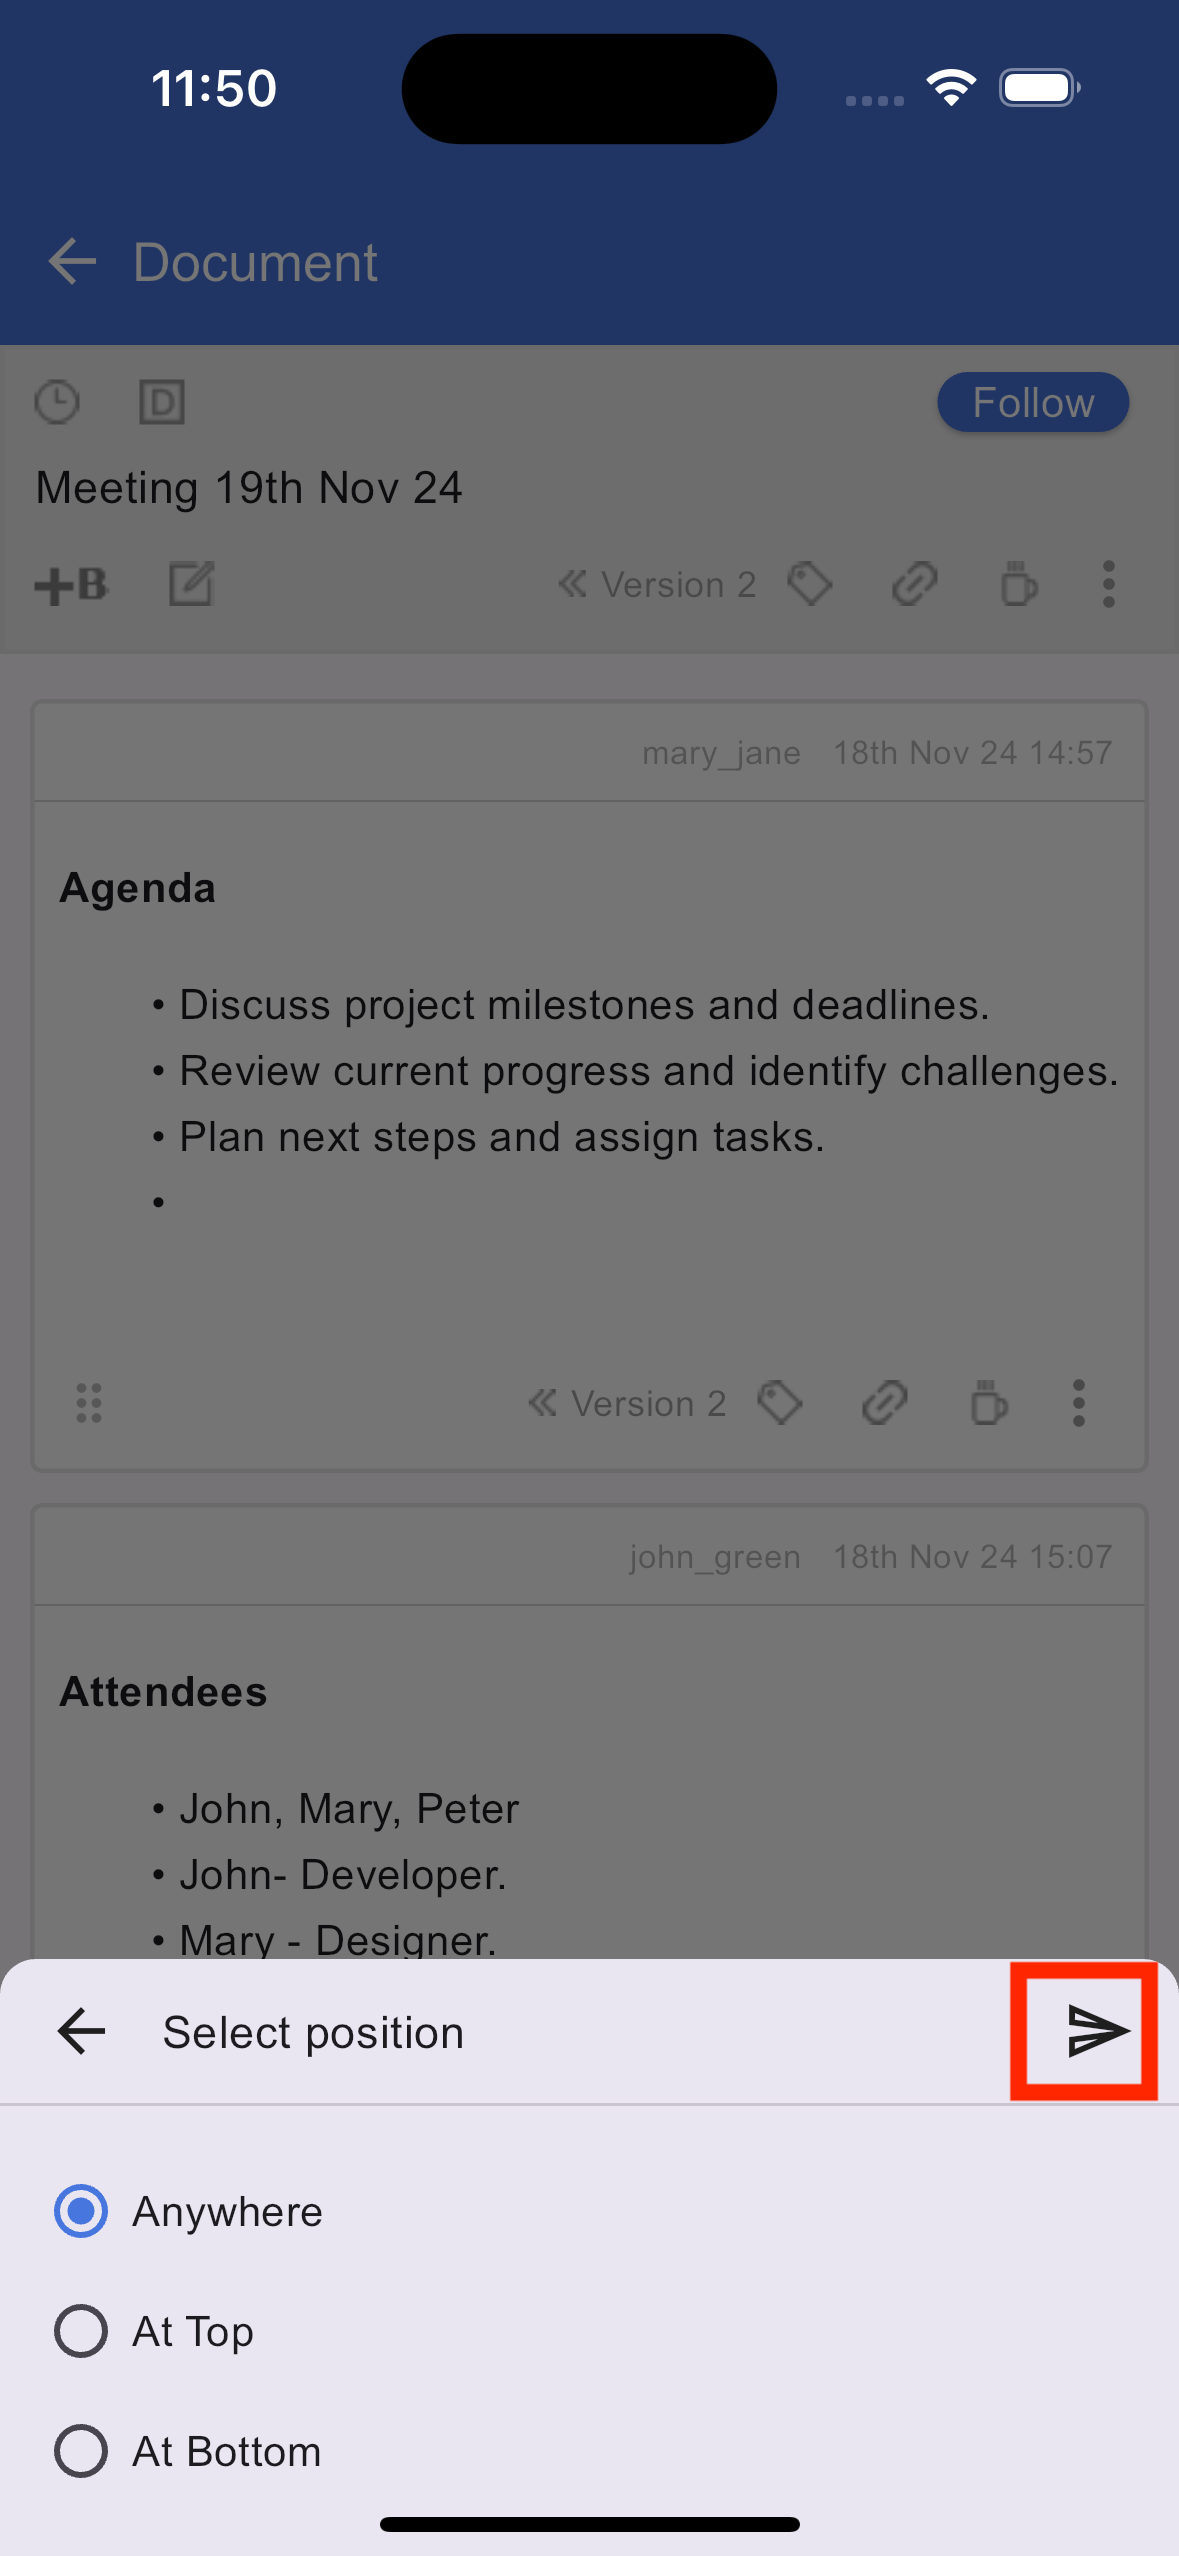
Add section using position

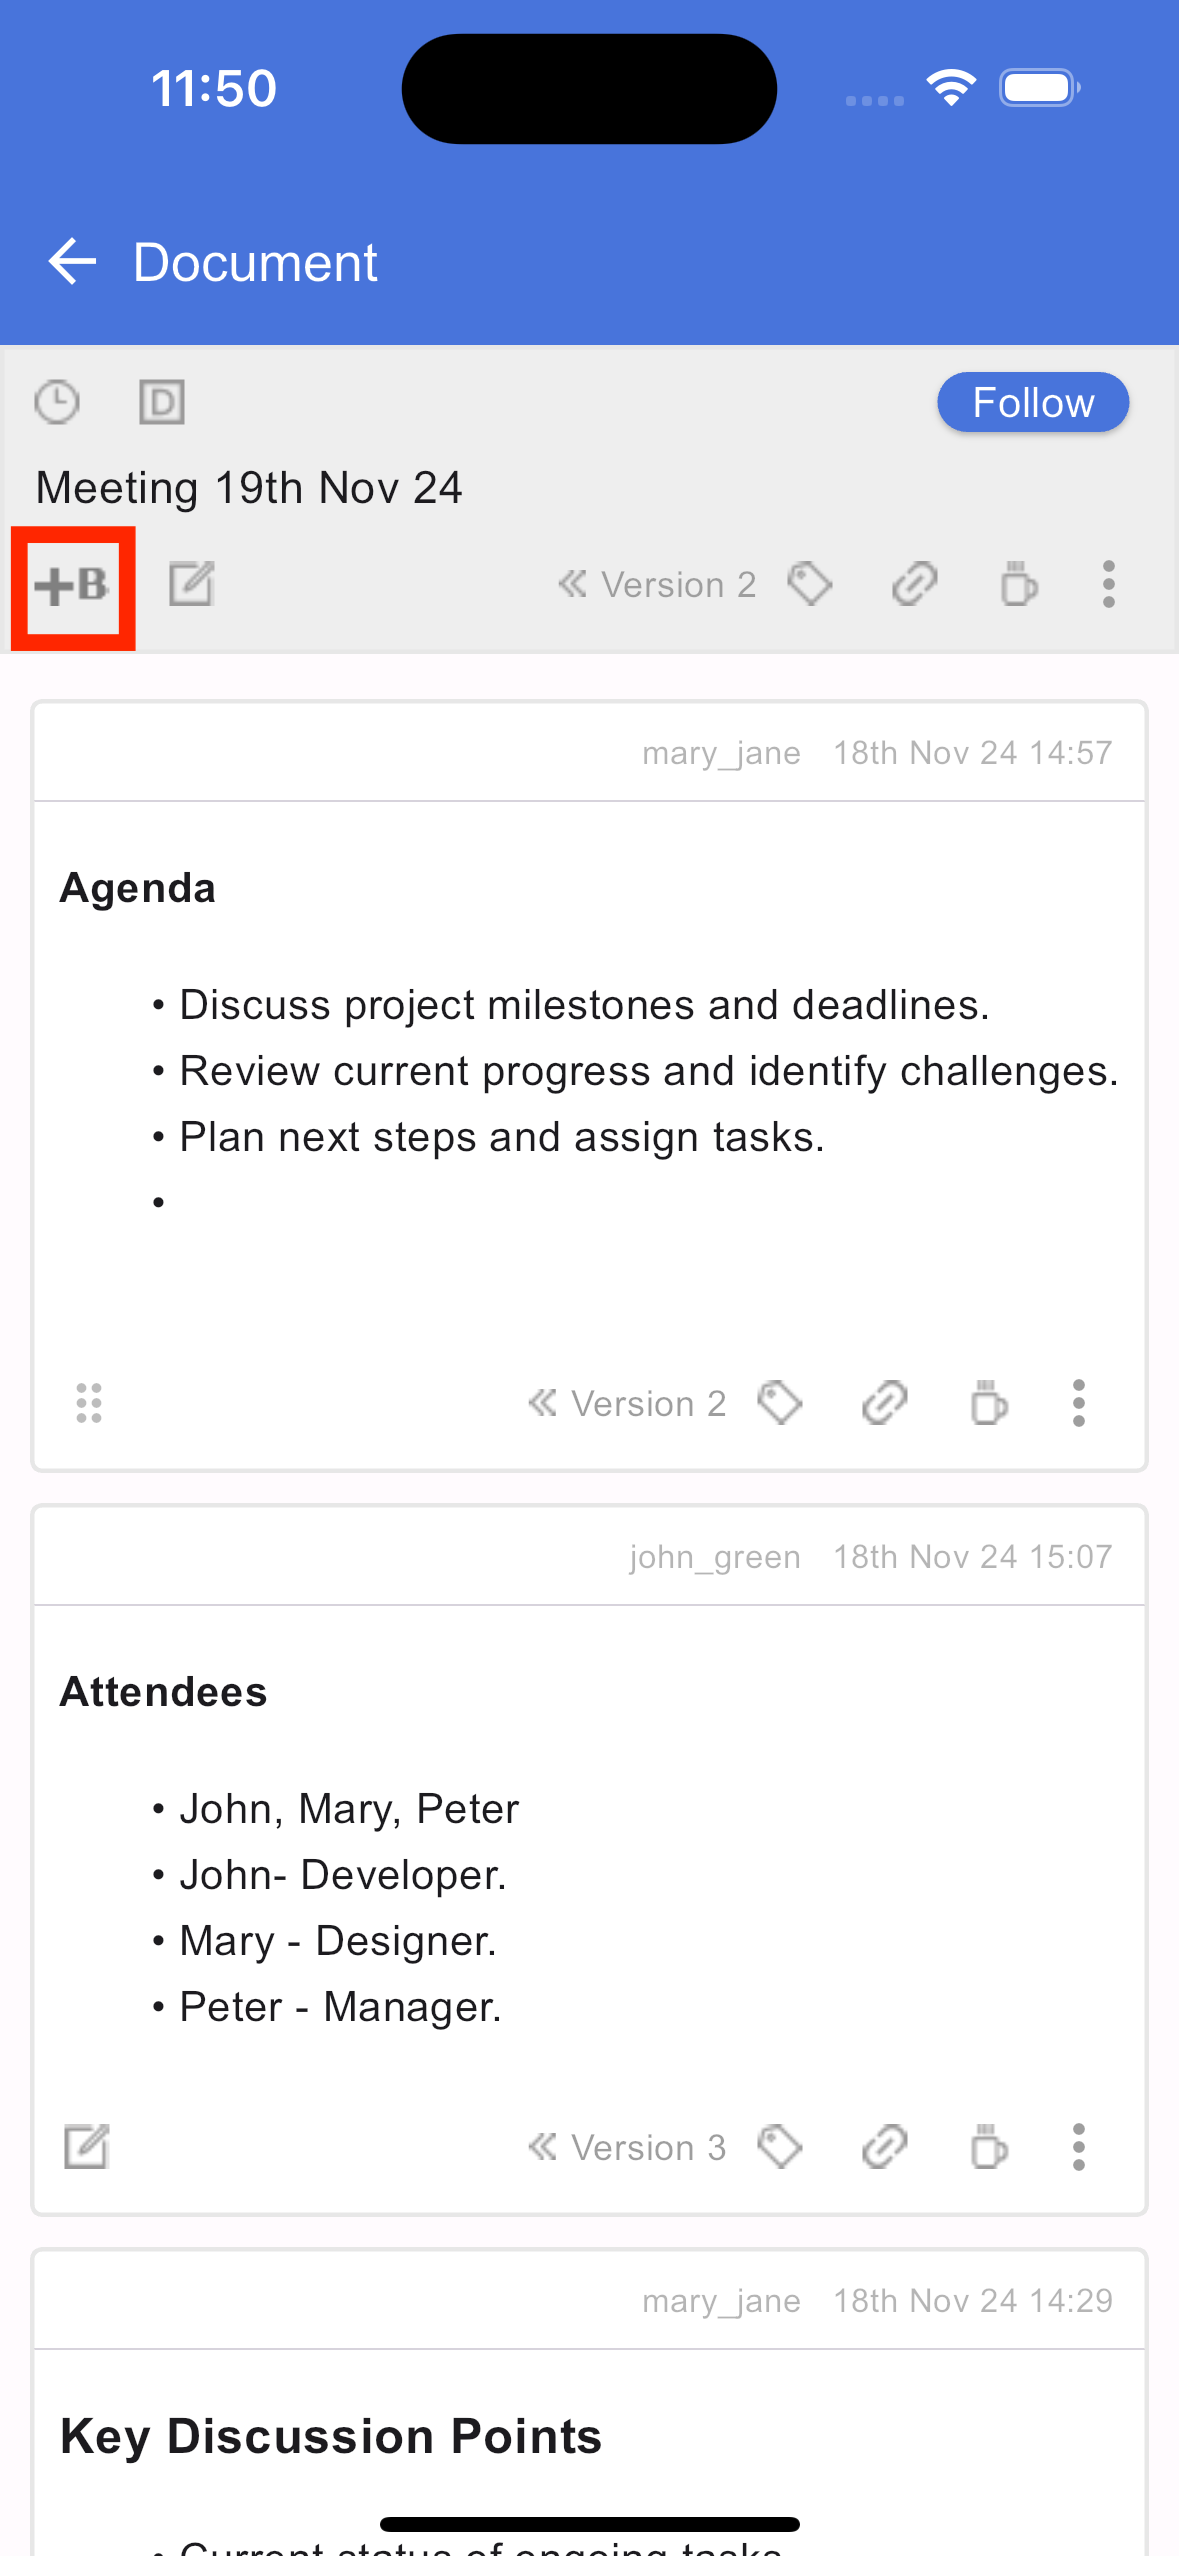
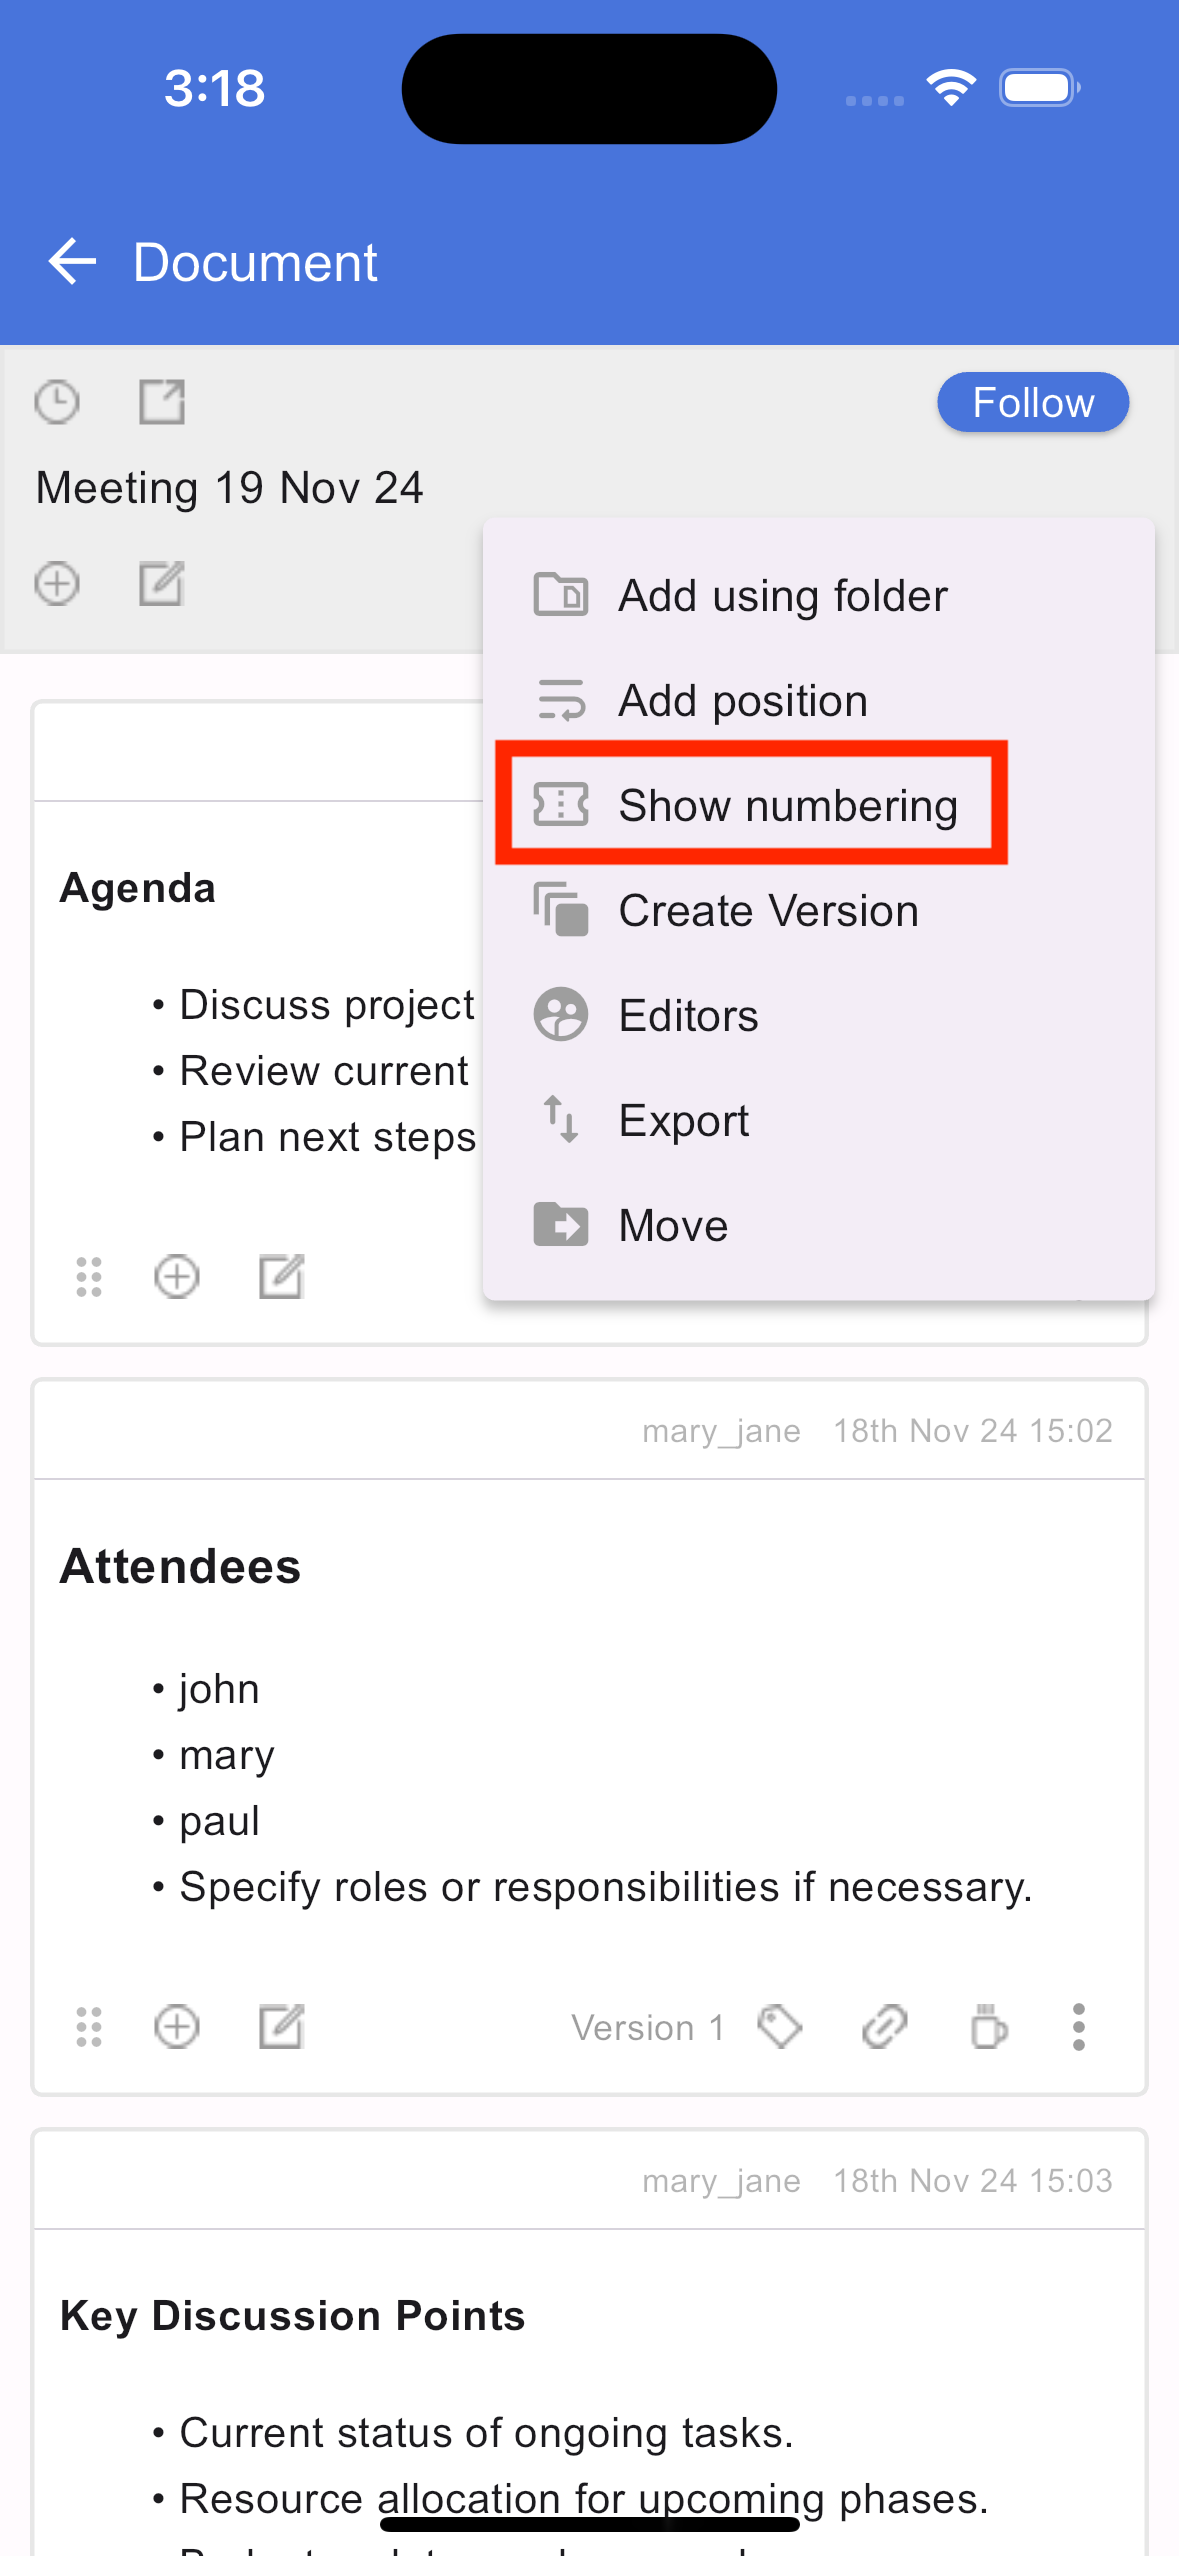
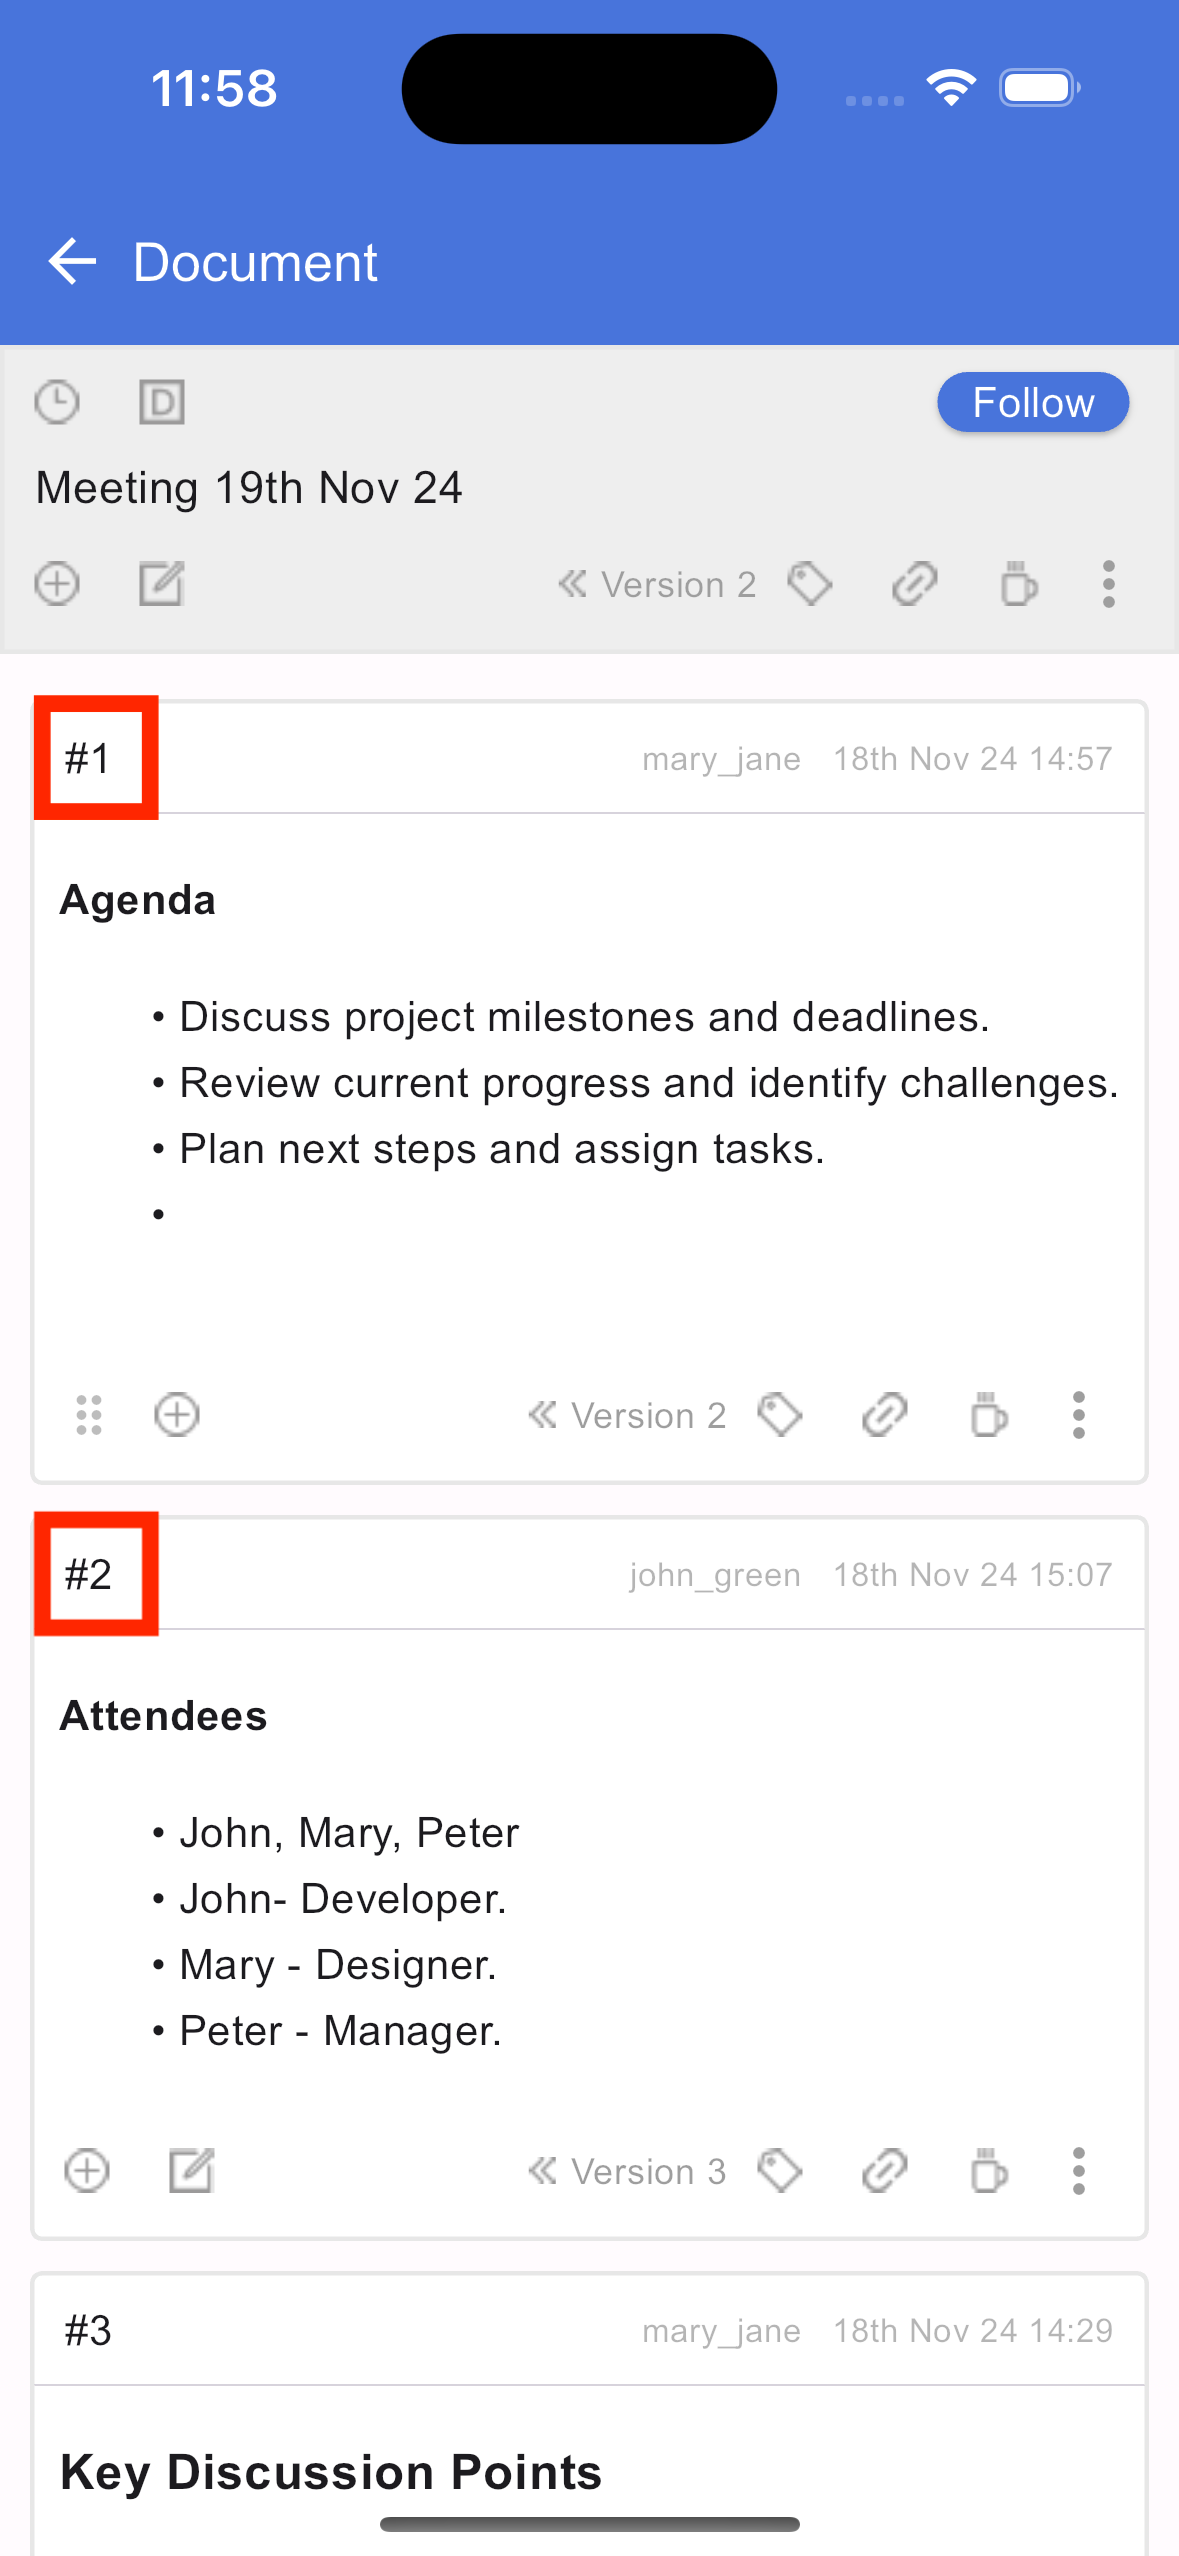
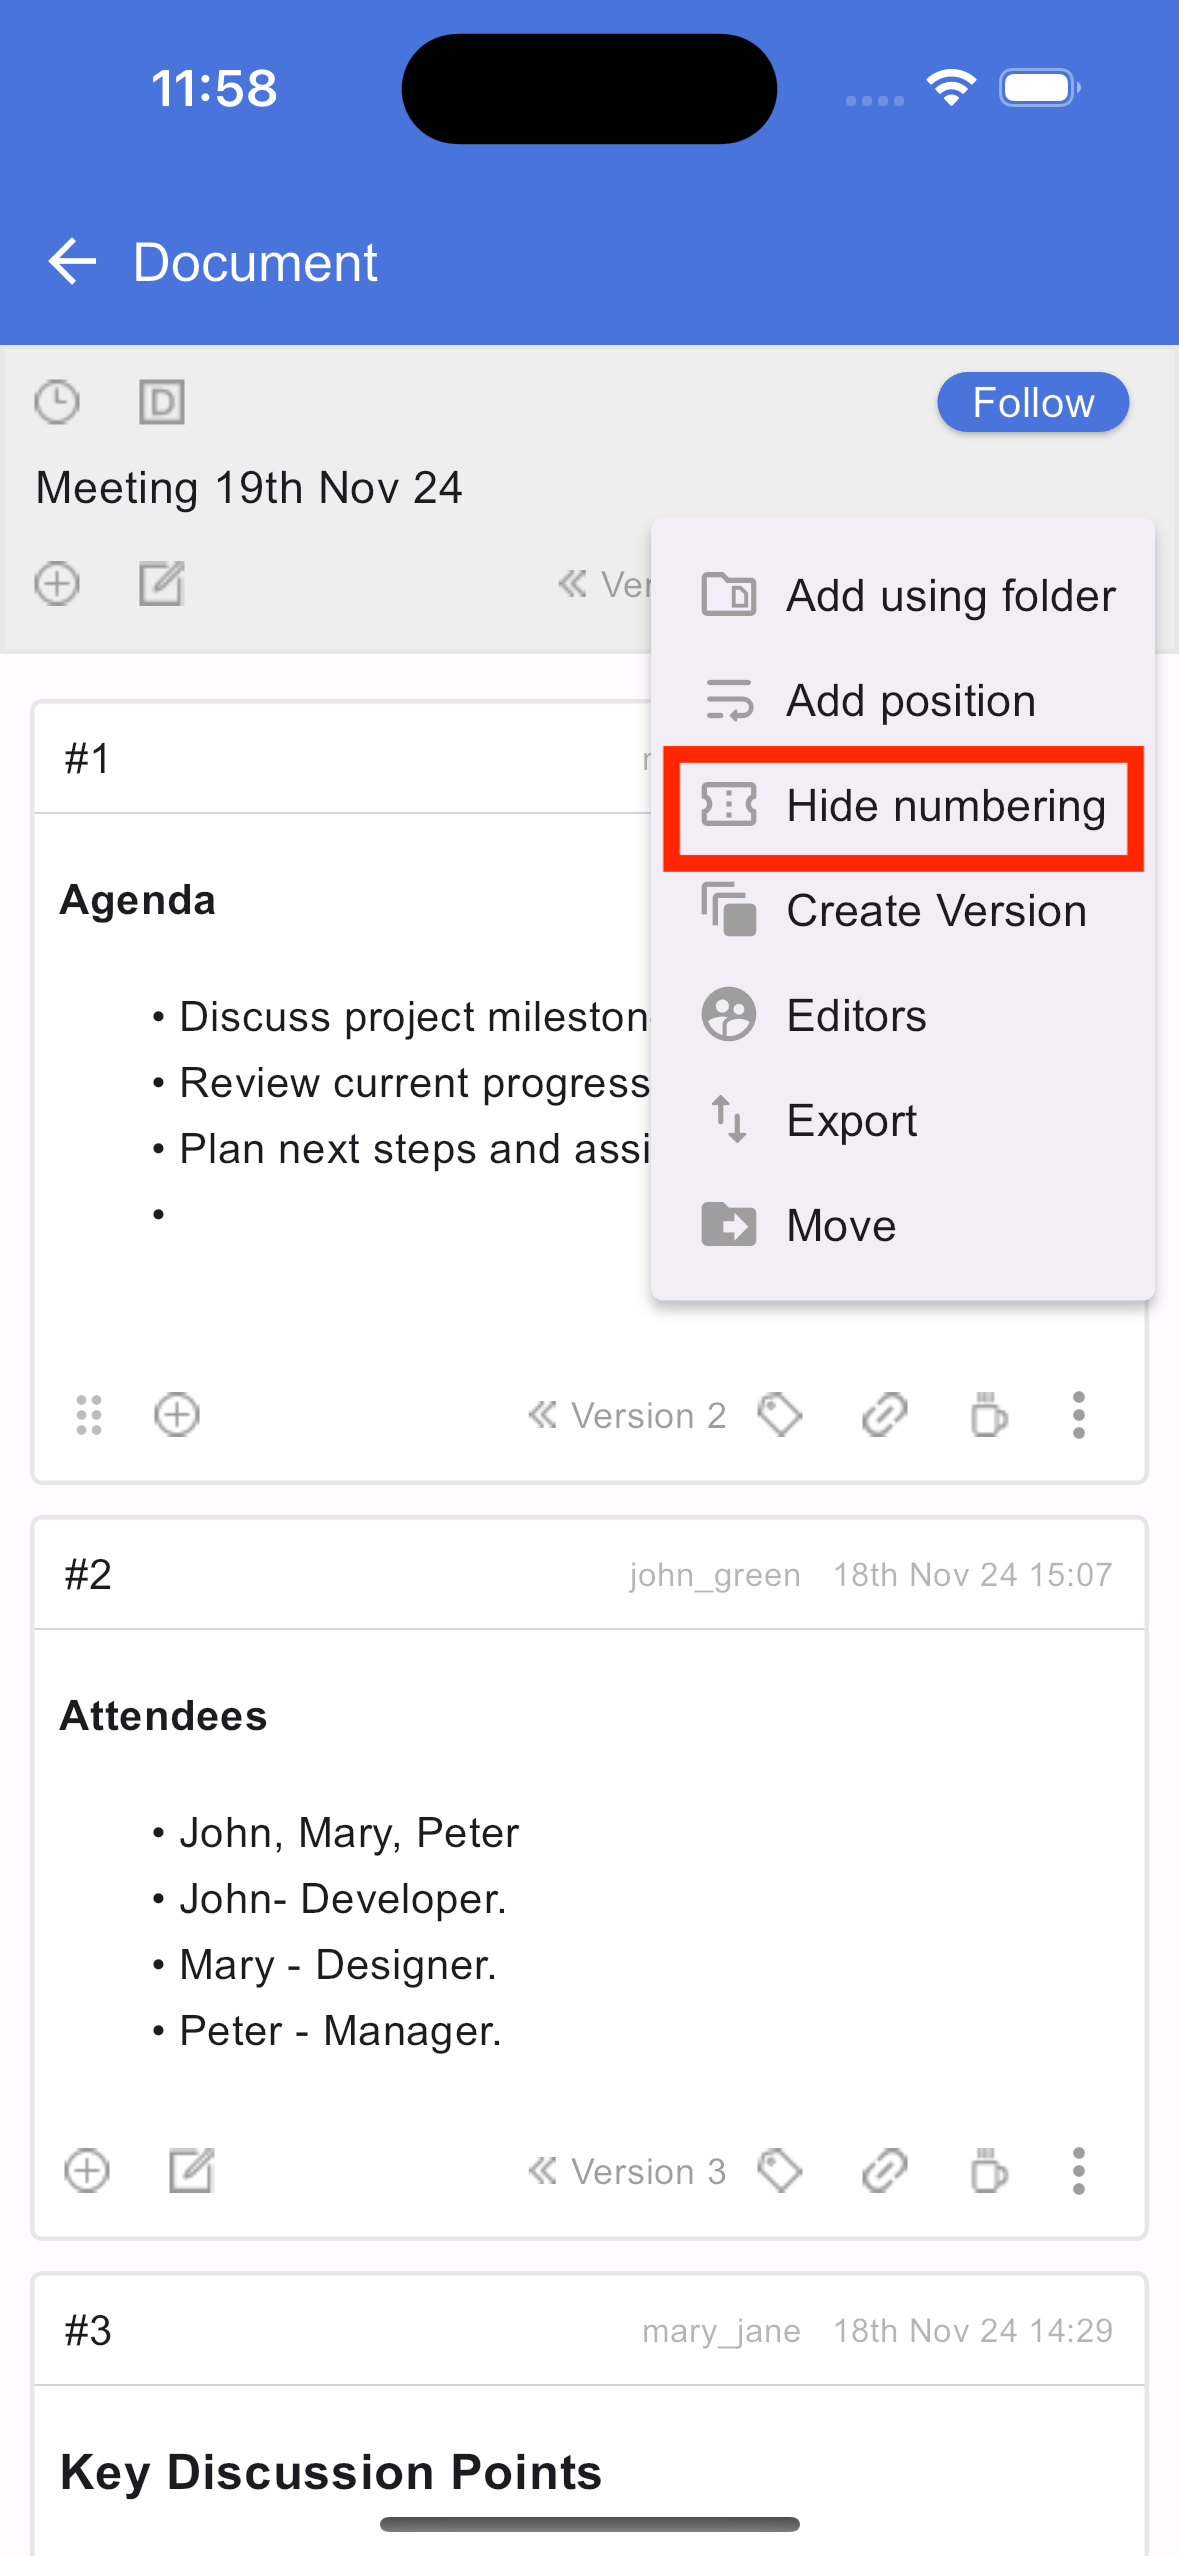
Show hide numbering
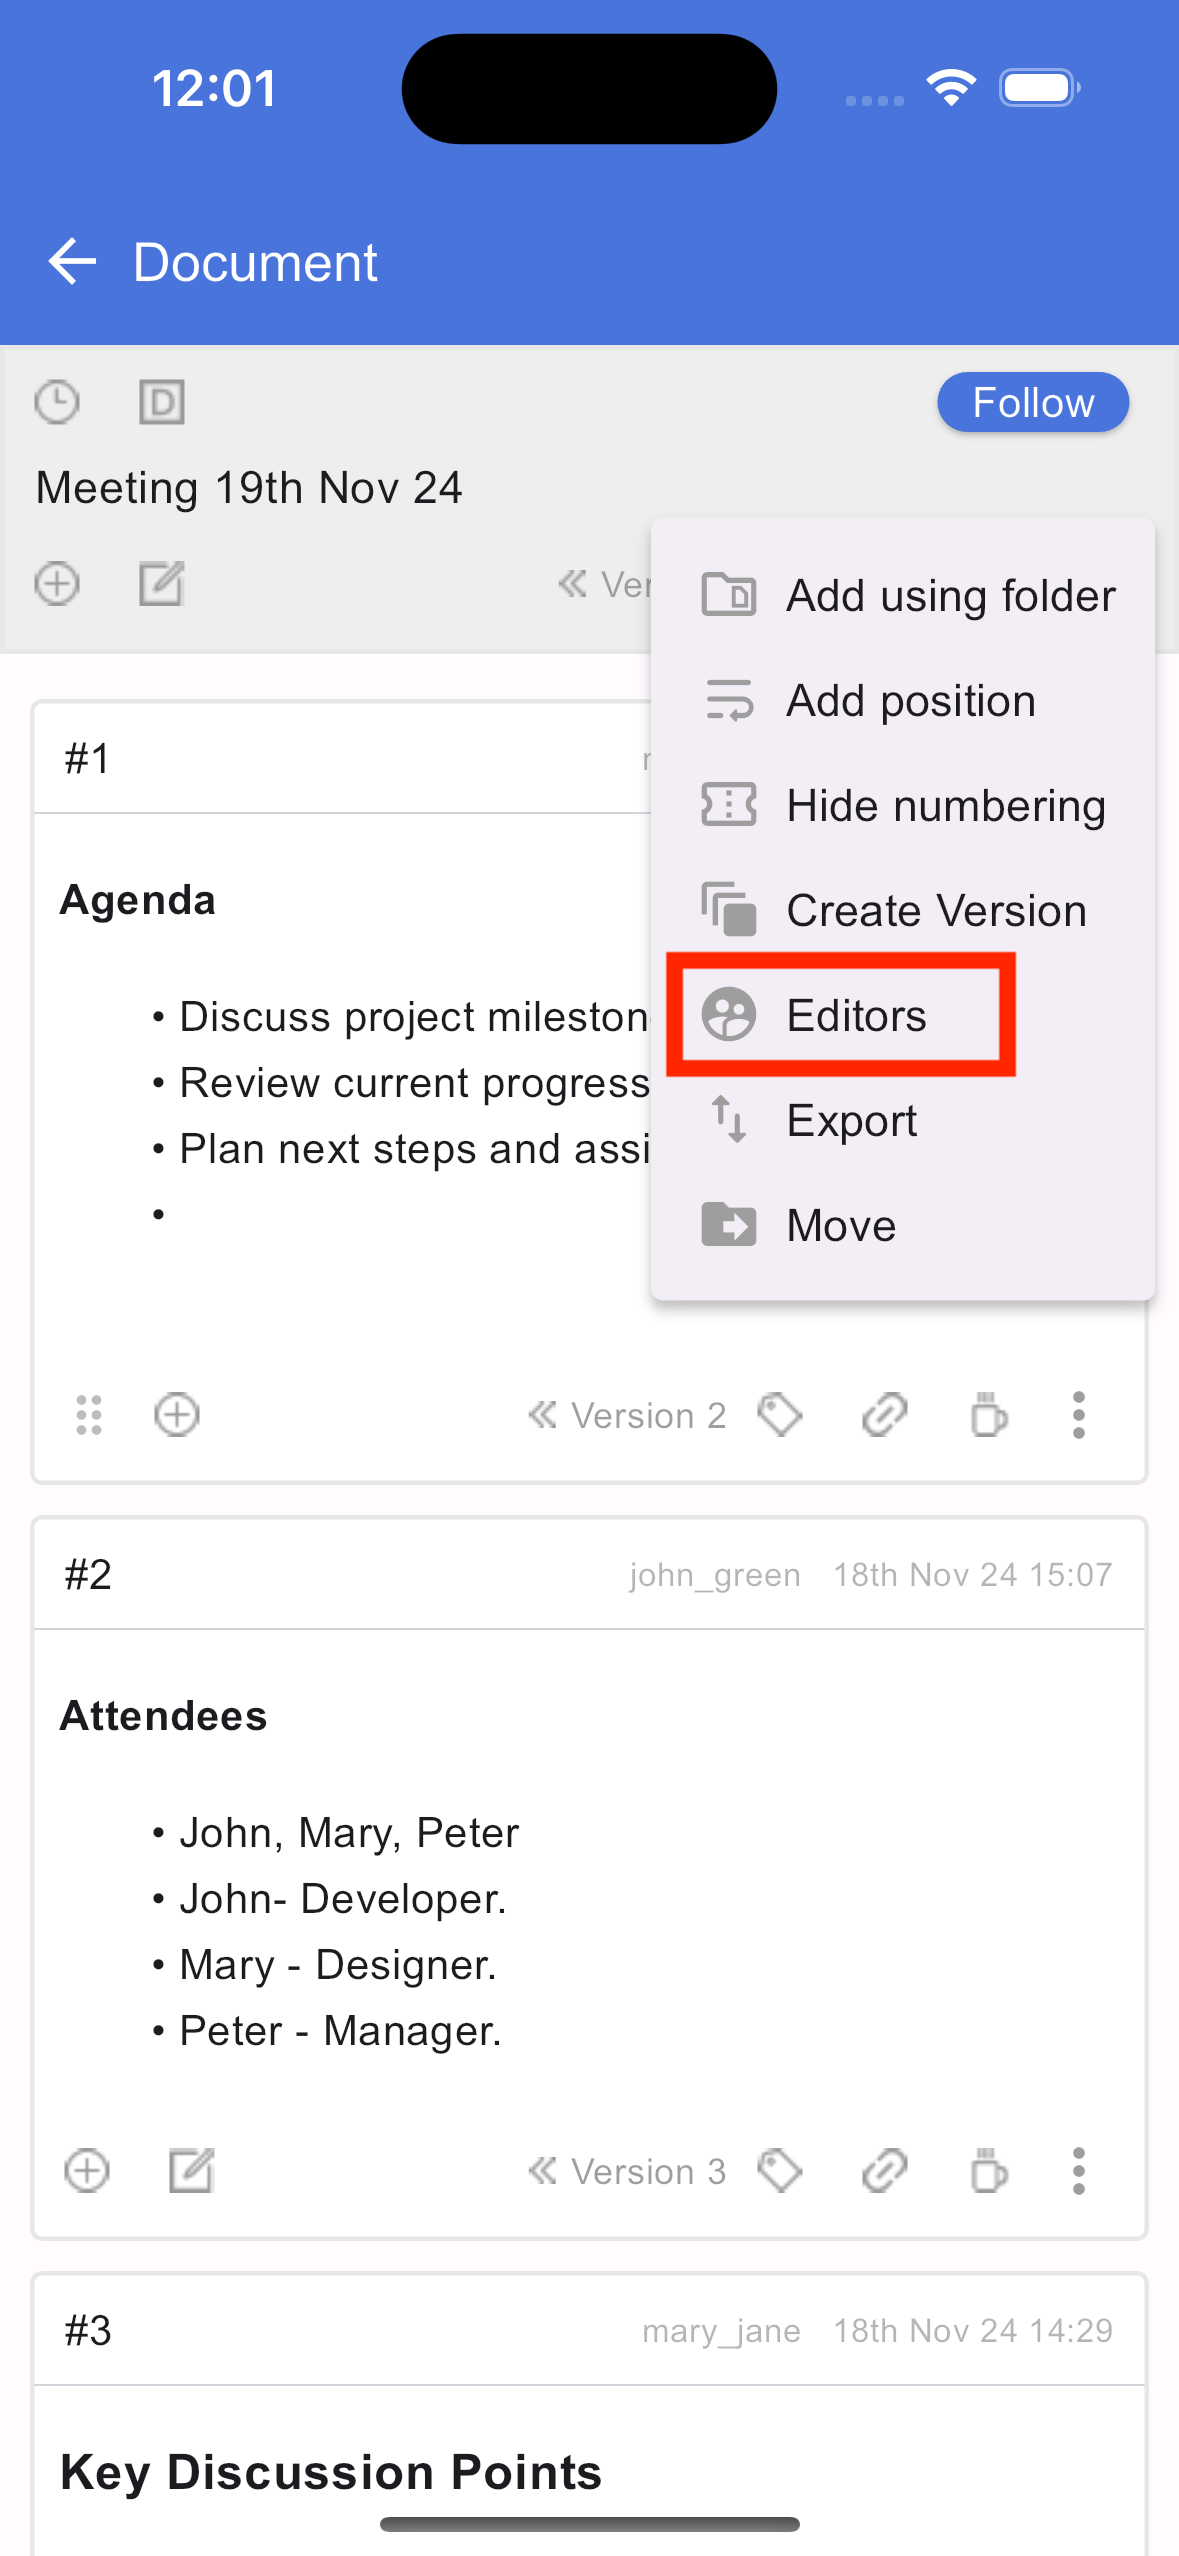
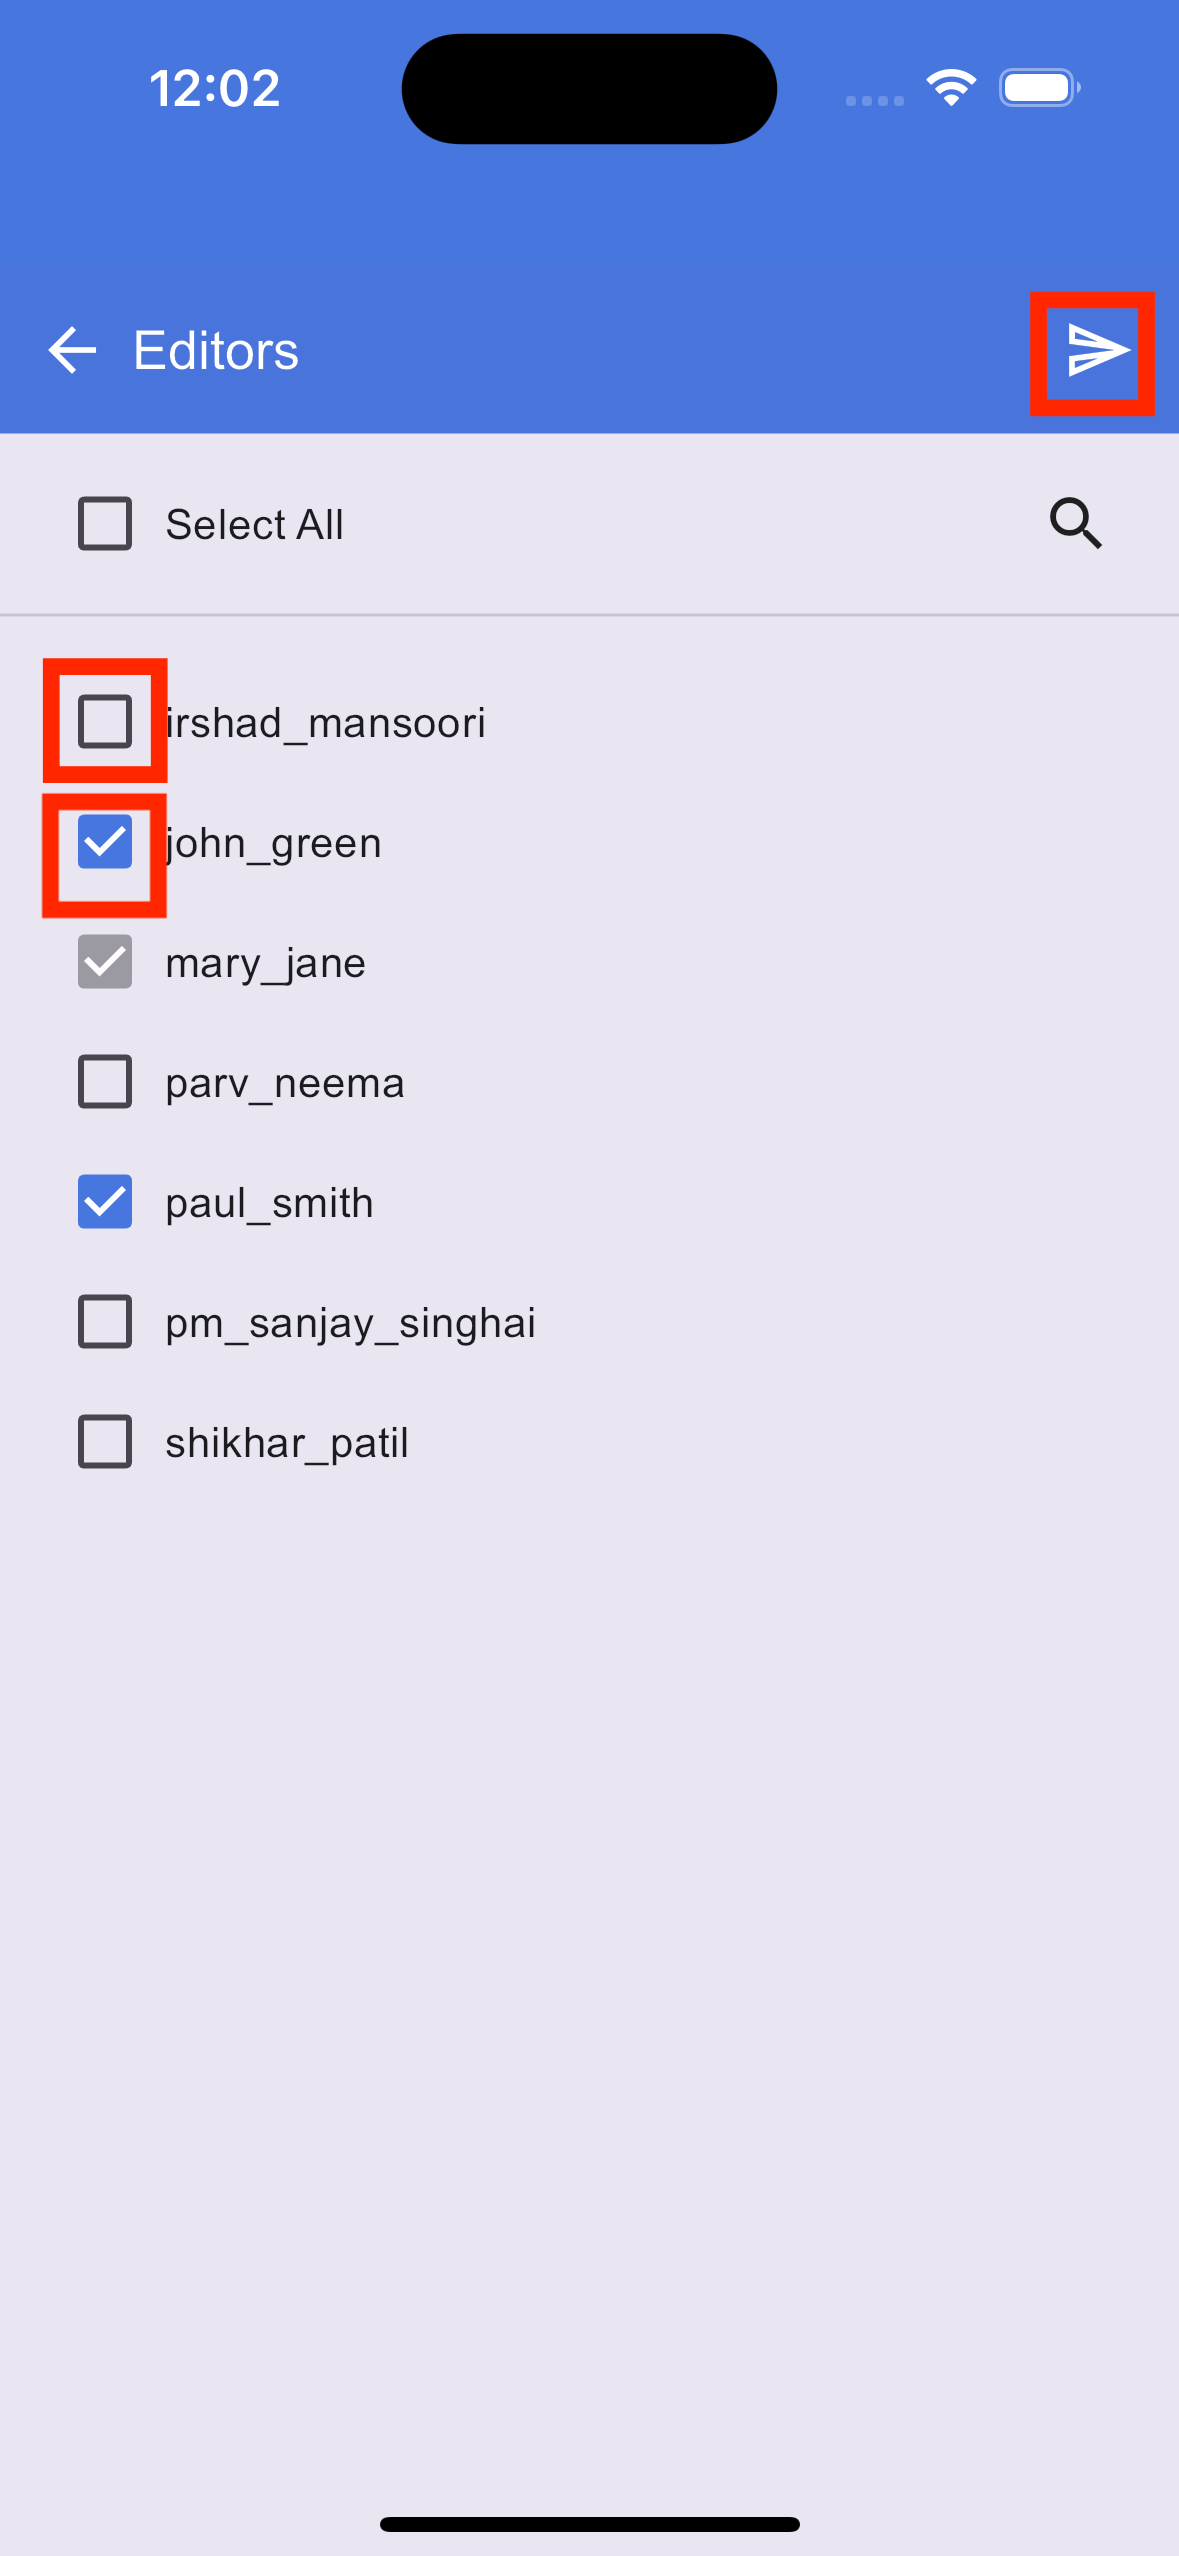
Managing list of editors
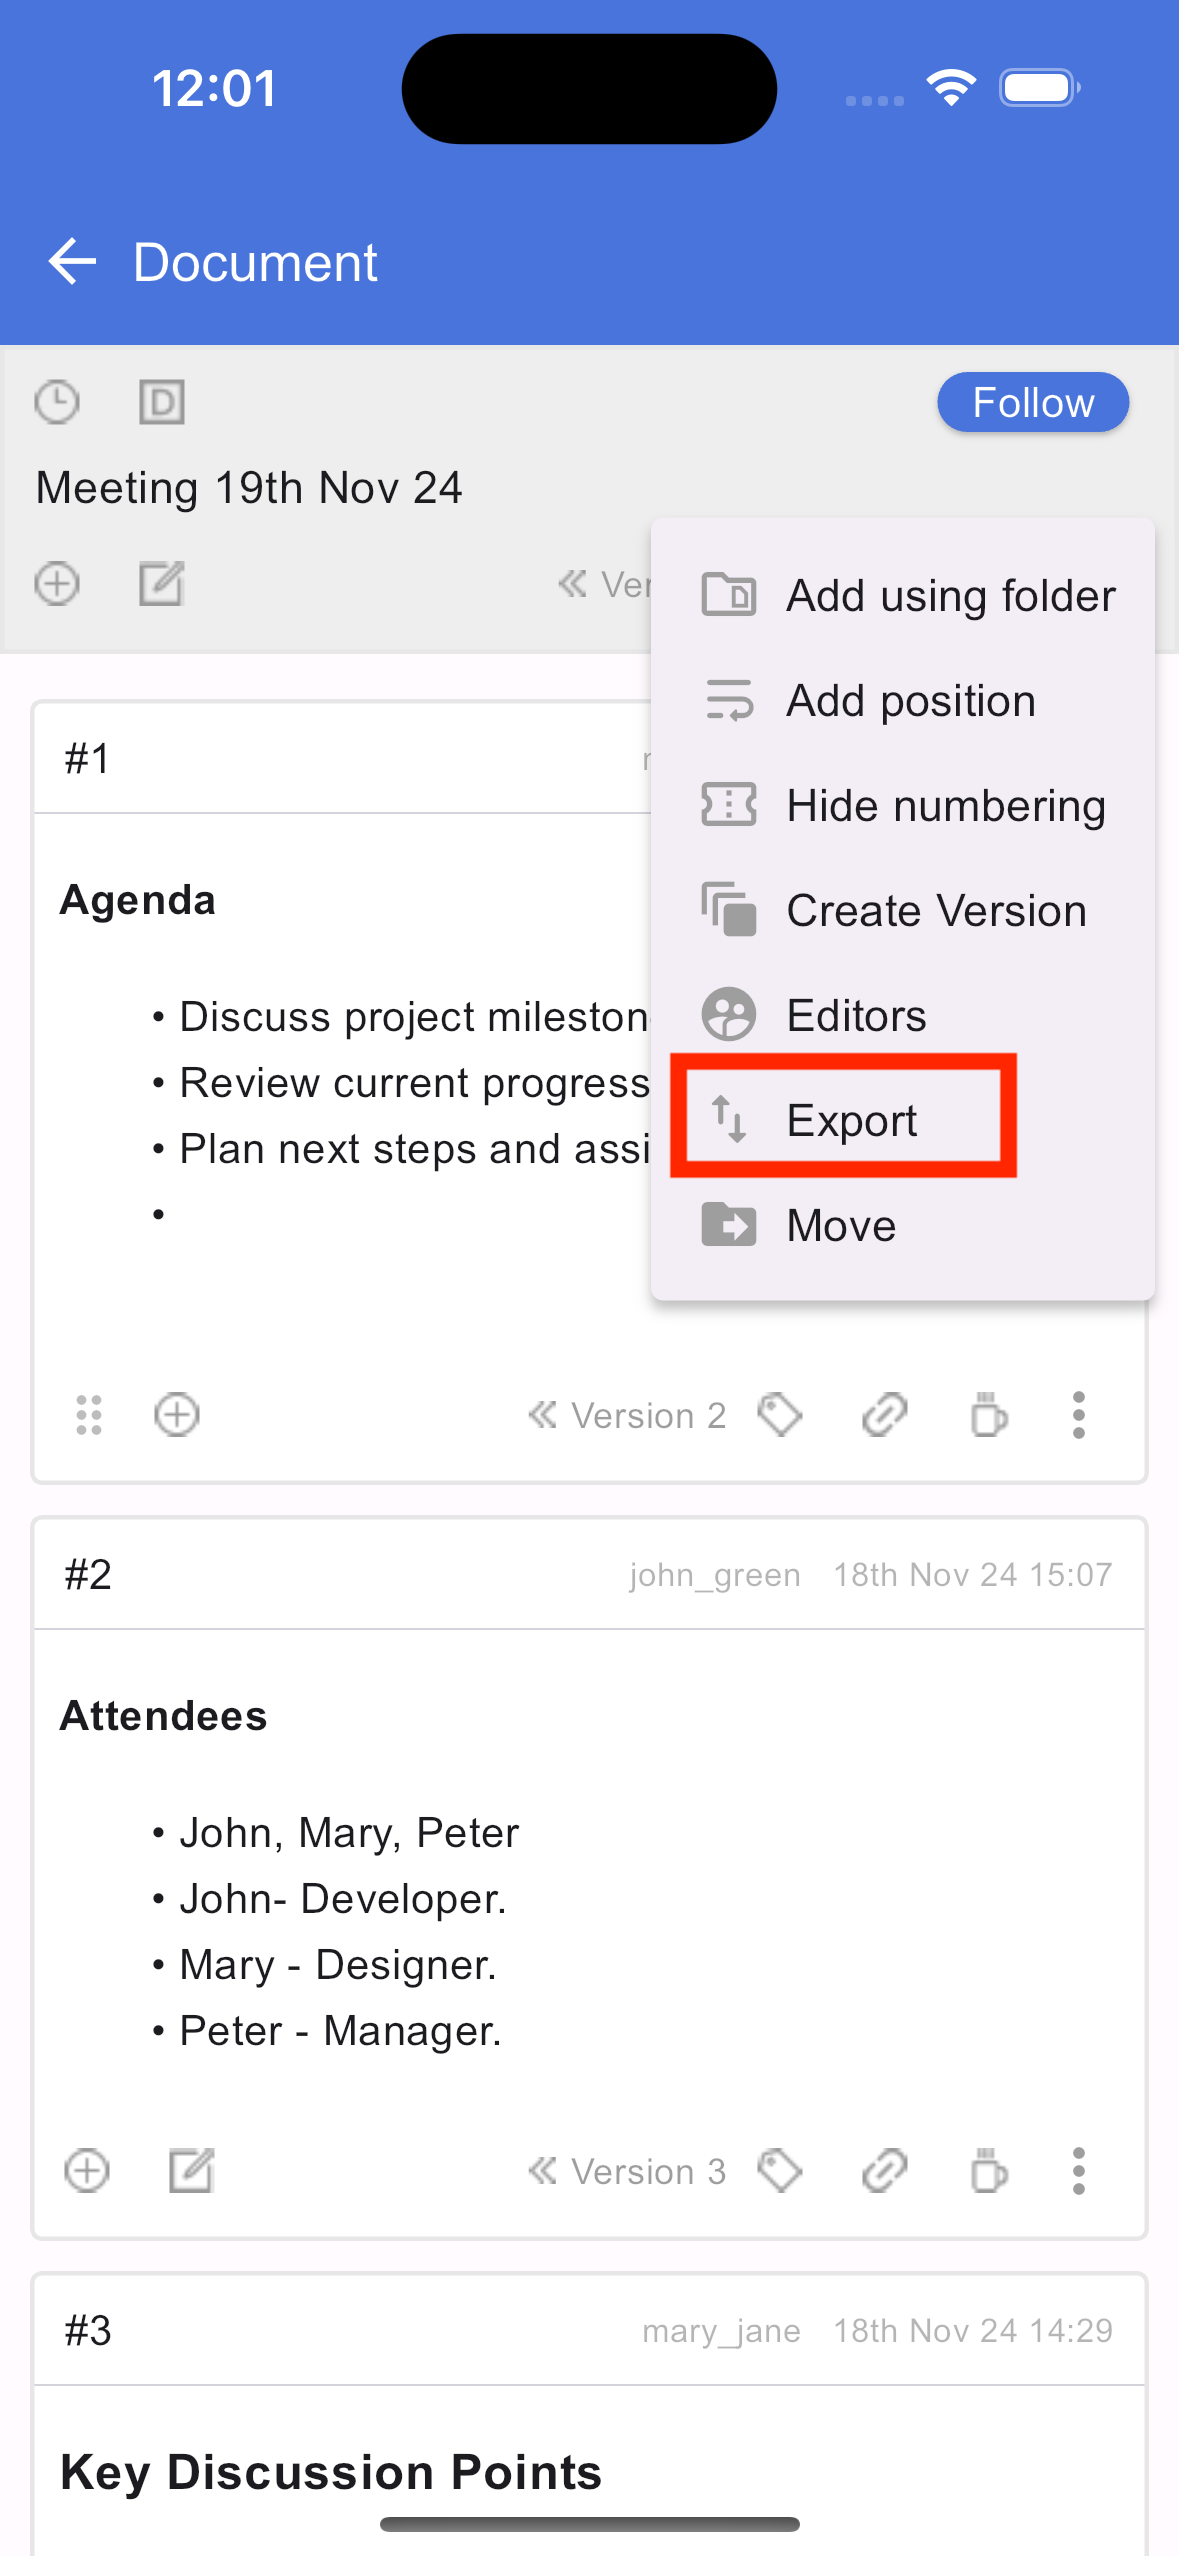
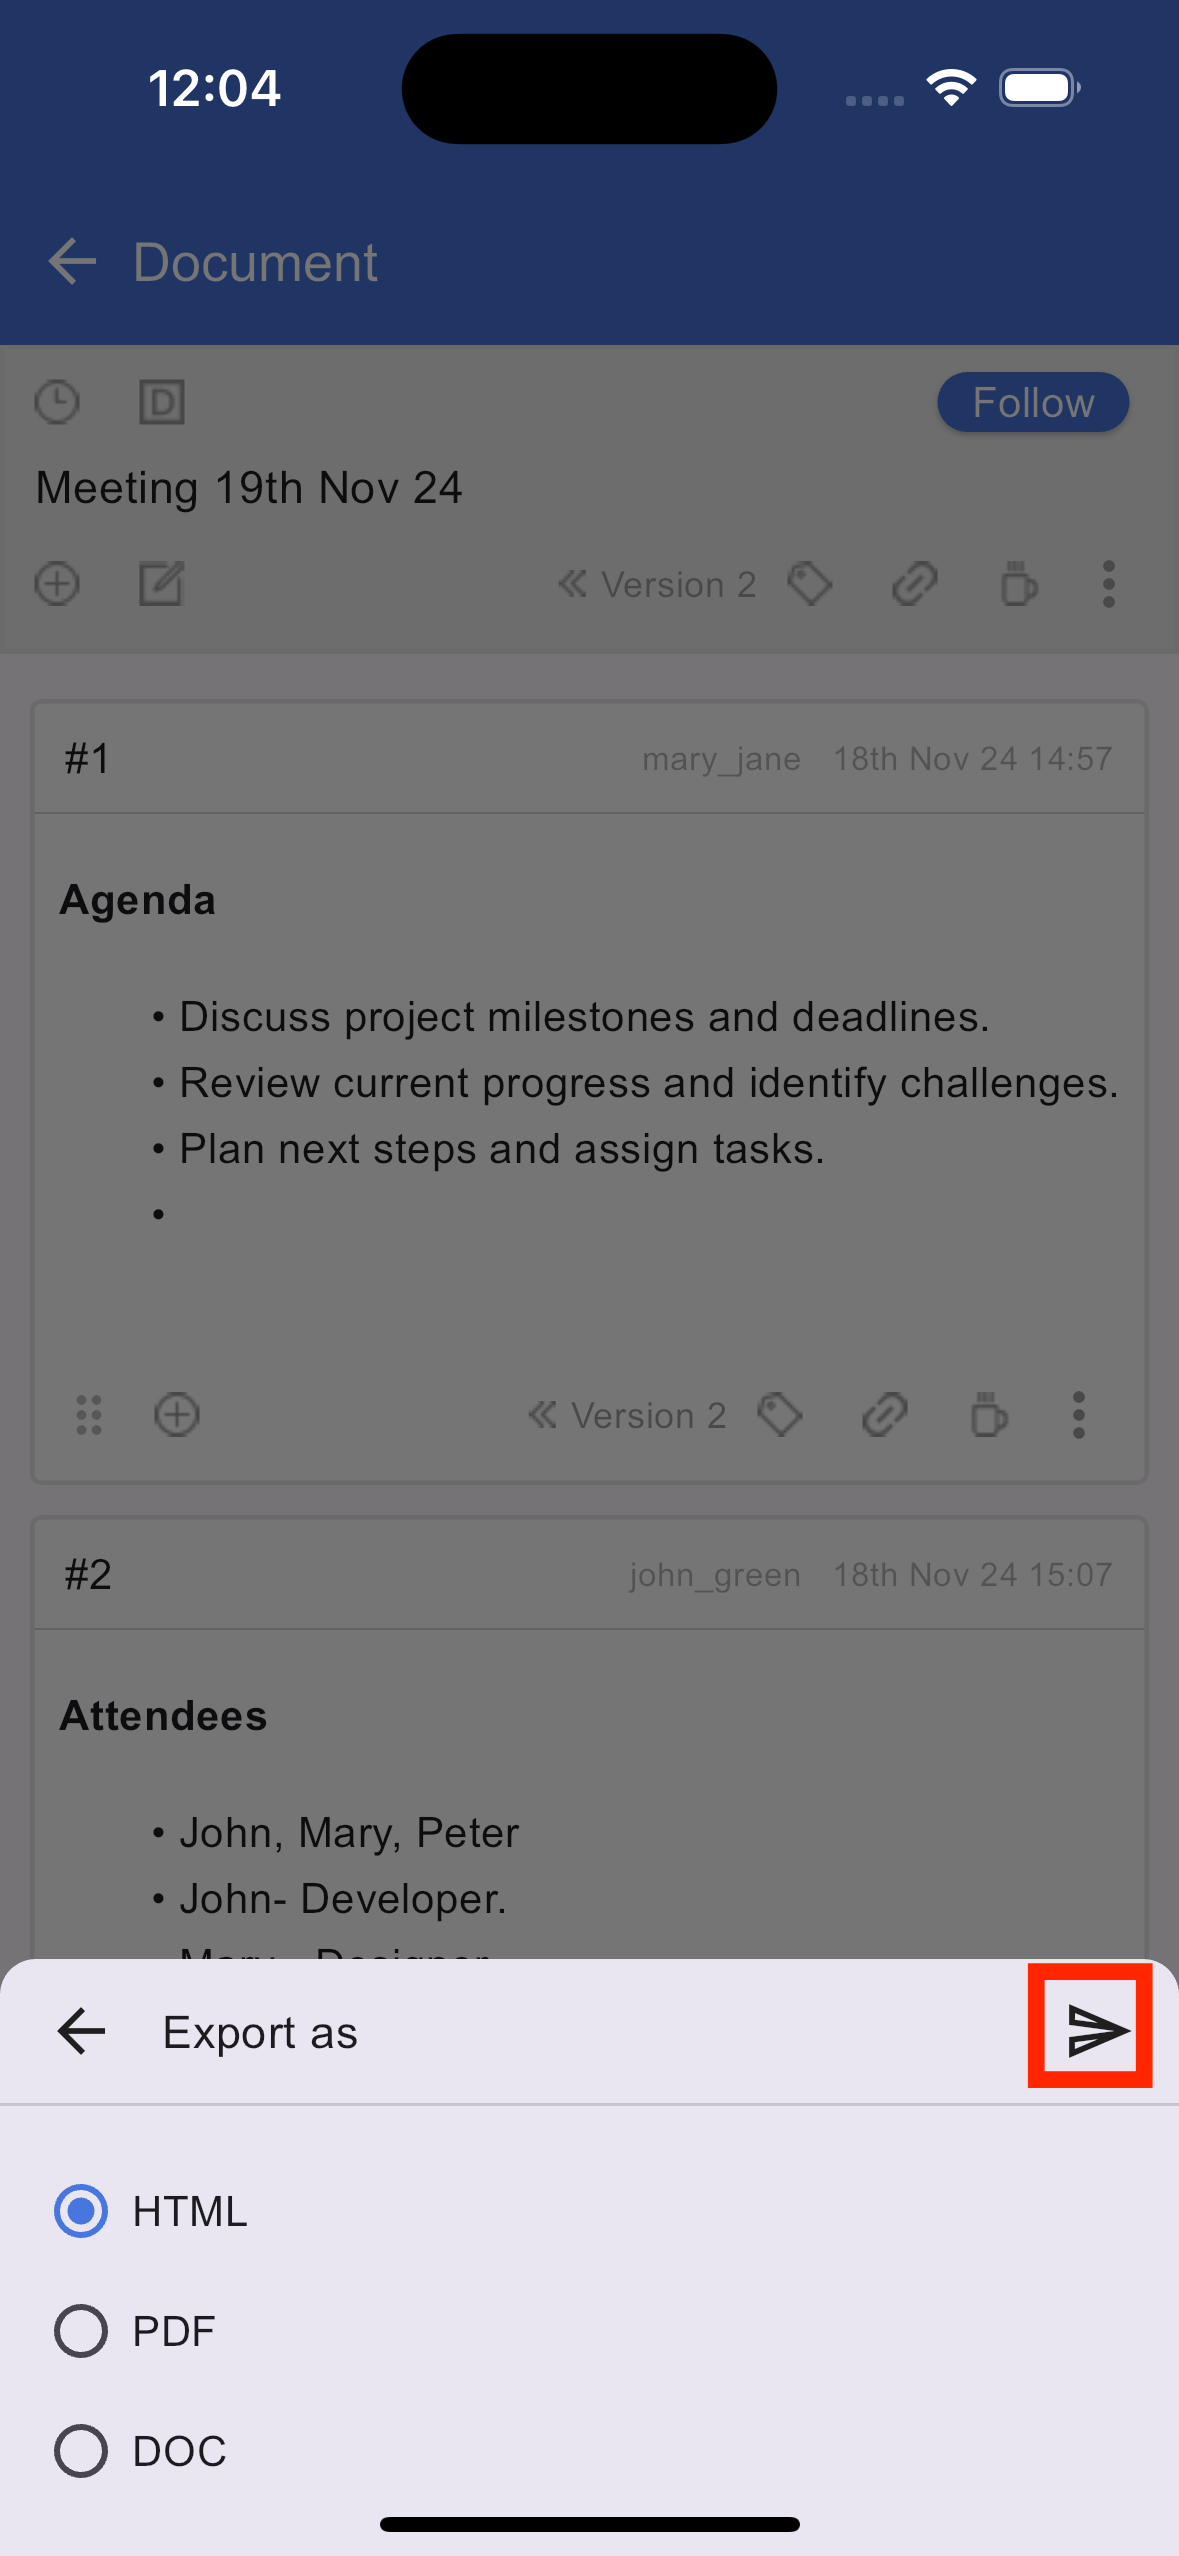
Exporting a document
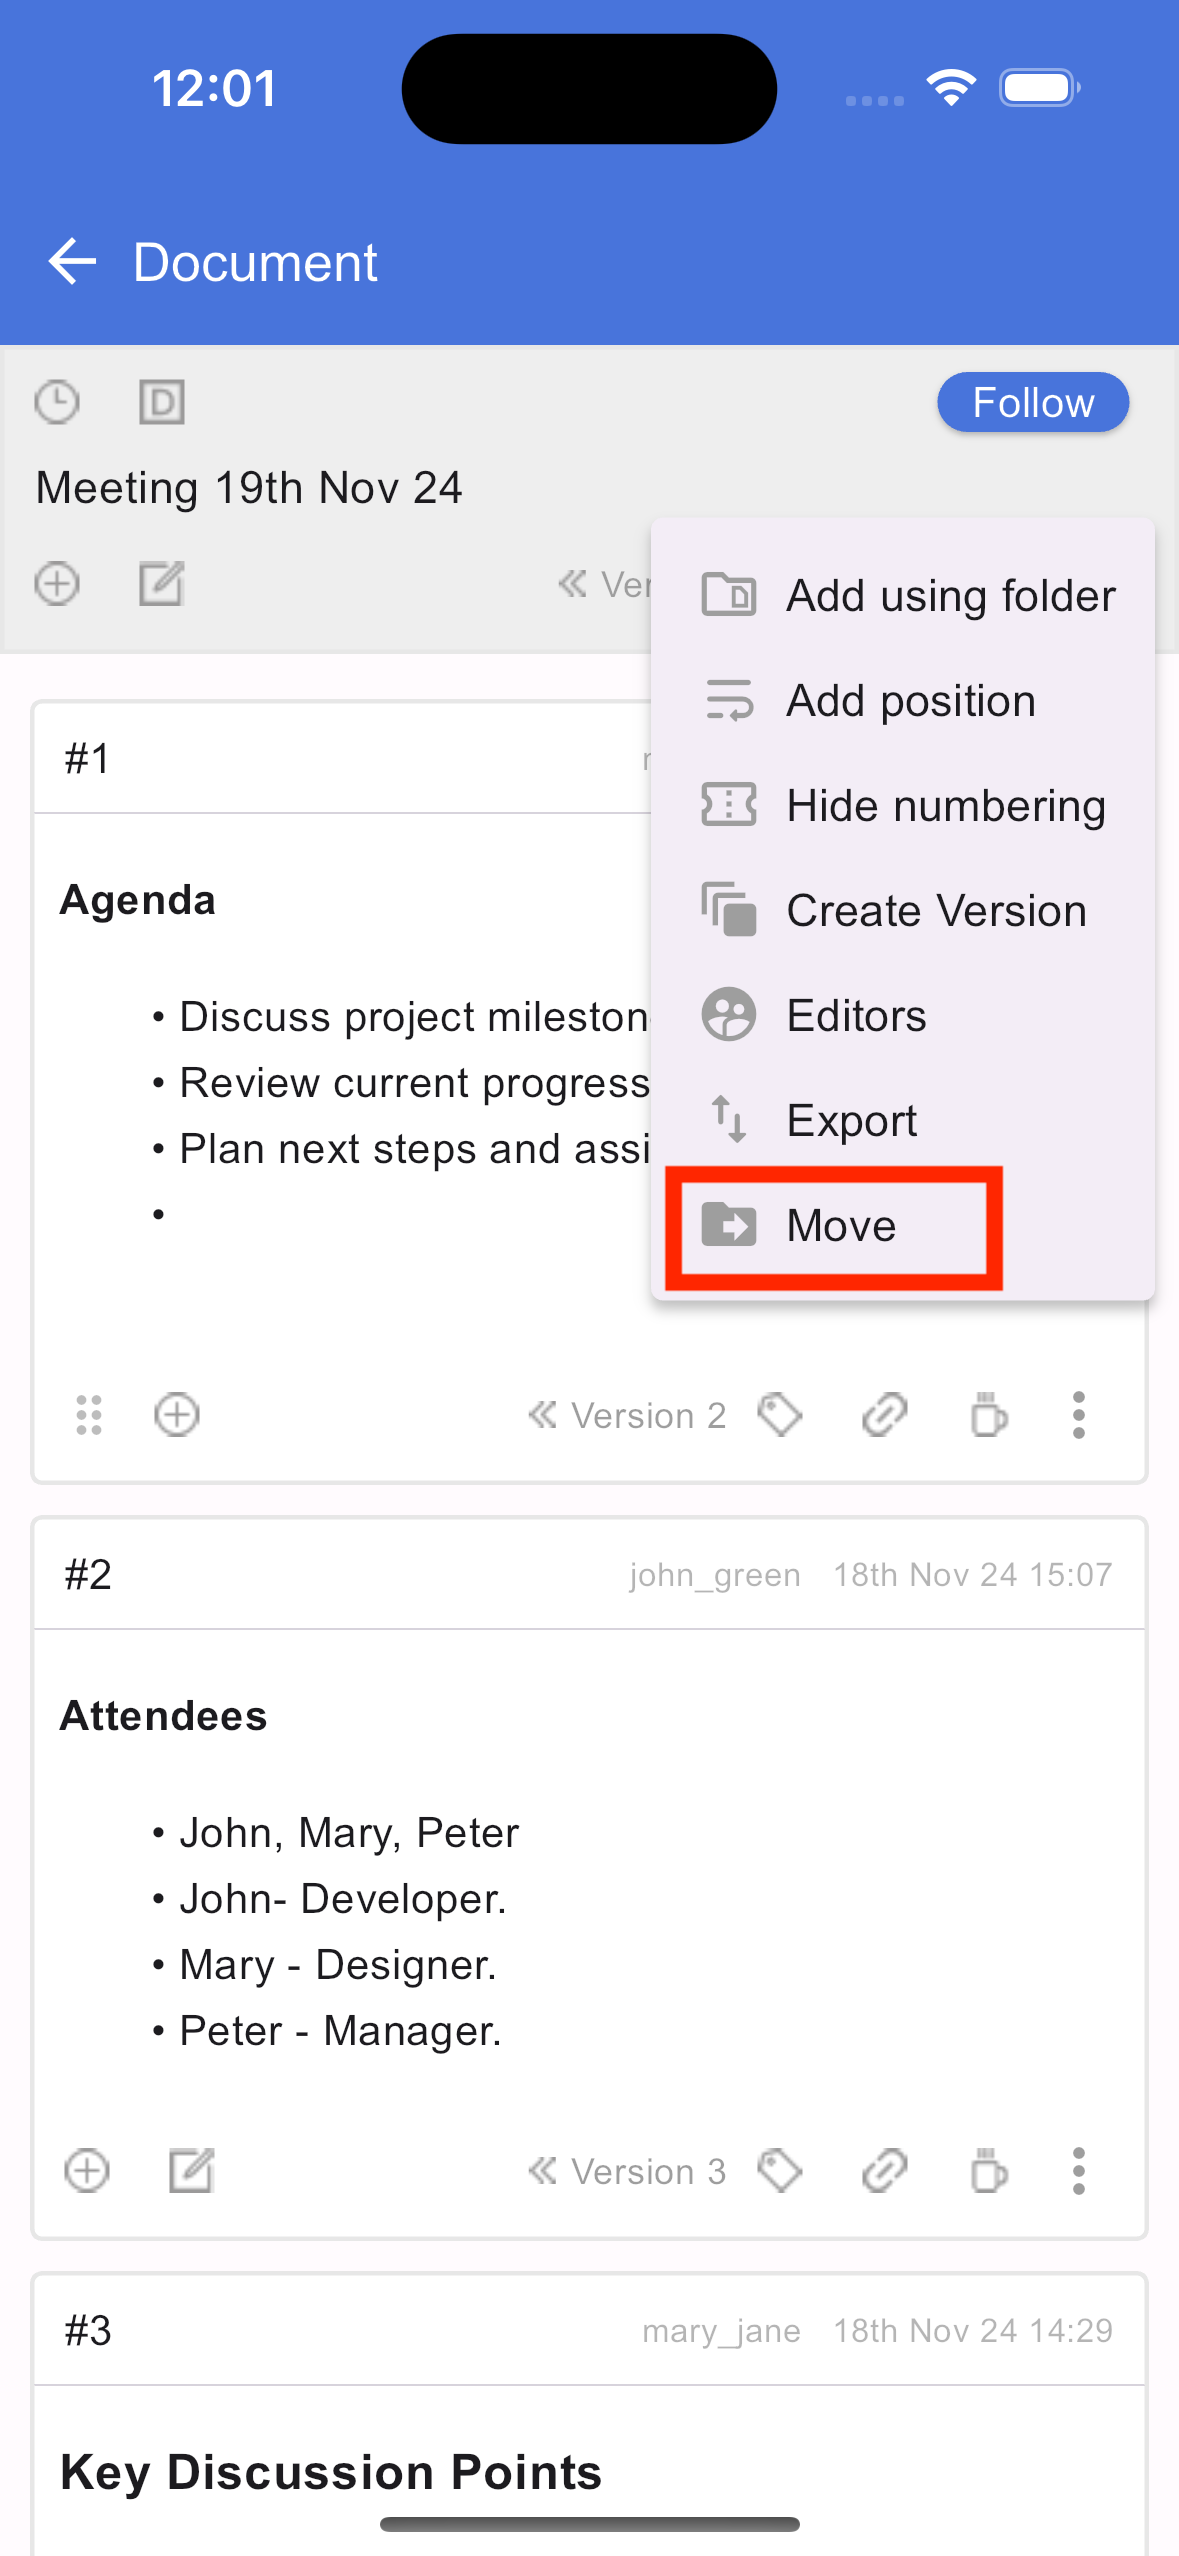
Moving a document

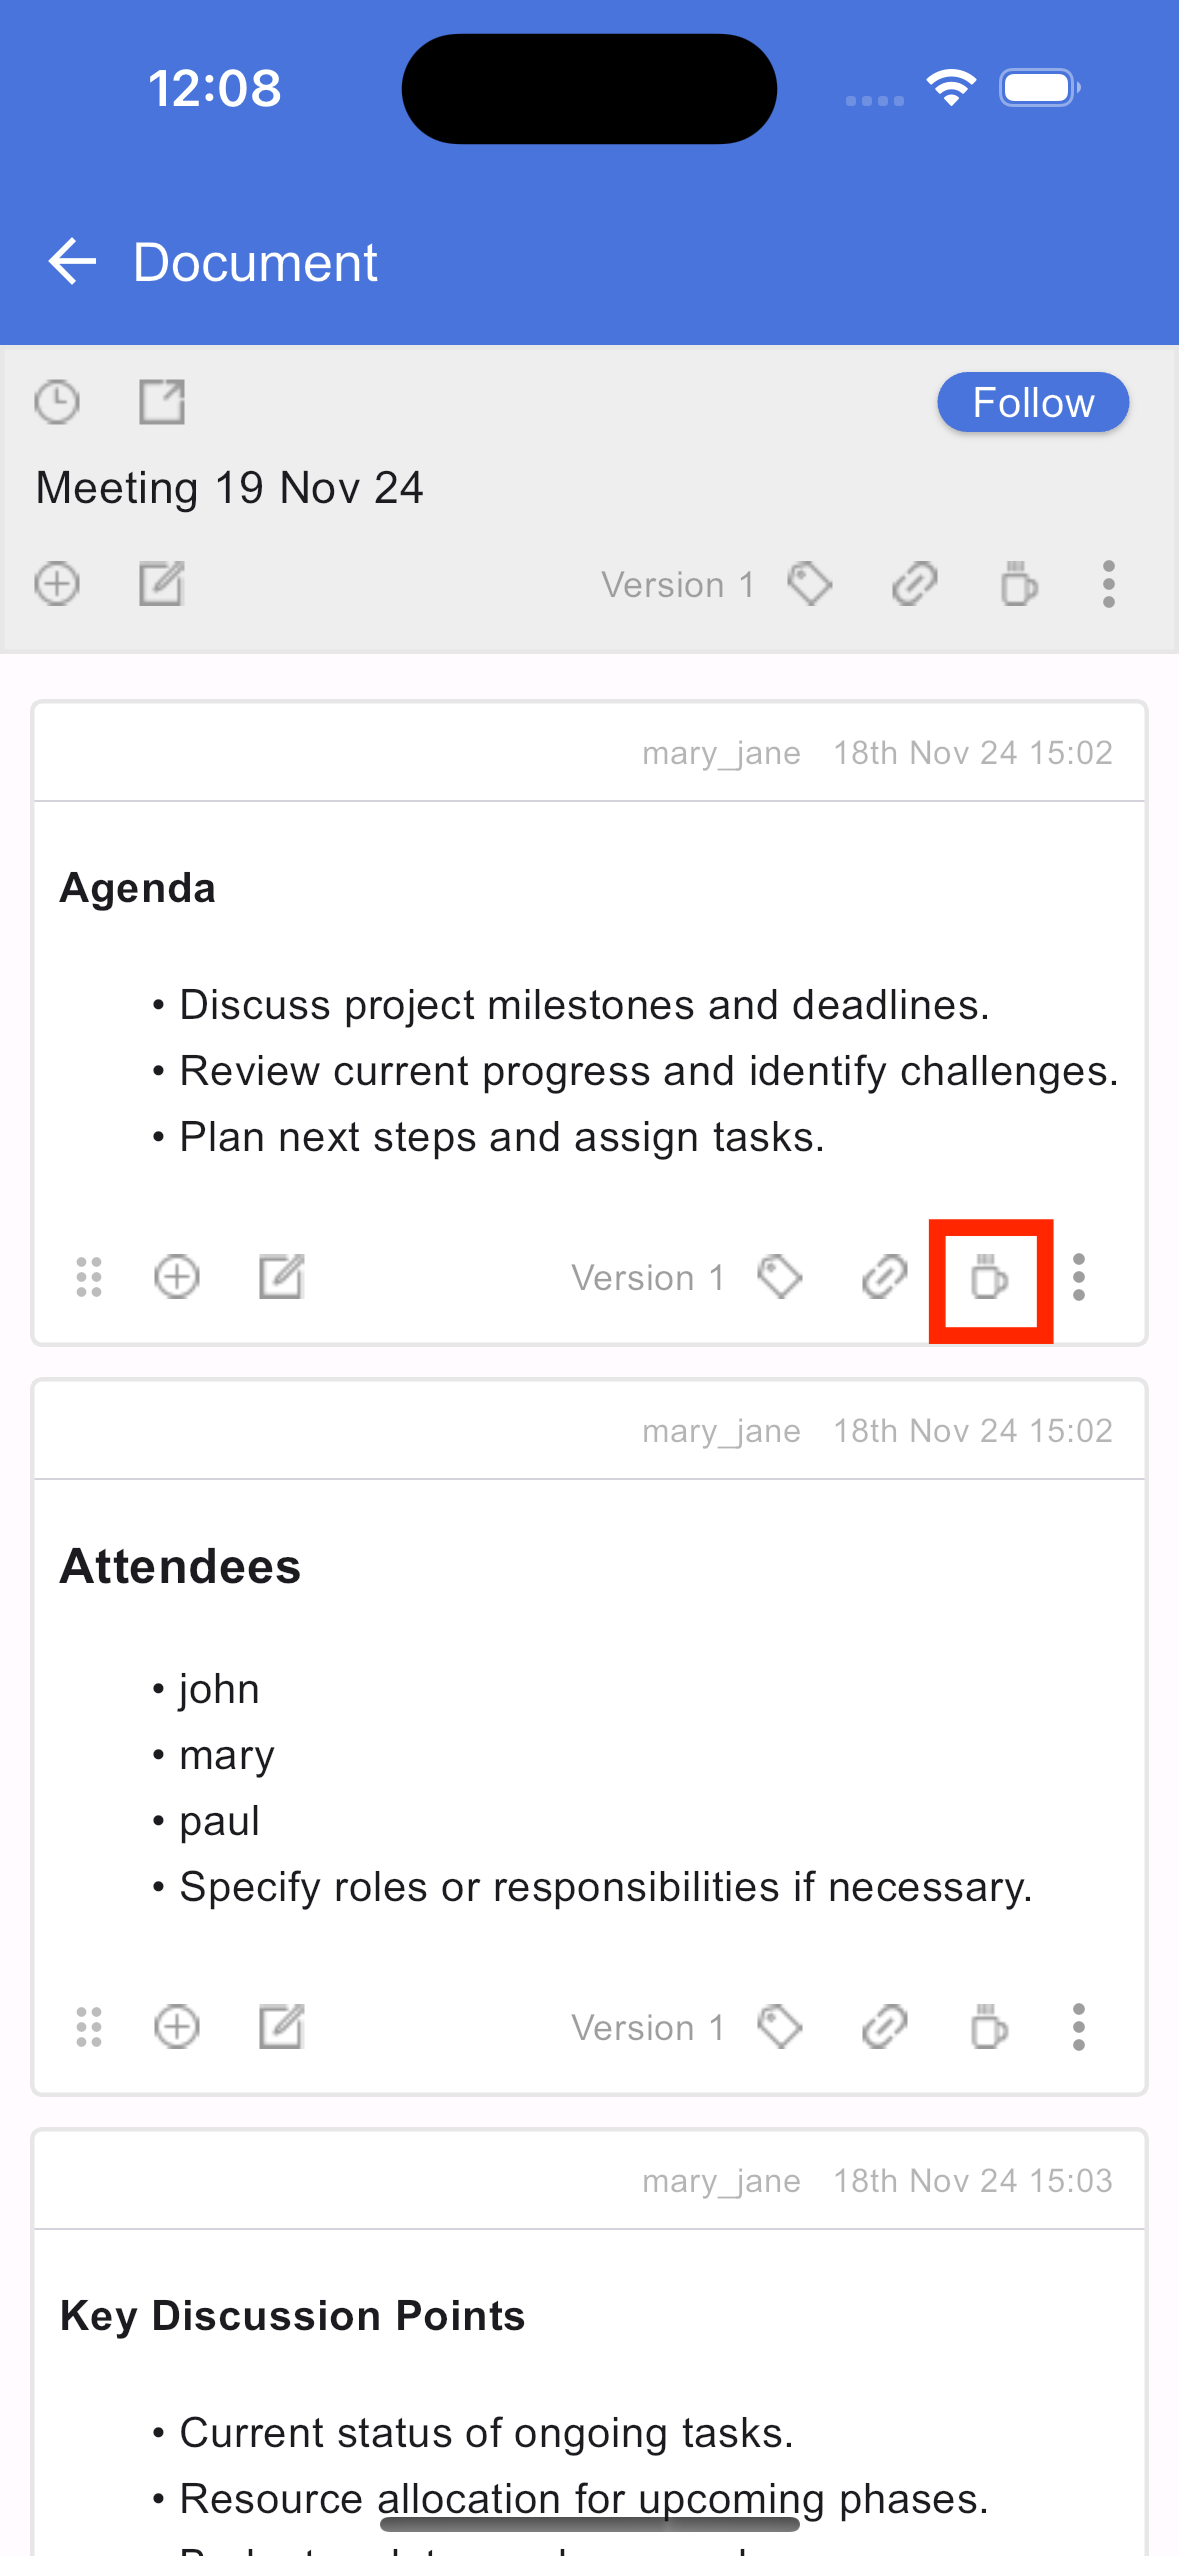
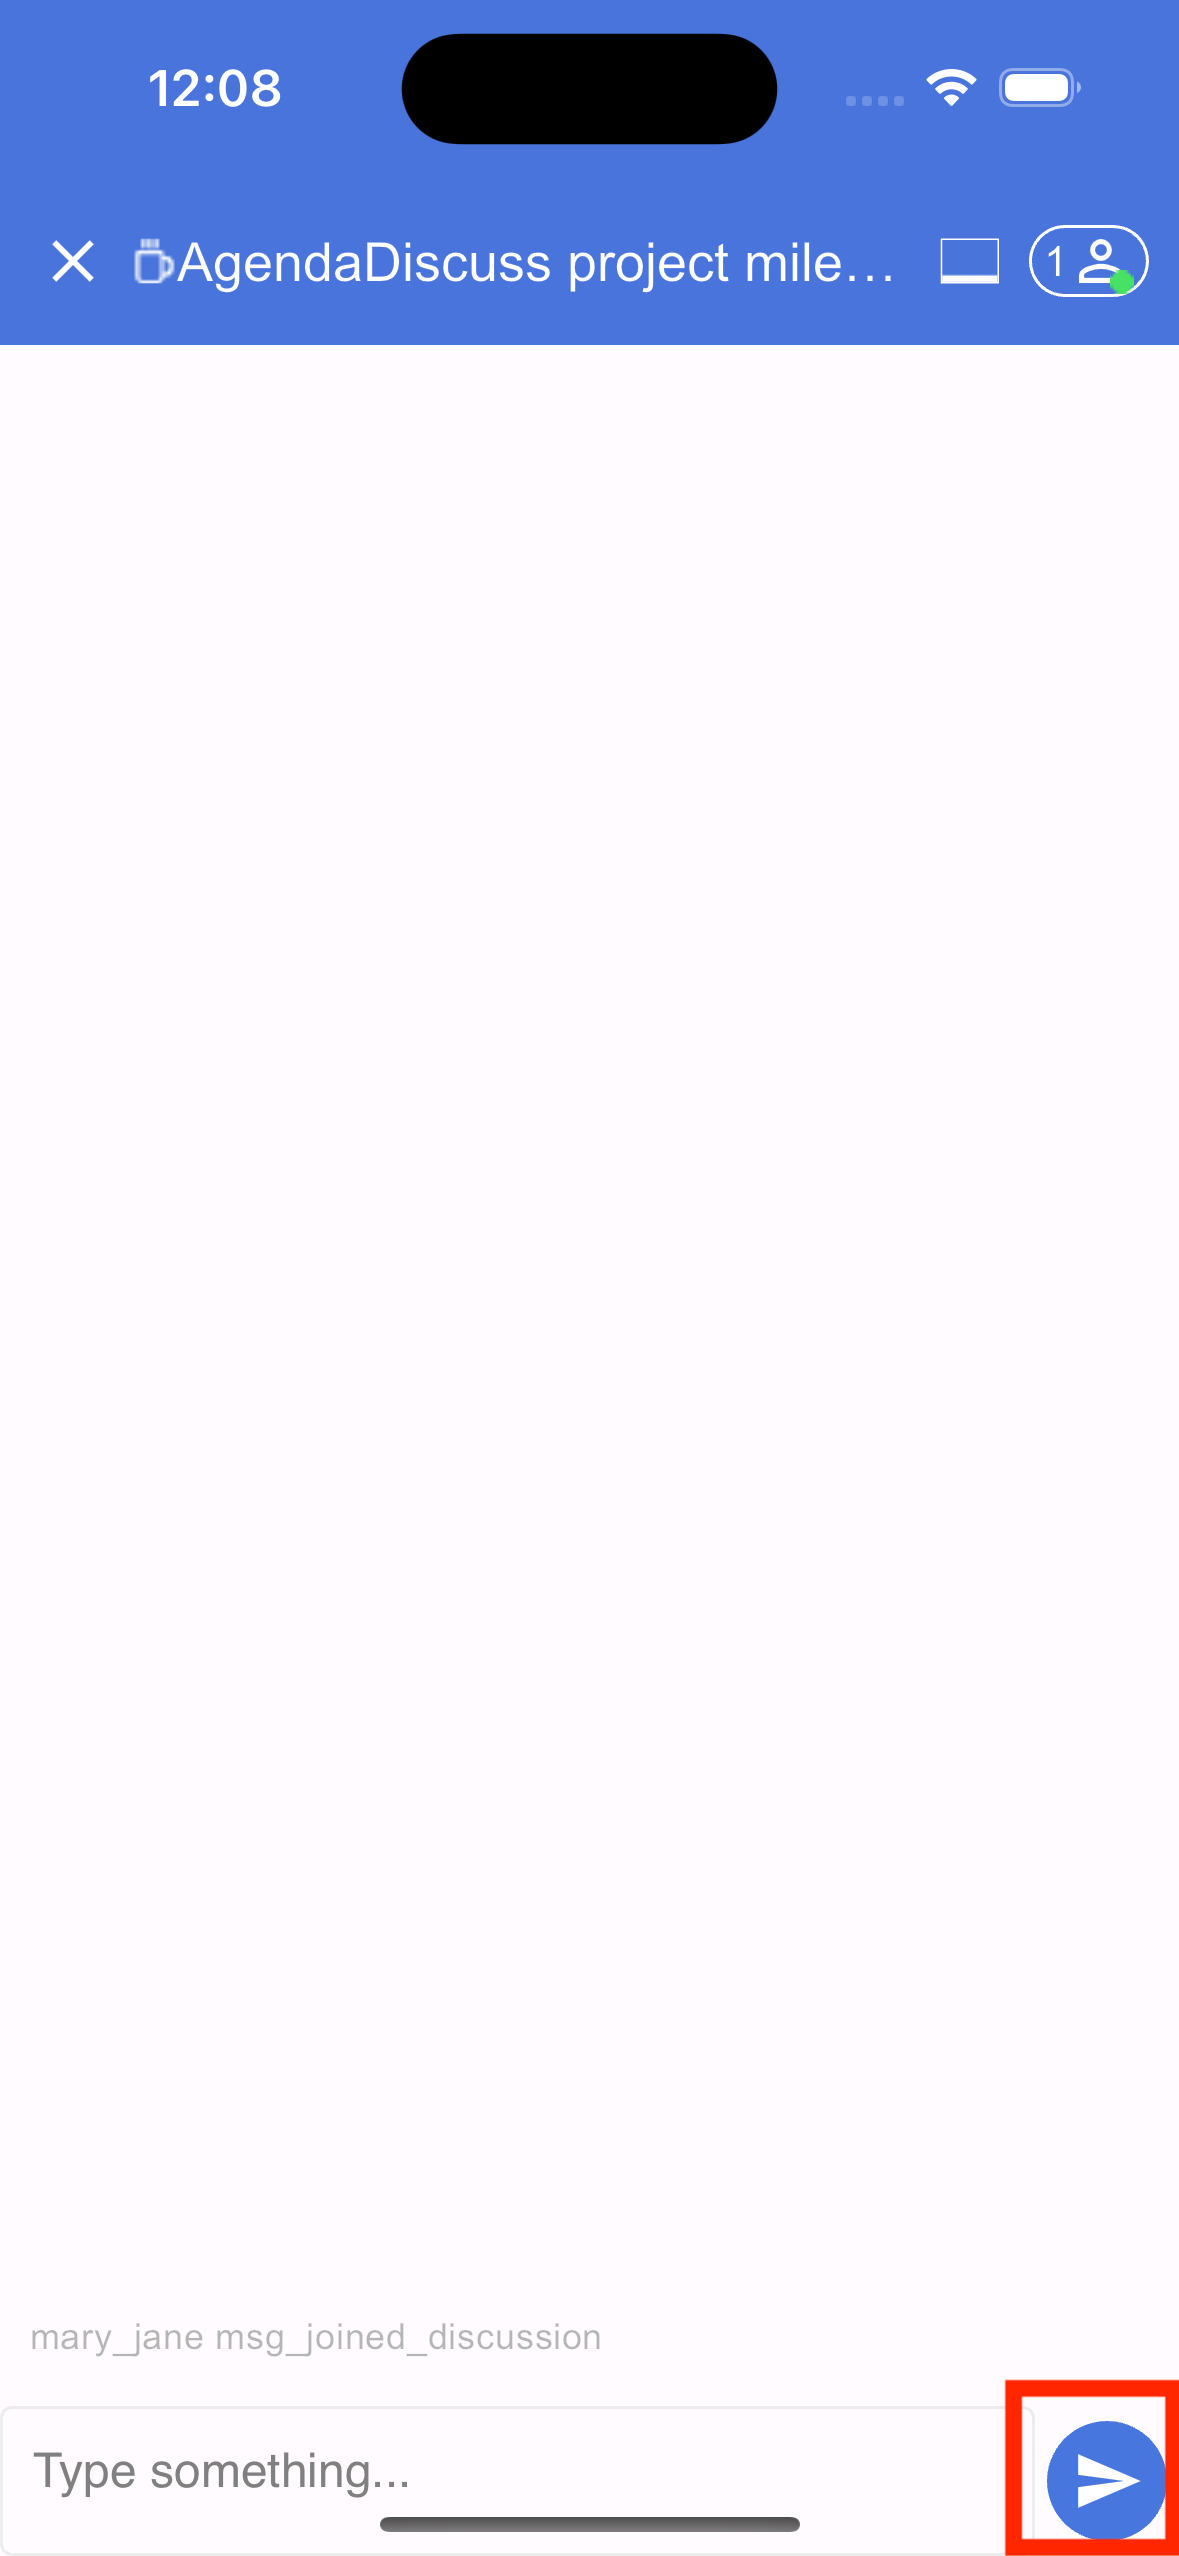
Talking a document
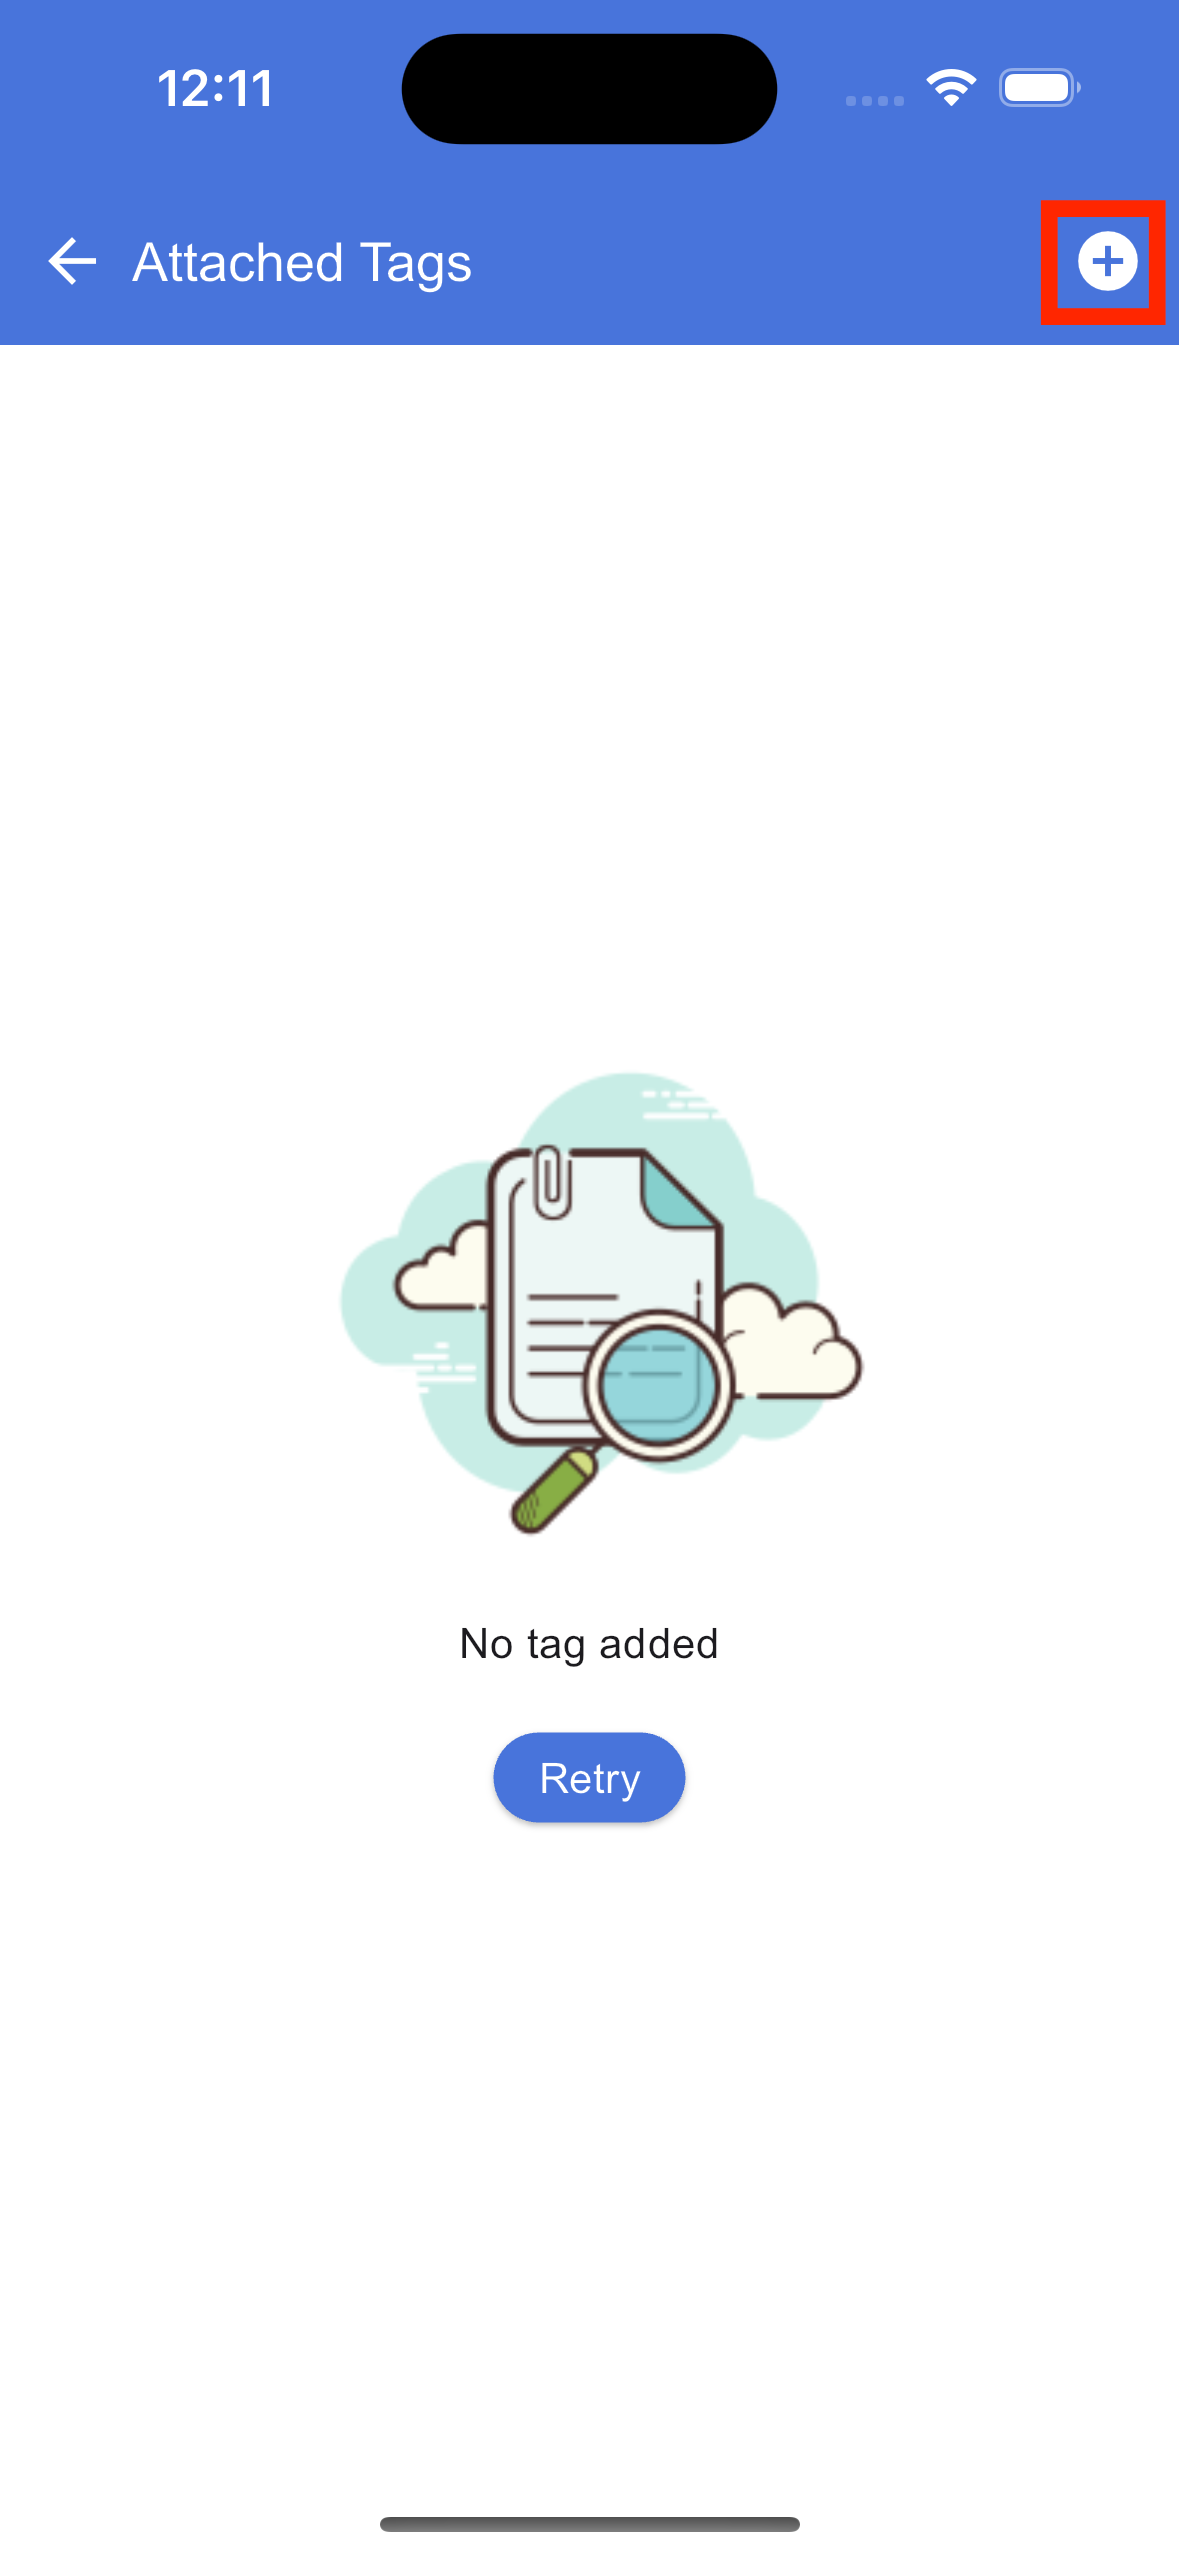
Tagging in document section

Apply signature request
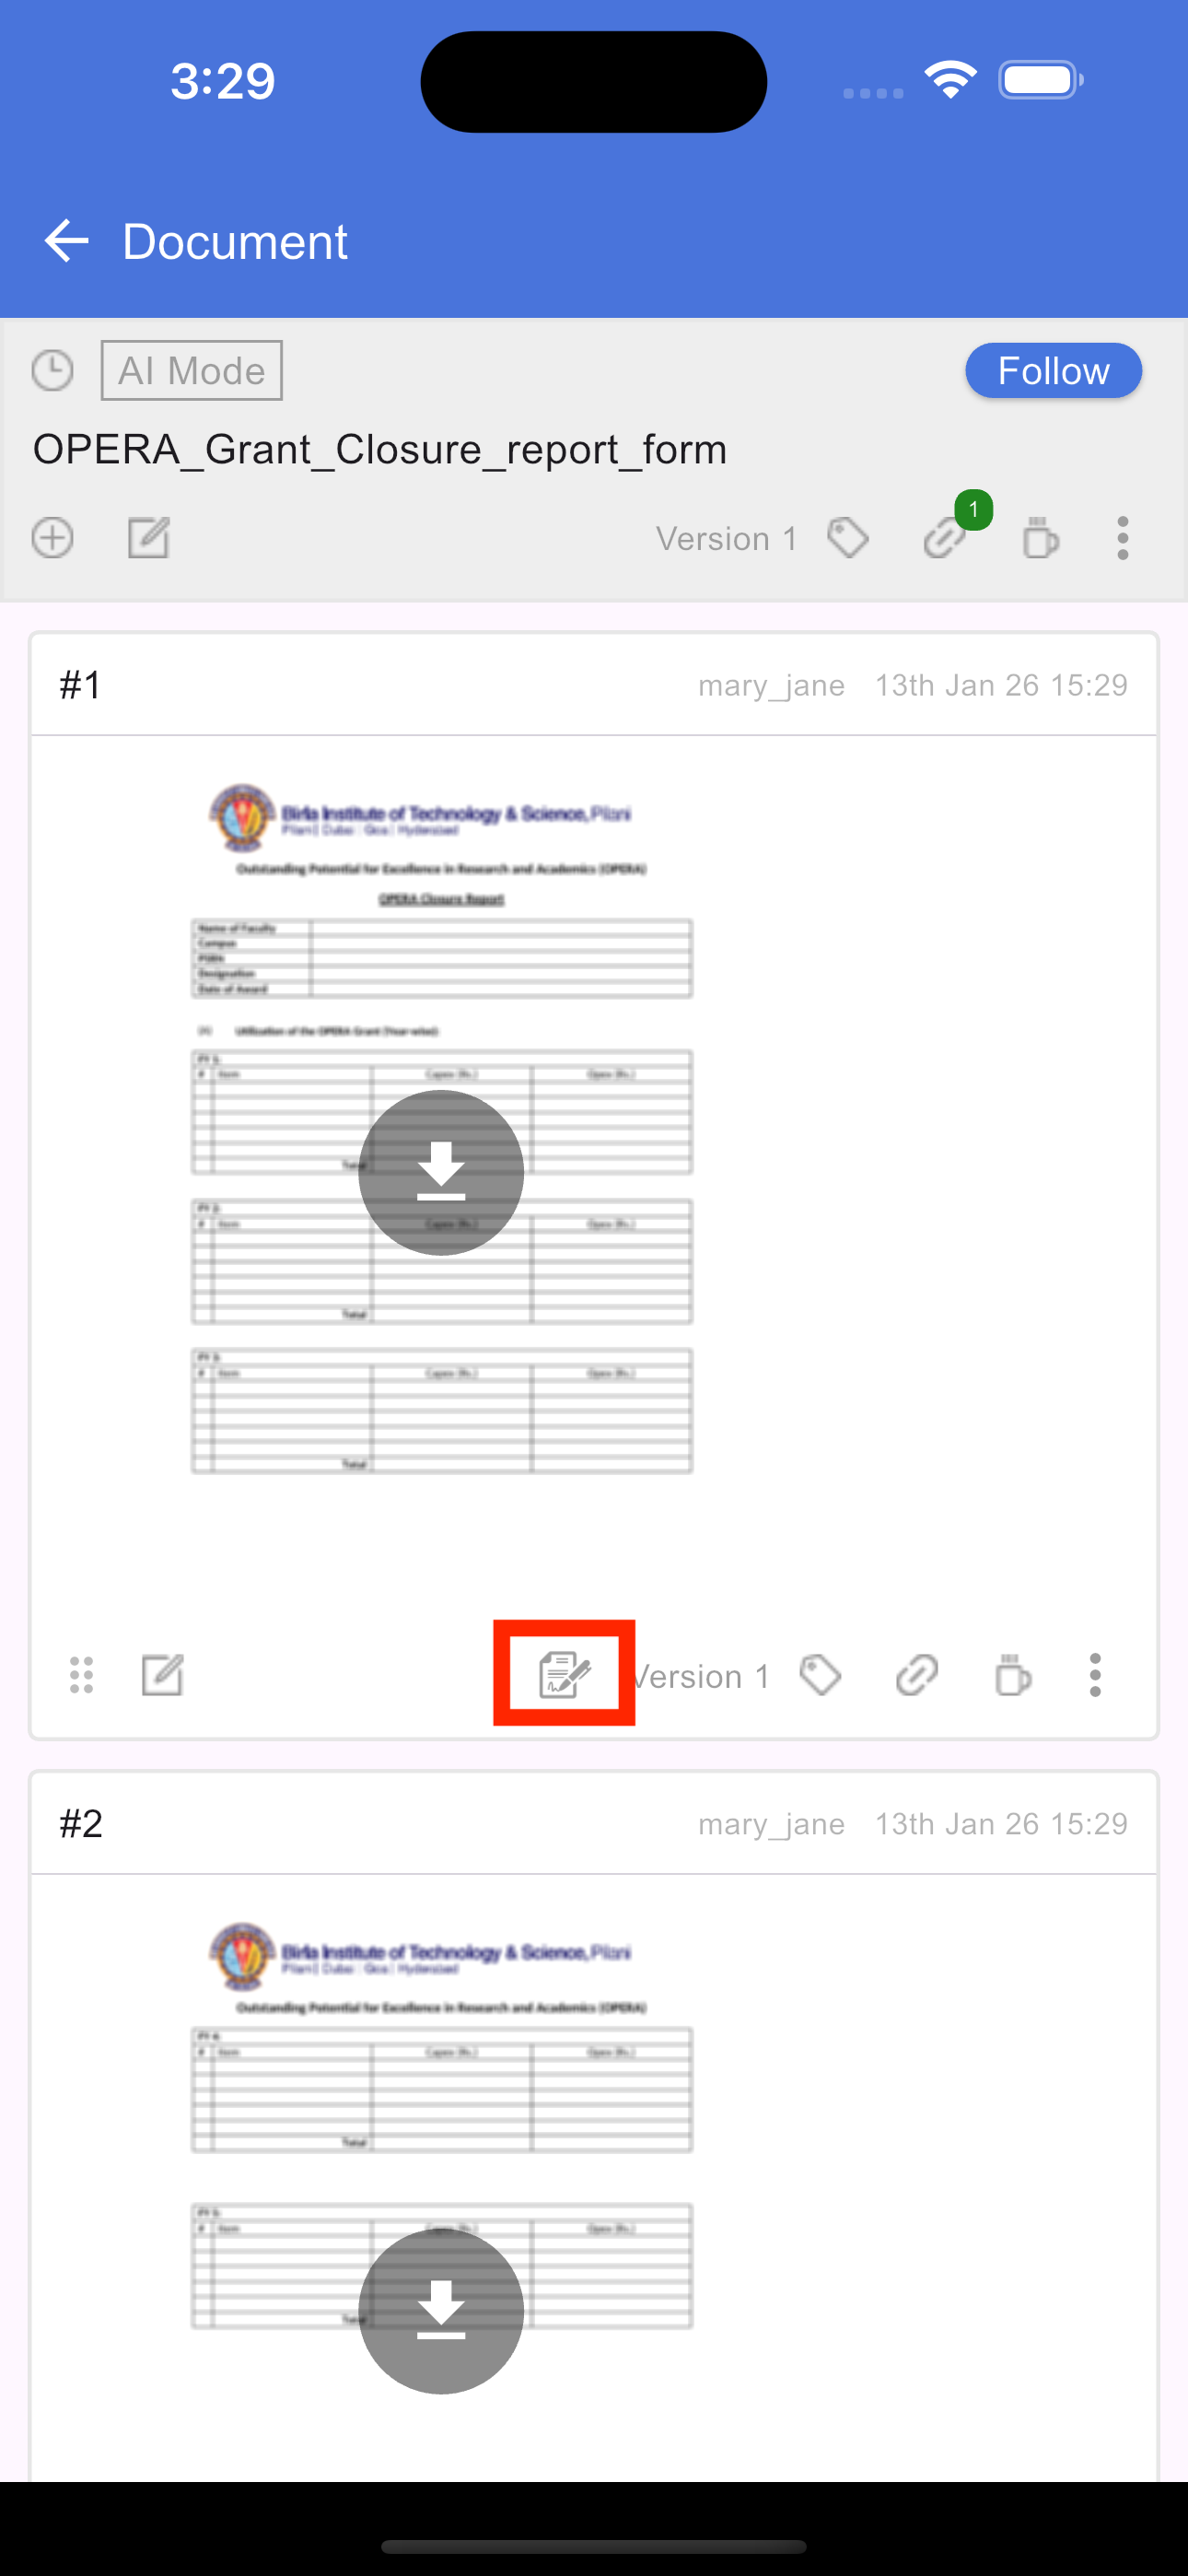
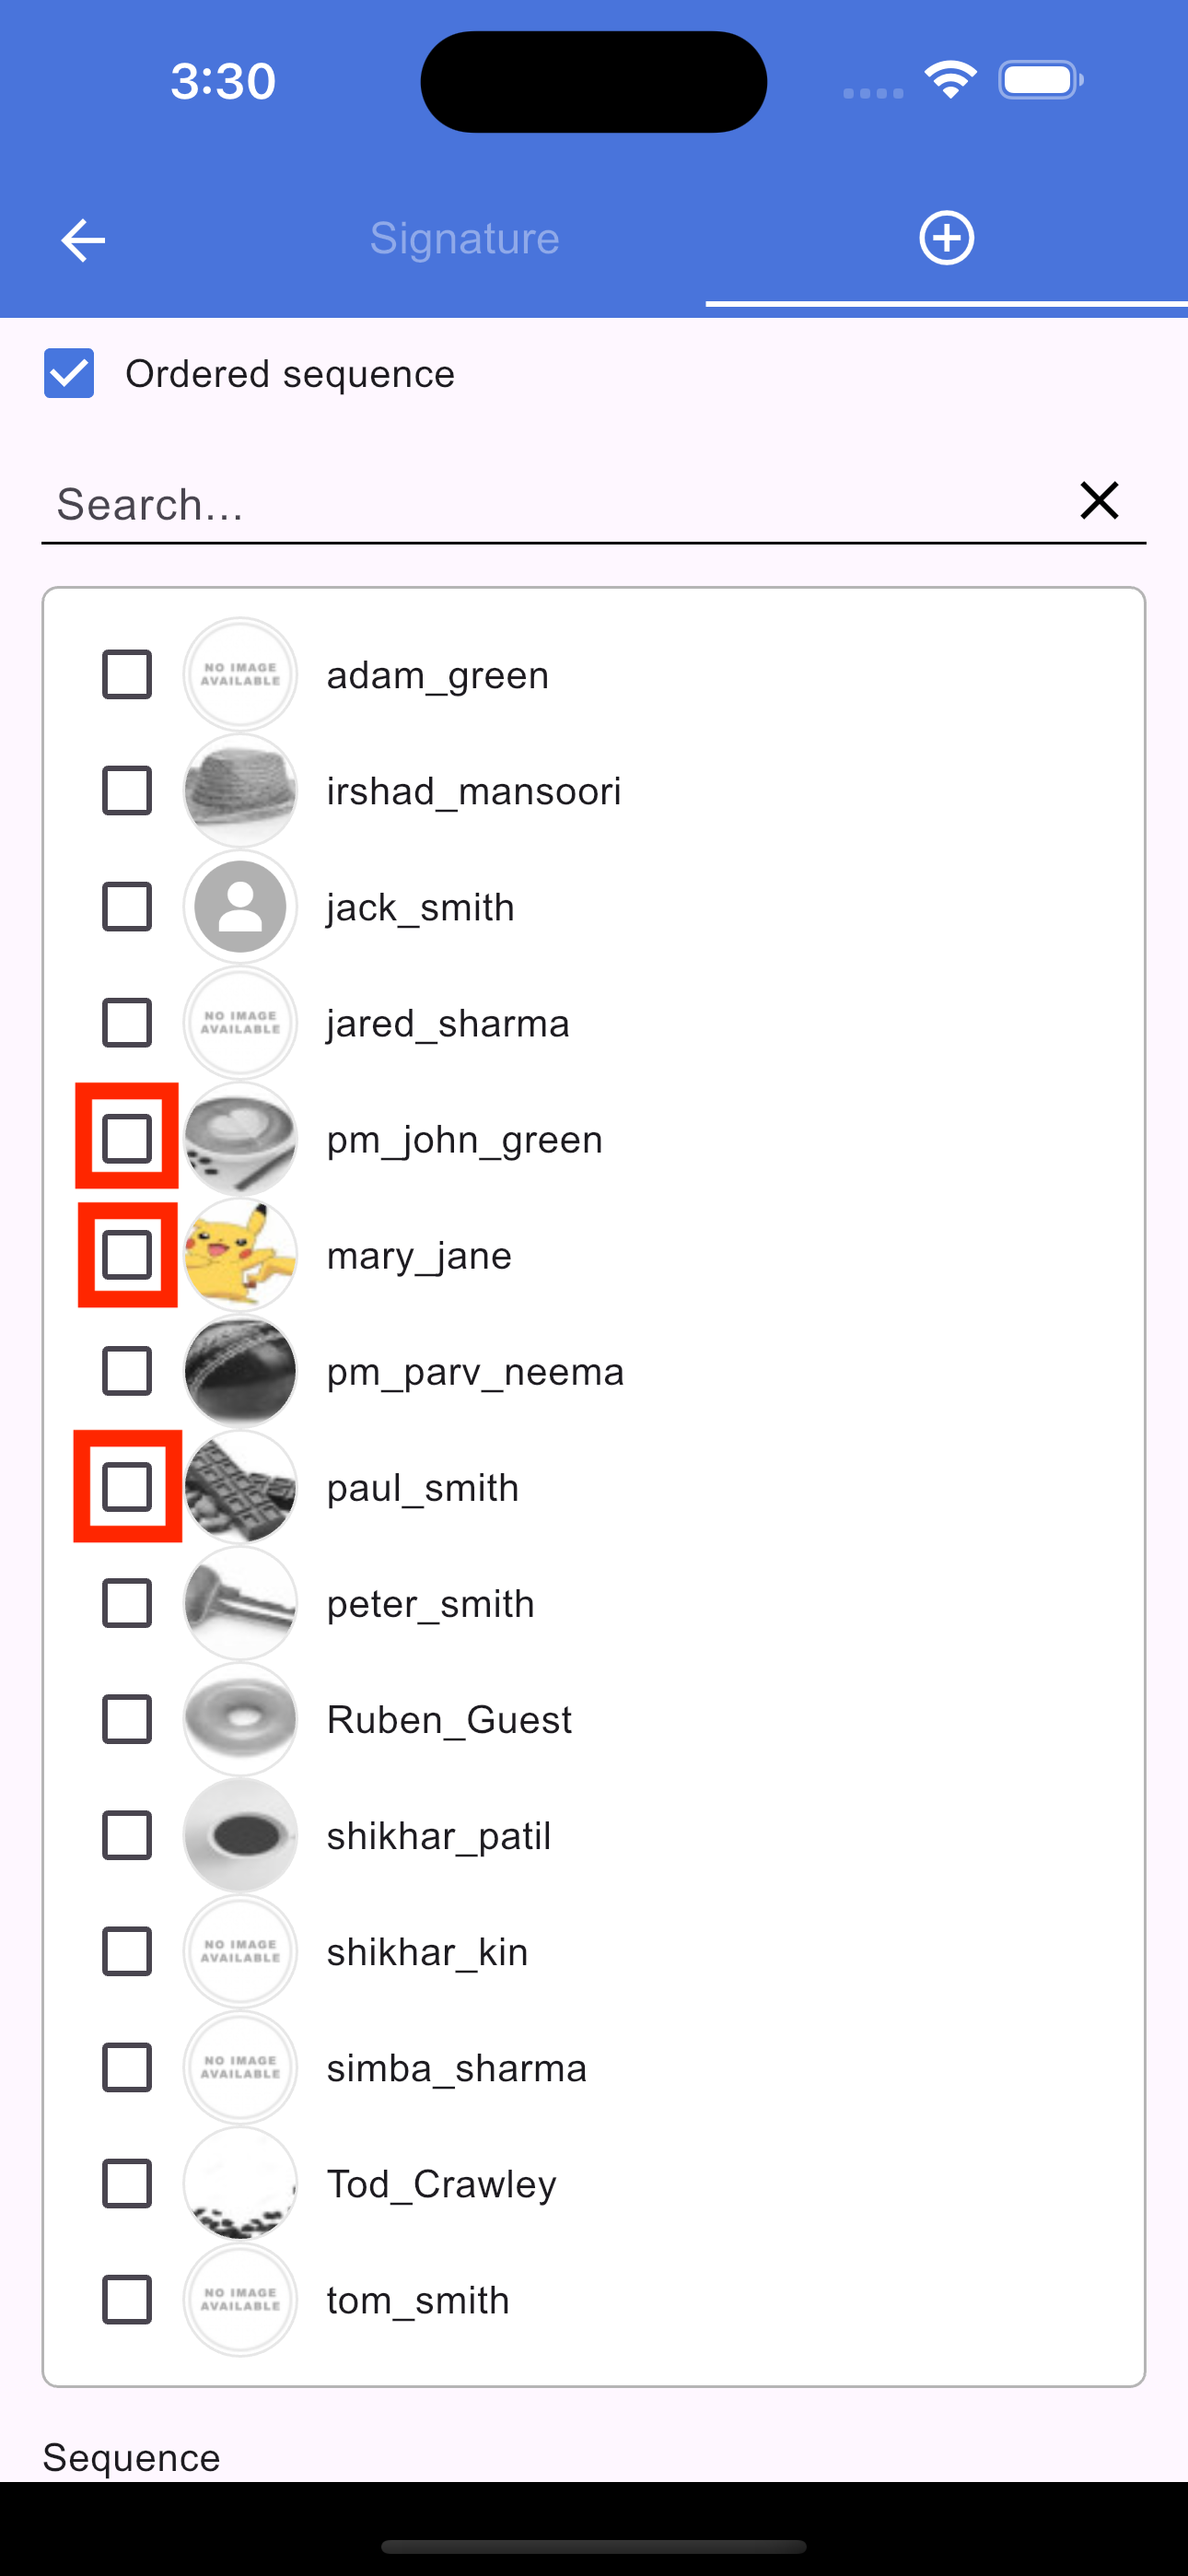
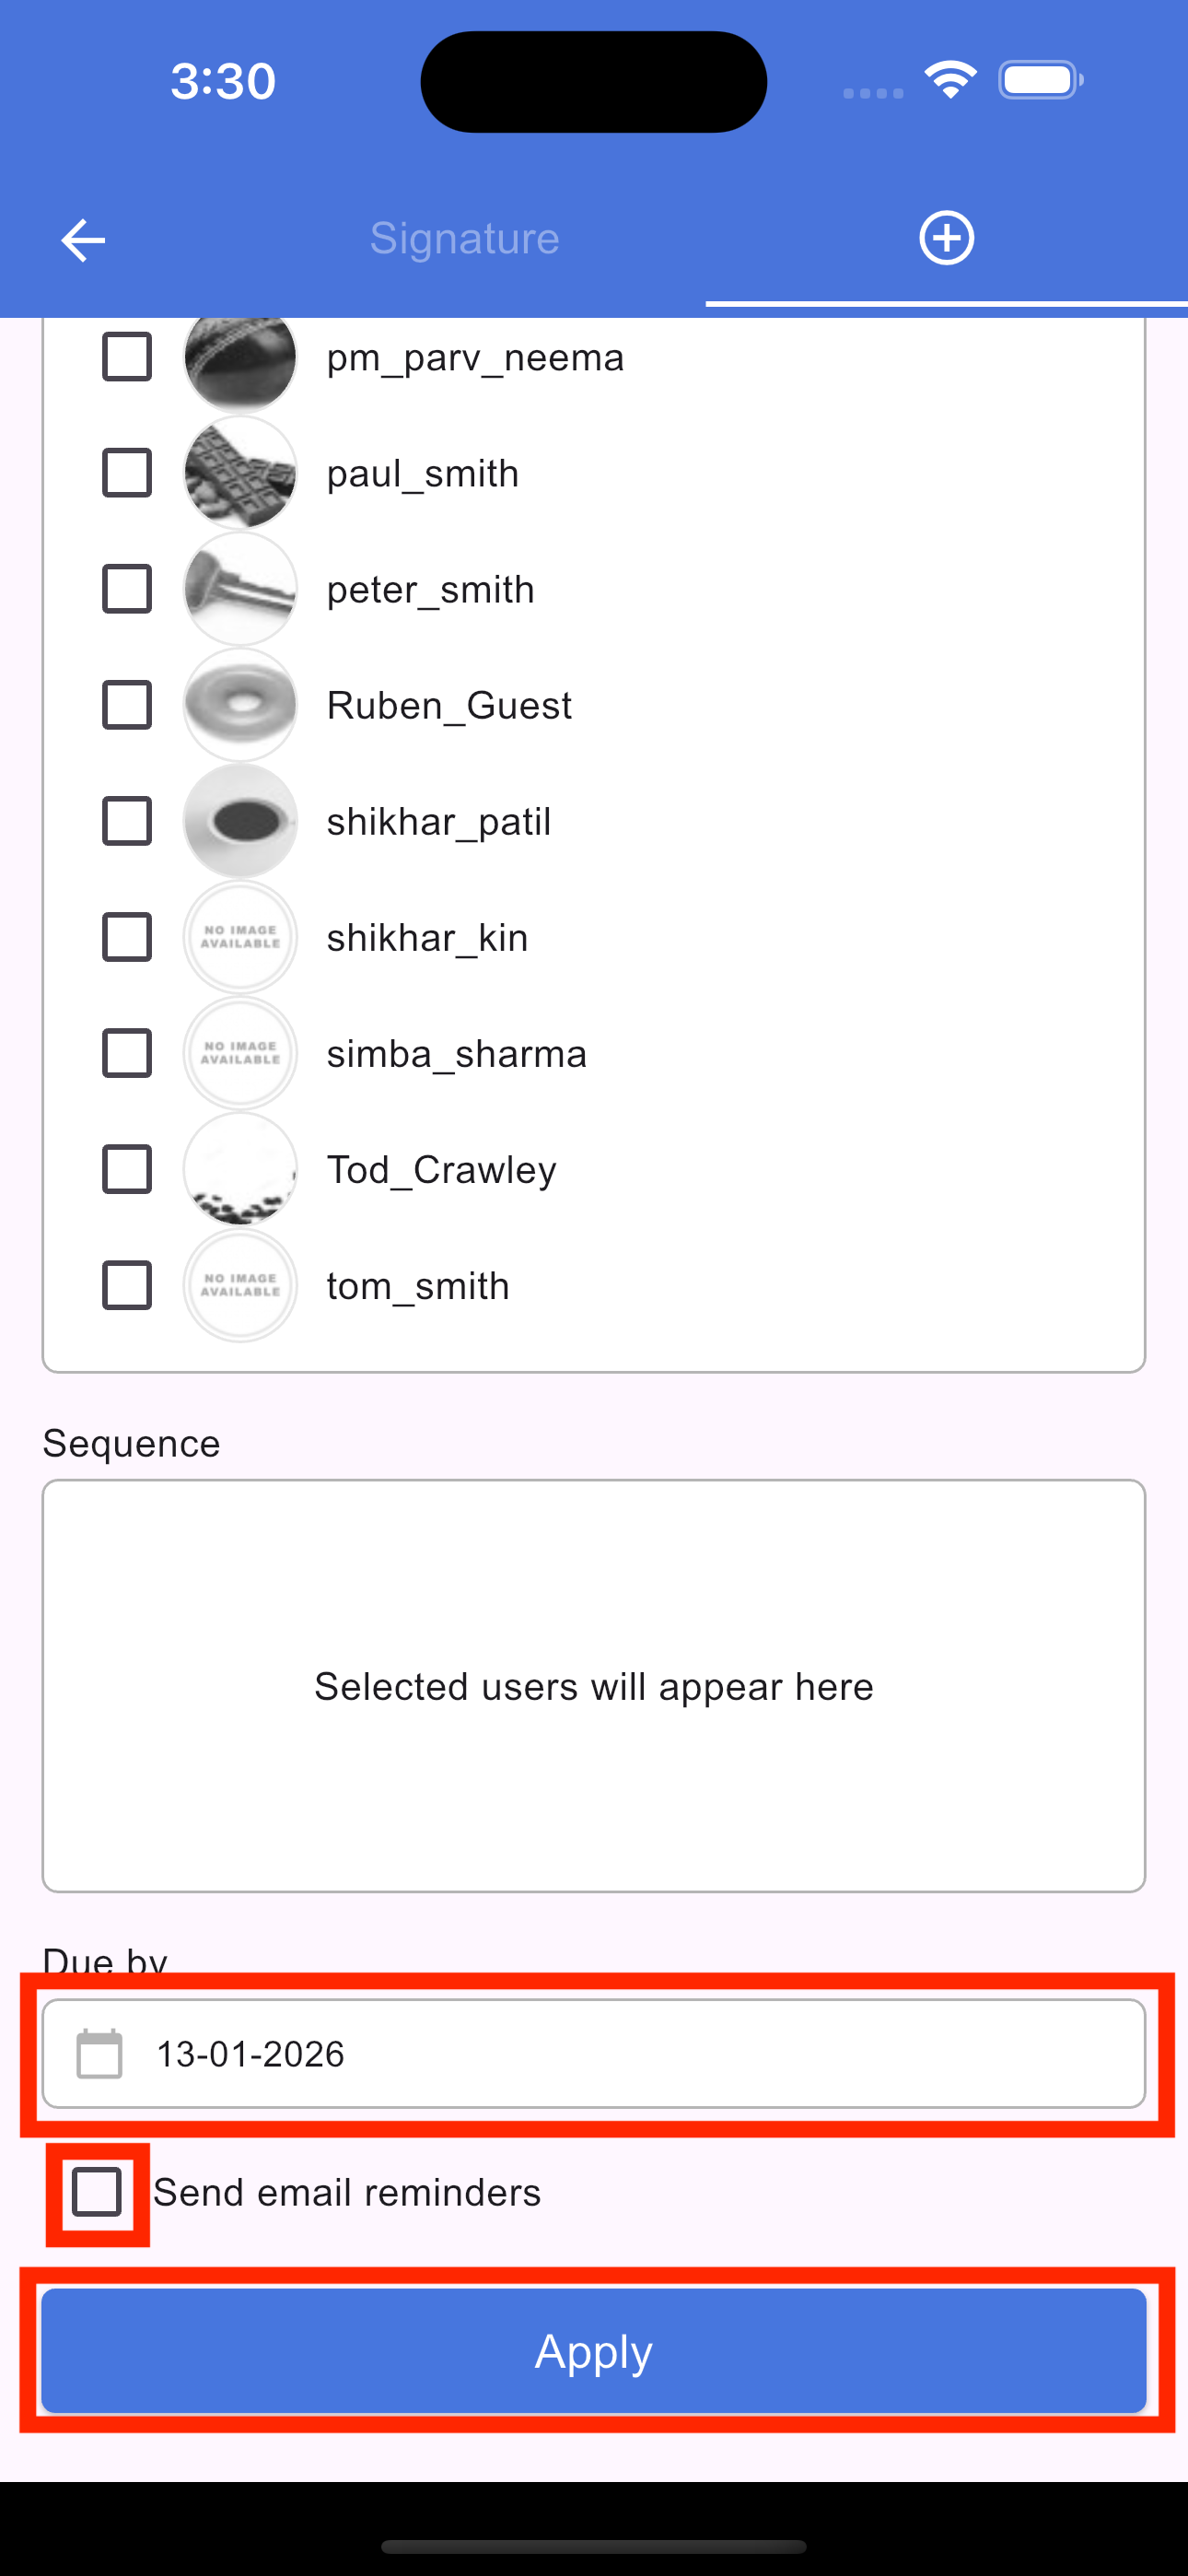
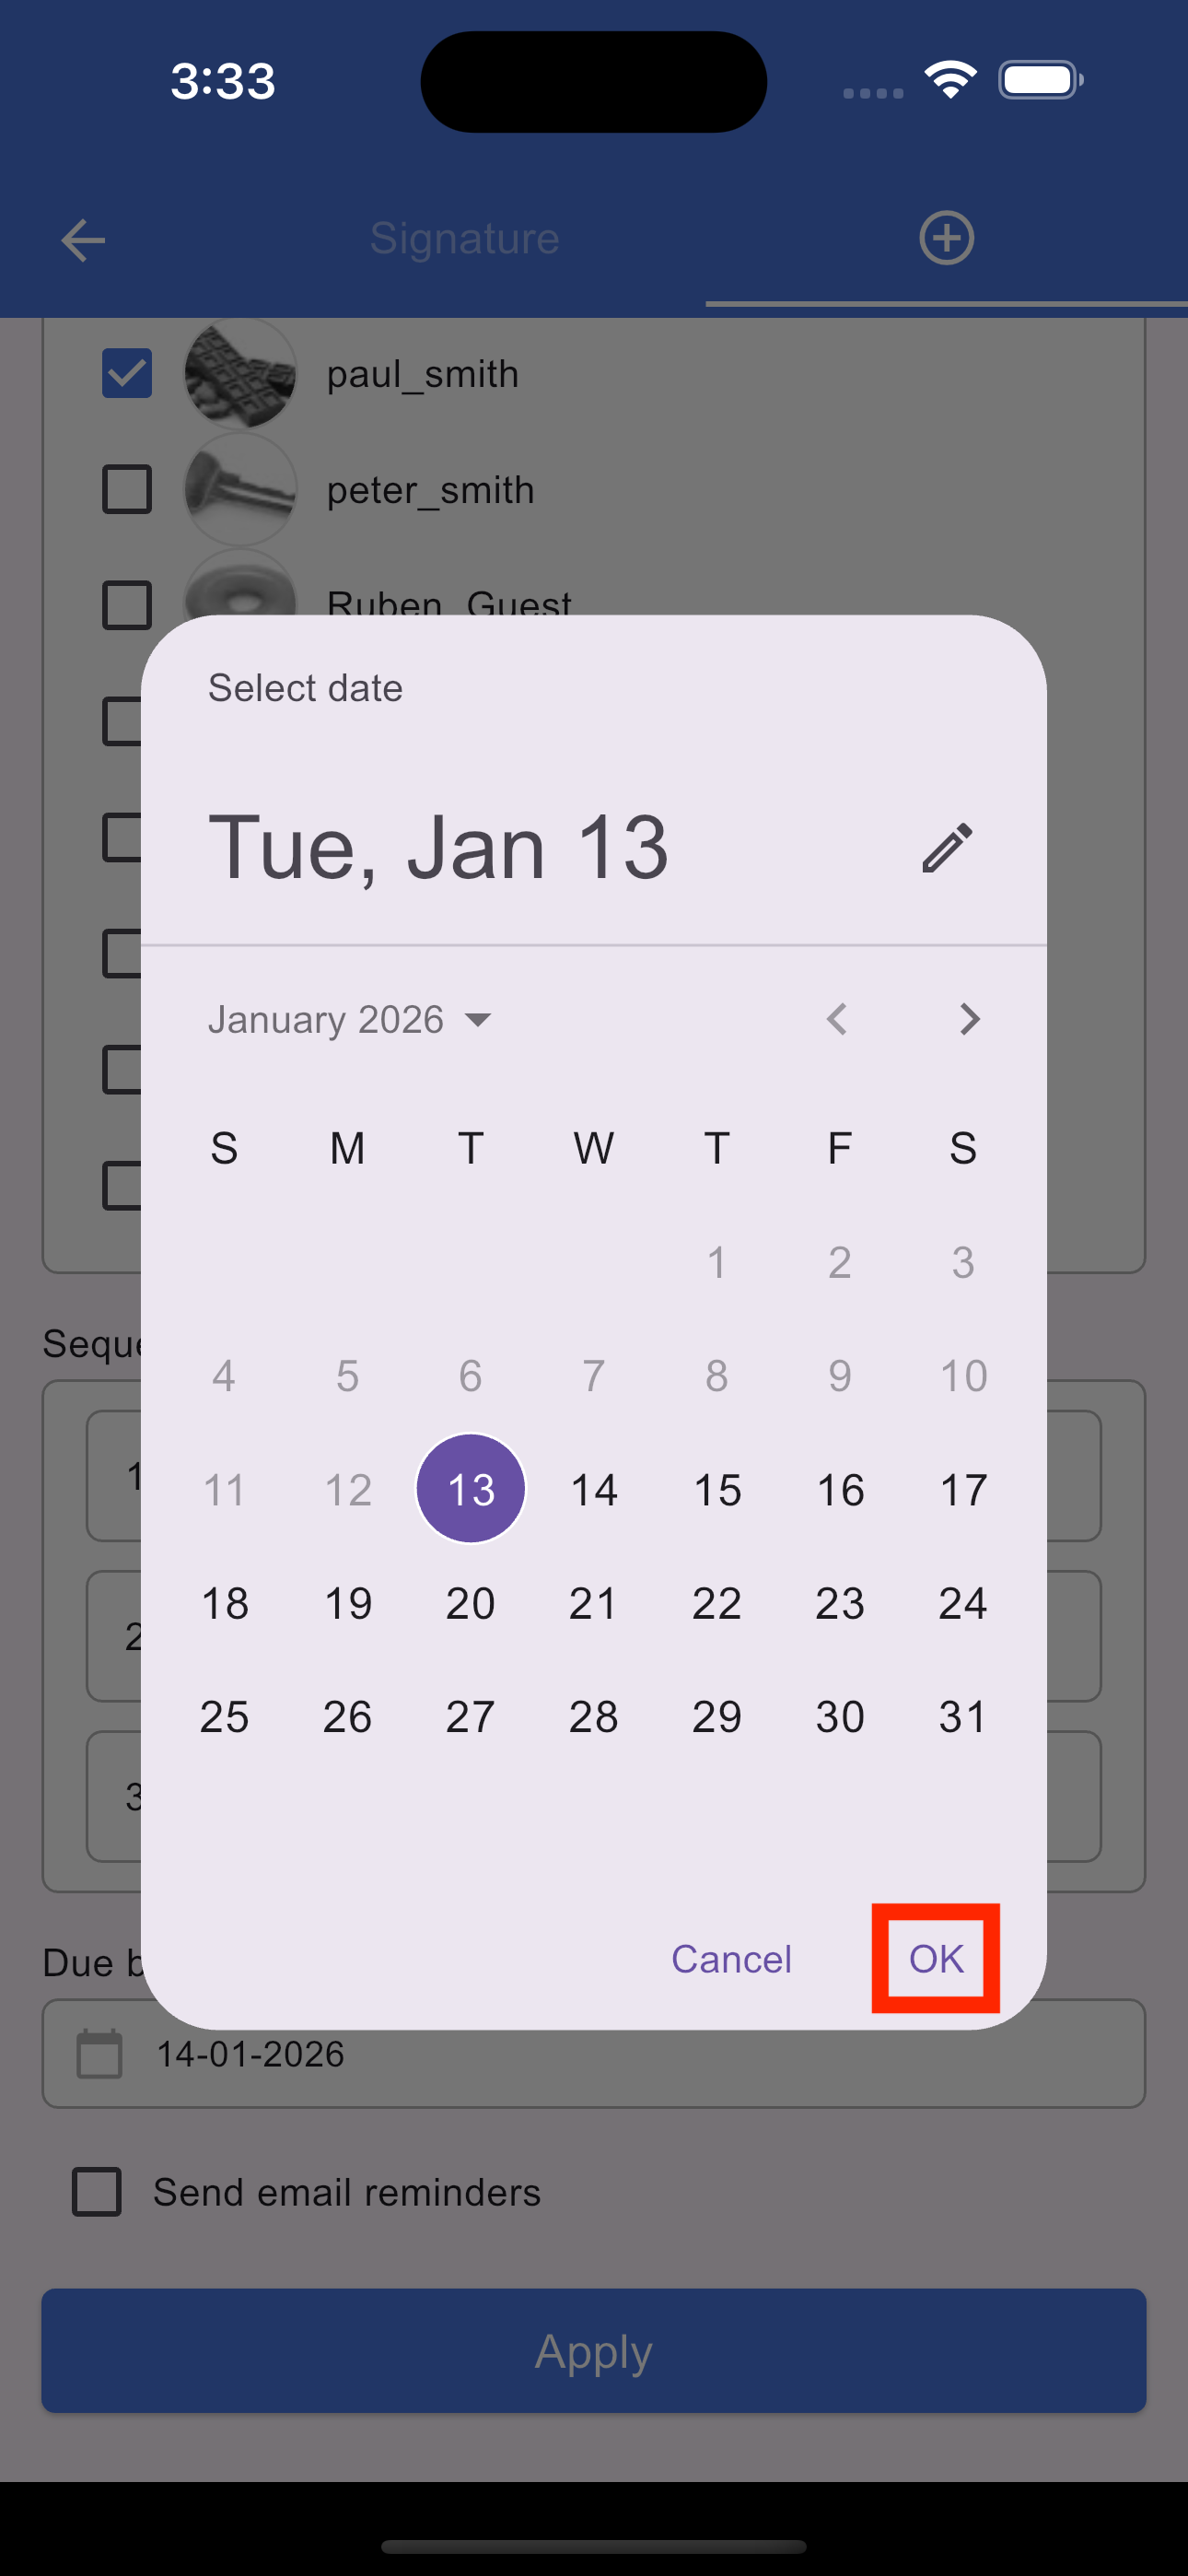
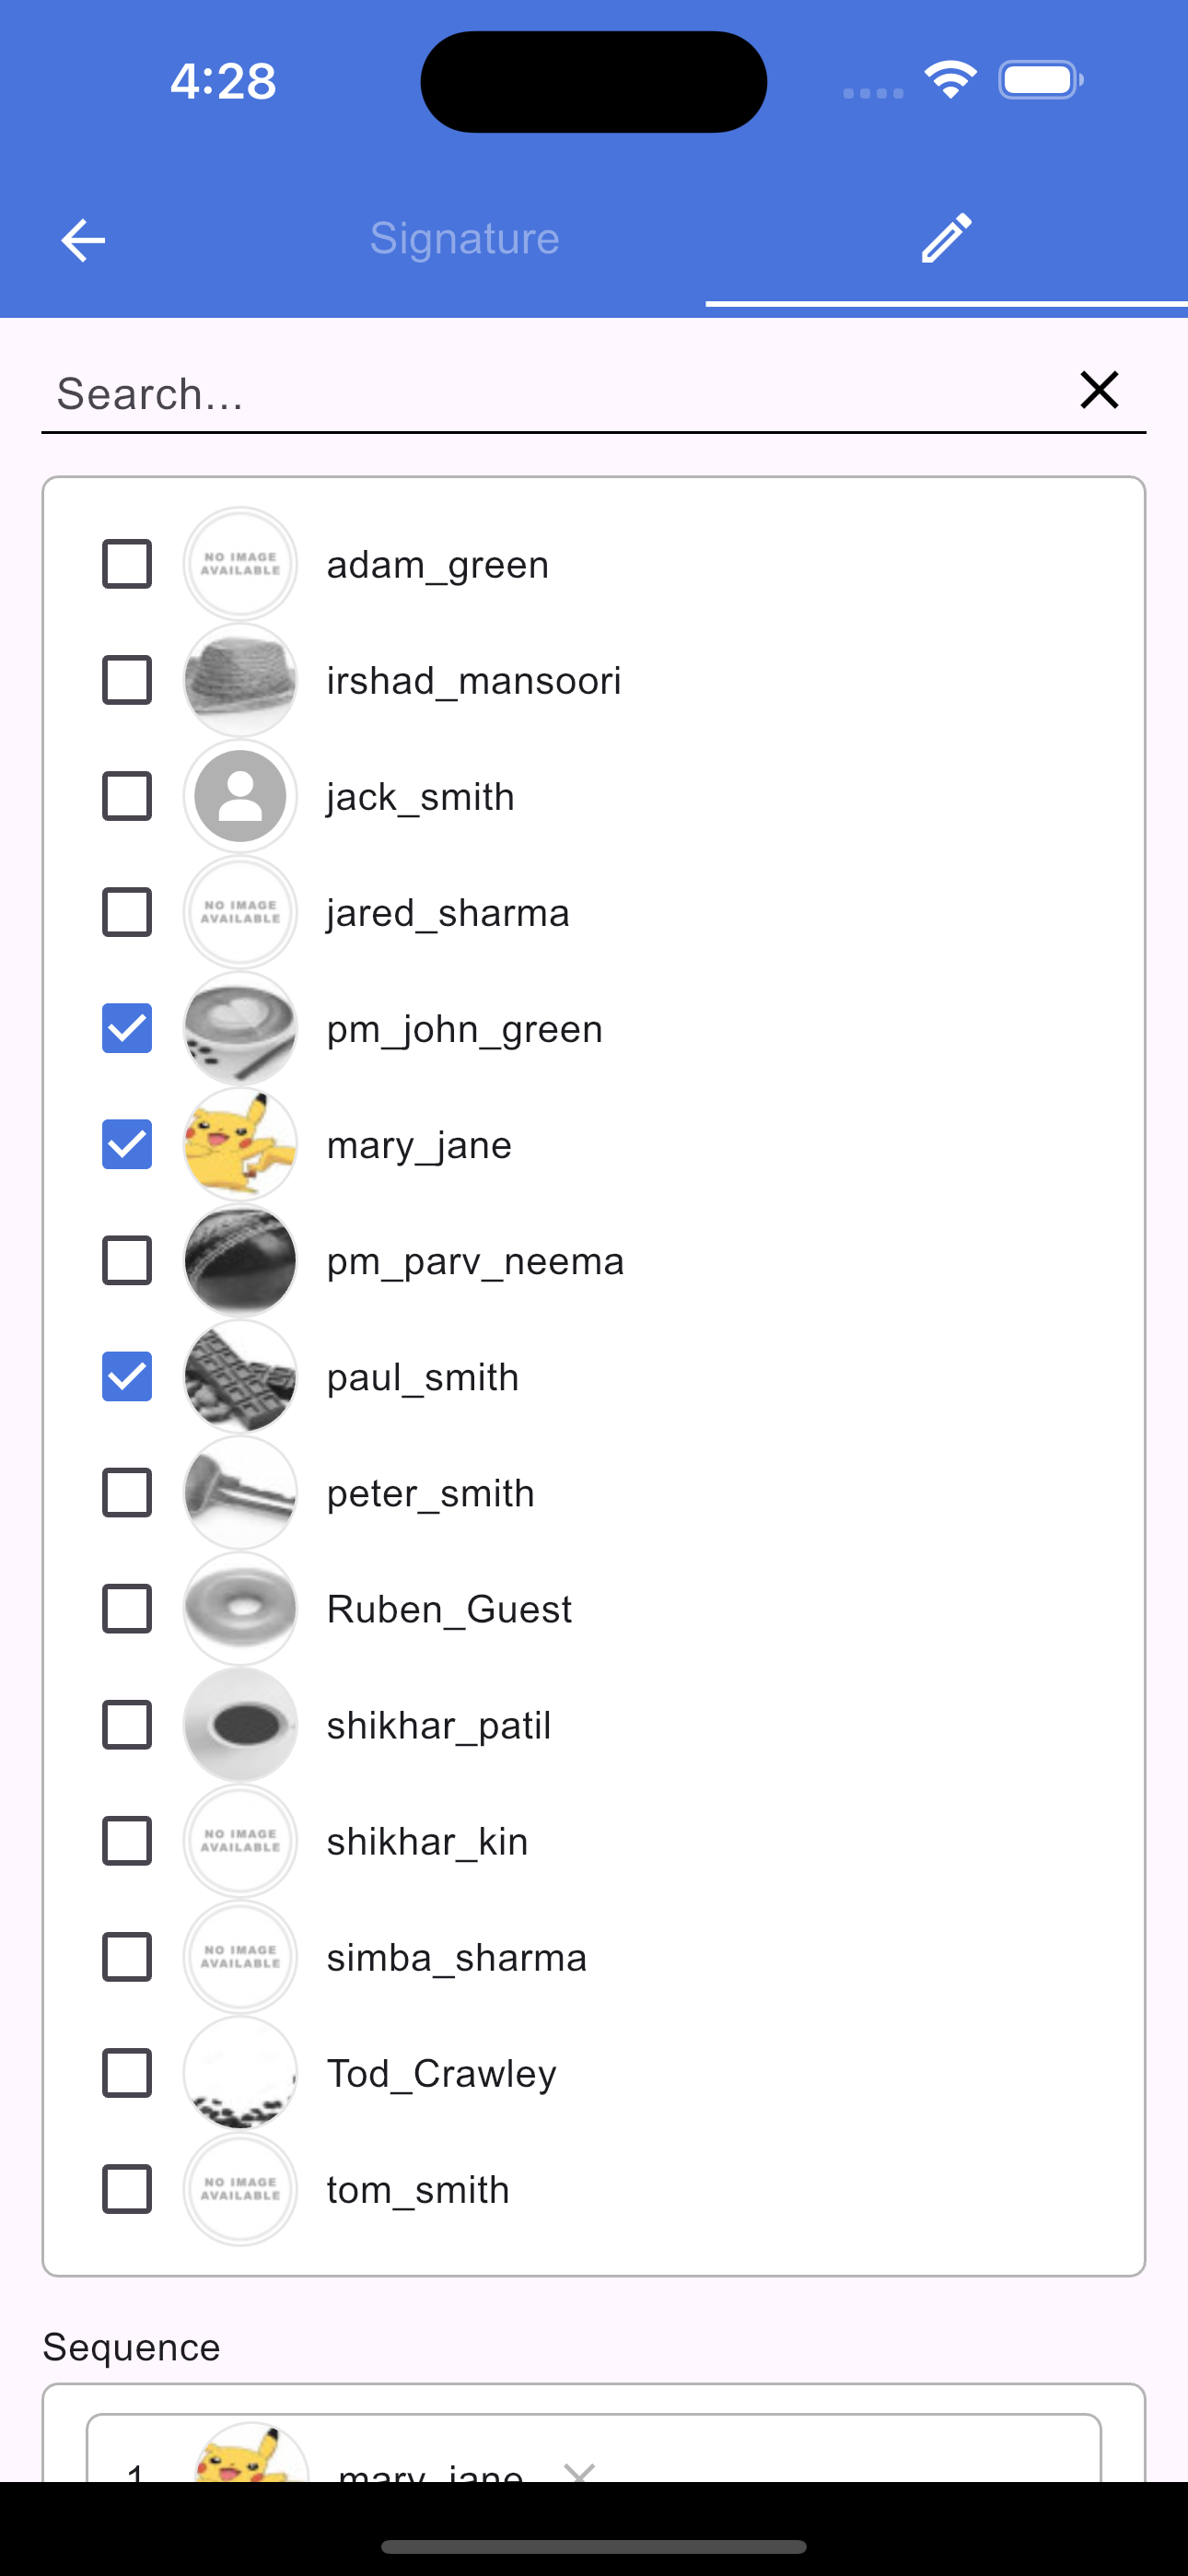
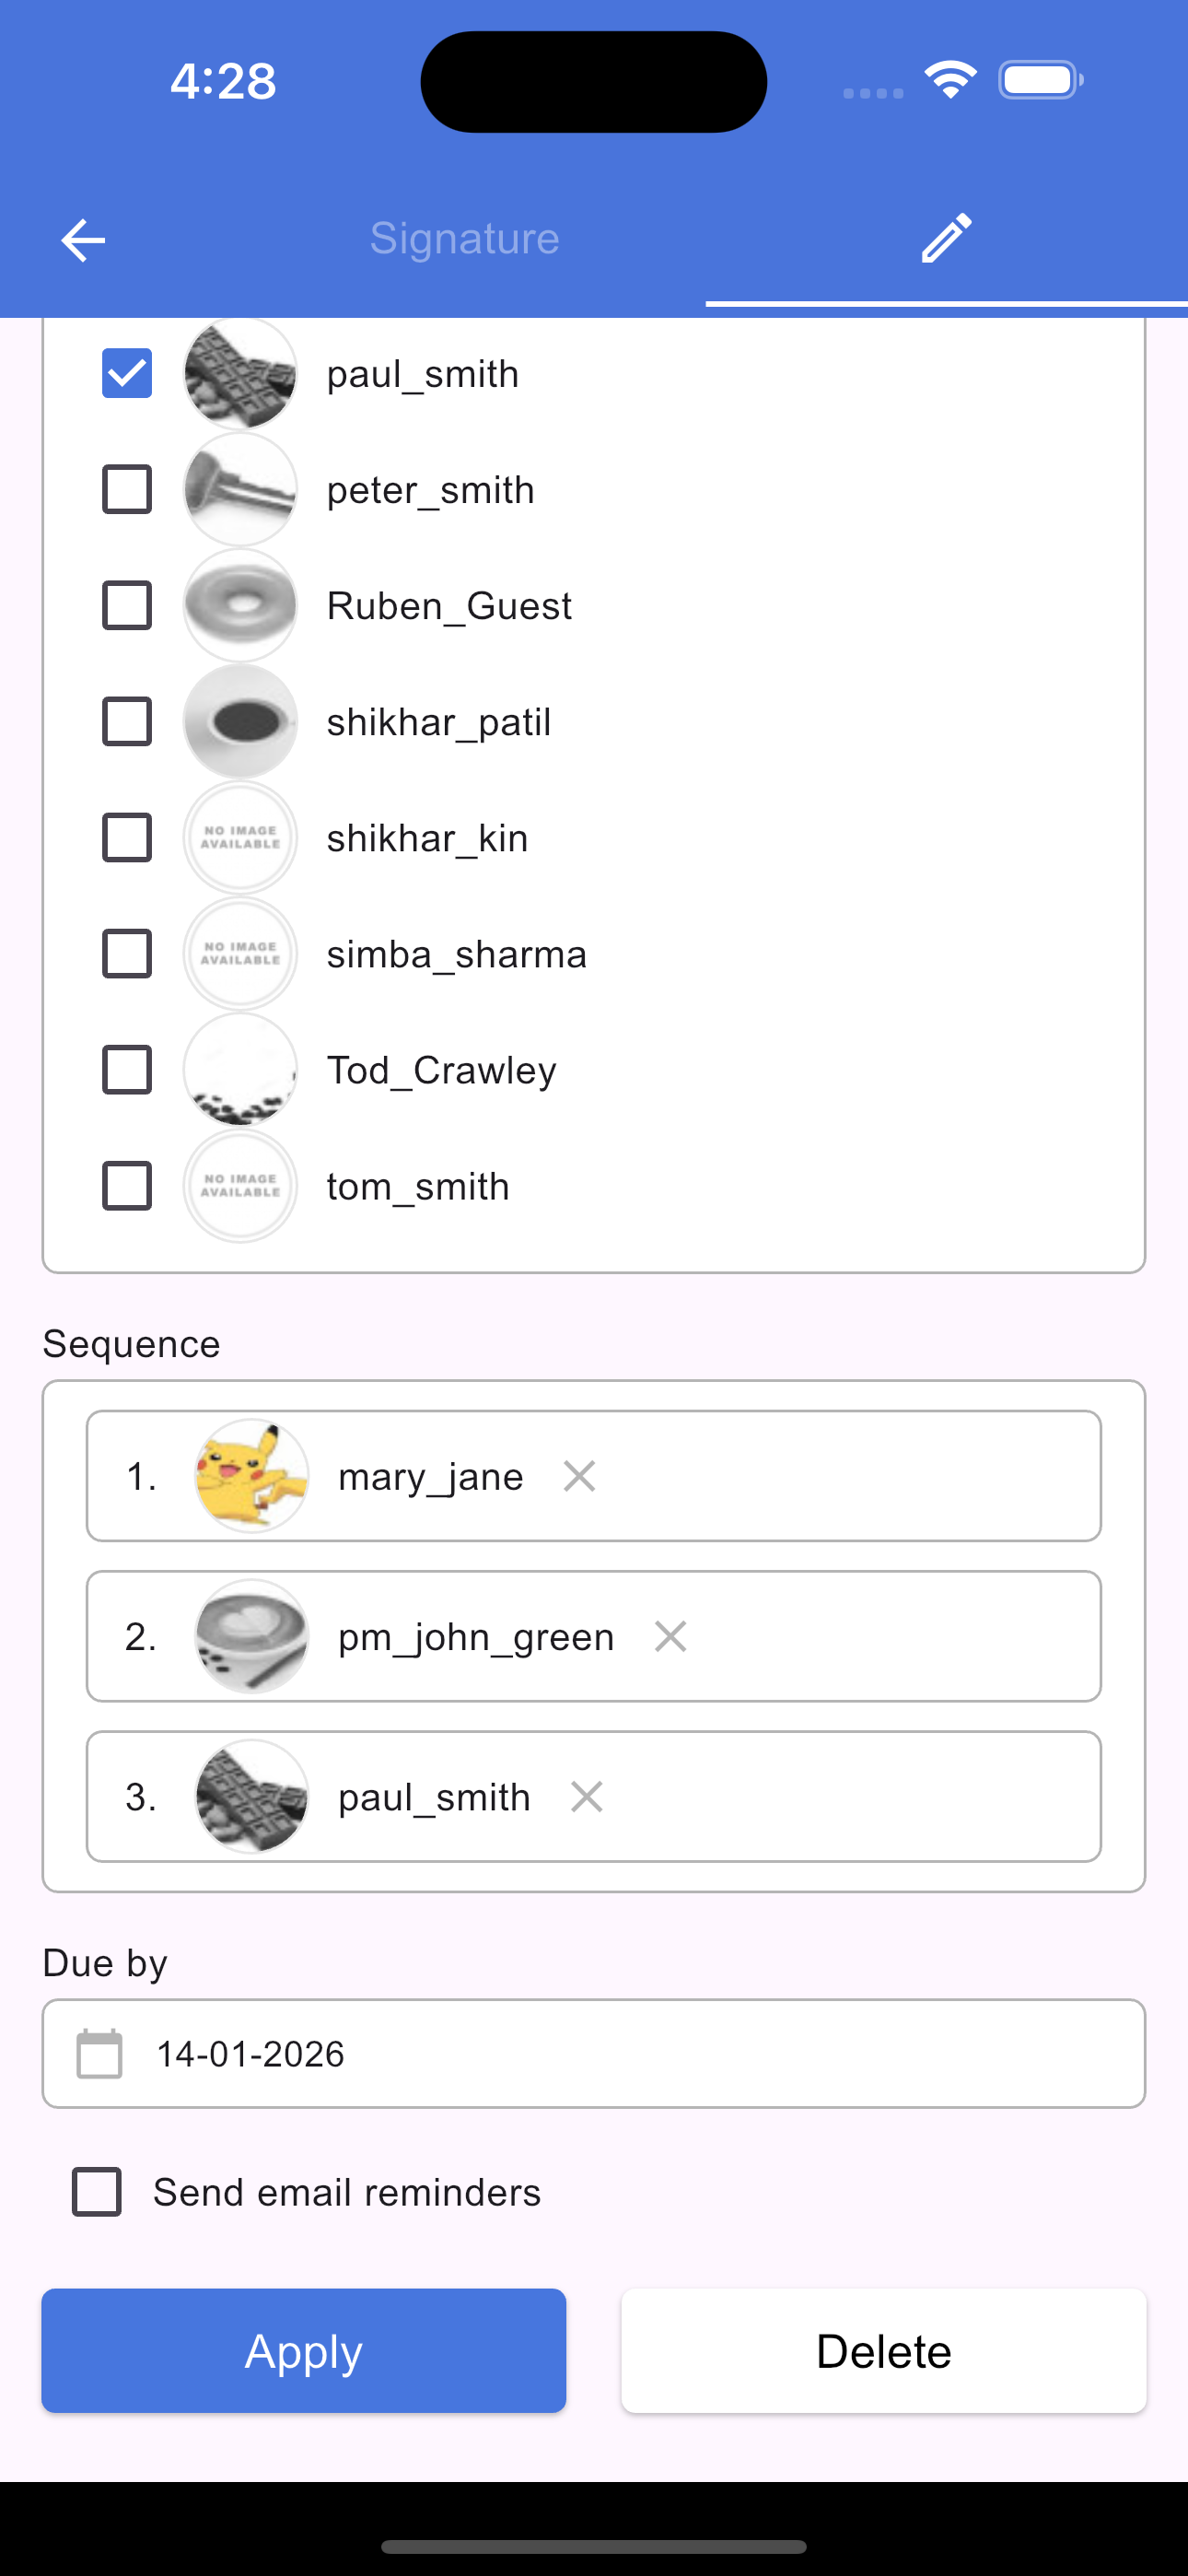
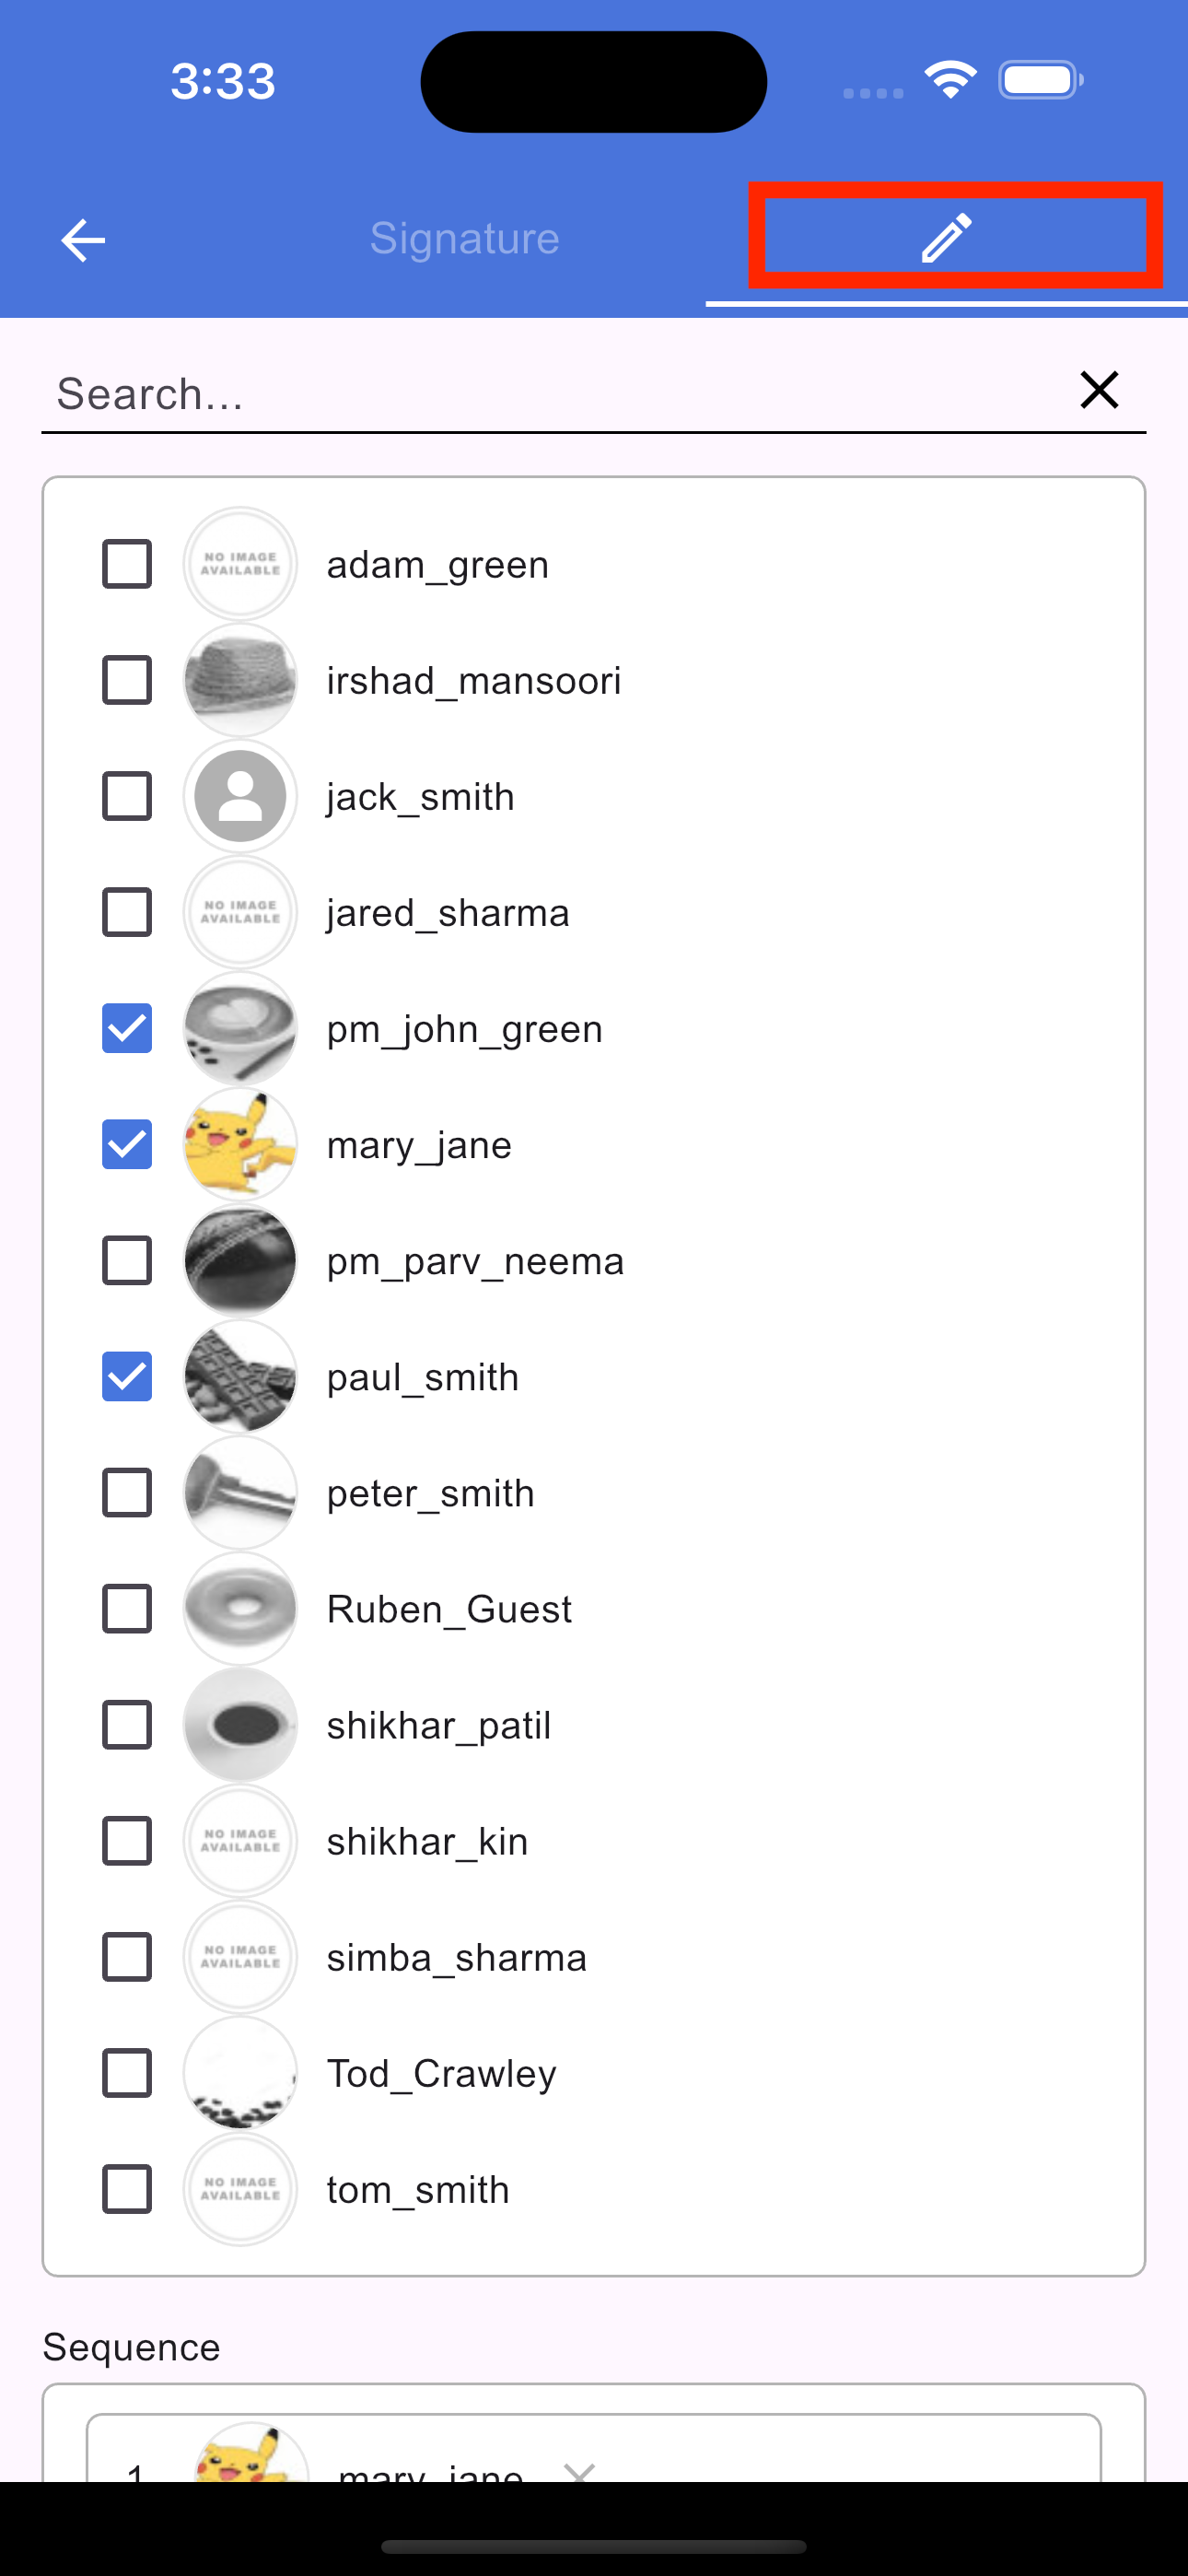
To apply a signature request, tap the Signature icon in the section footer (located next to the Tag and Link icons). Please note that only the document originator can initiate a request. On the screen that opens, you can add signers, arrange them in your preferred sequence, and set a due date. Tap Apply to finalize the request and save it to the section.
Edit signature request
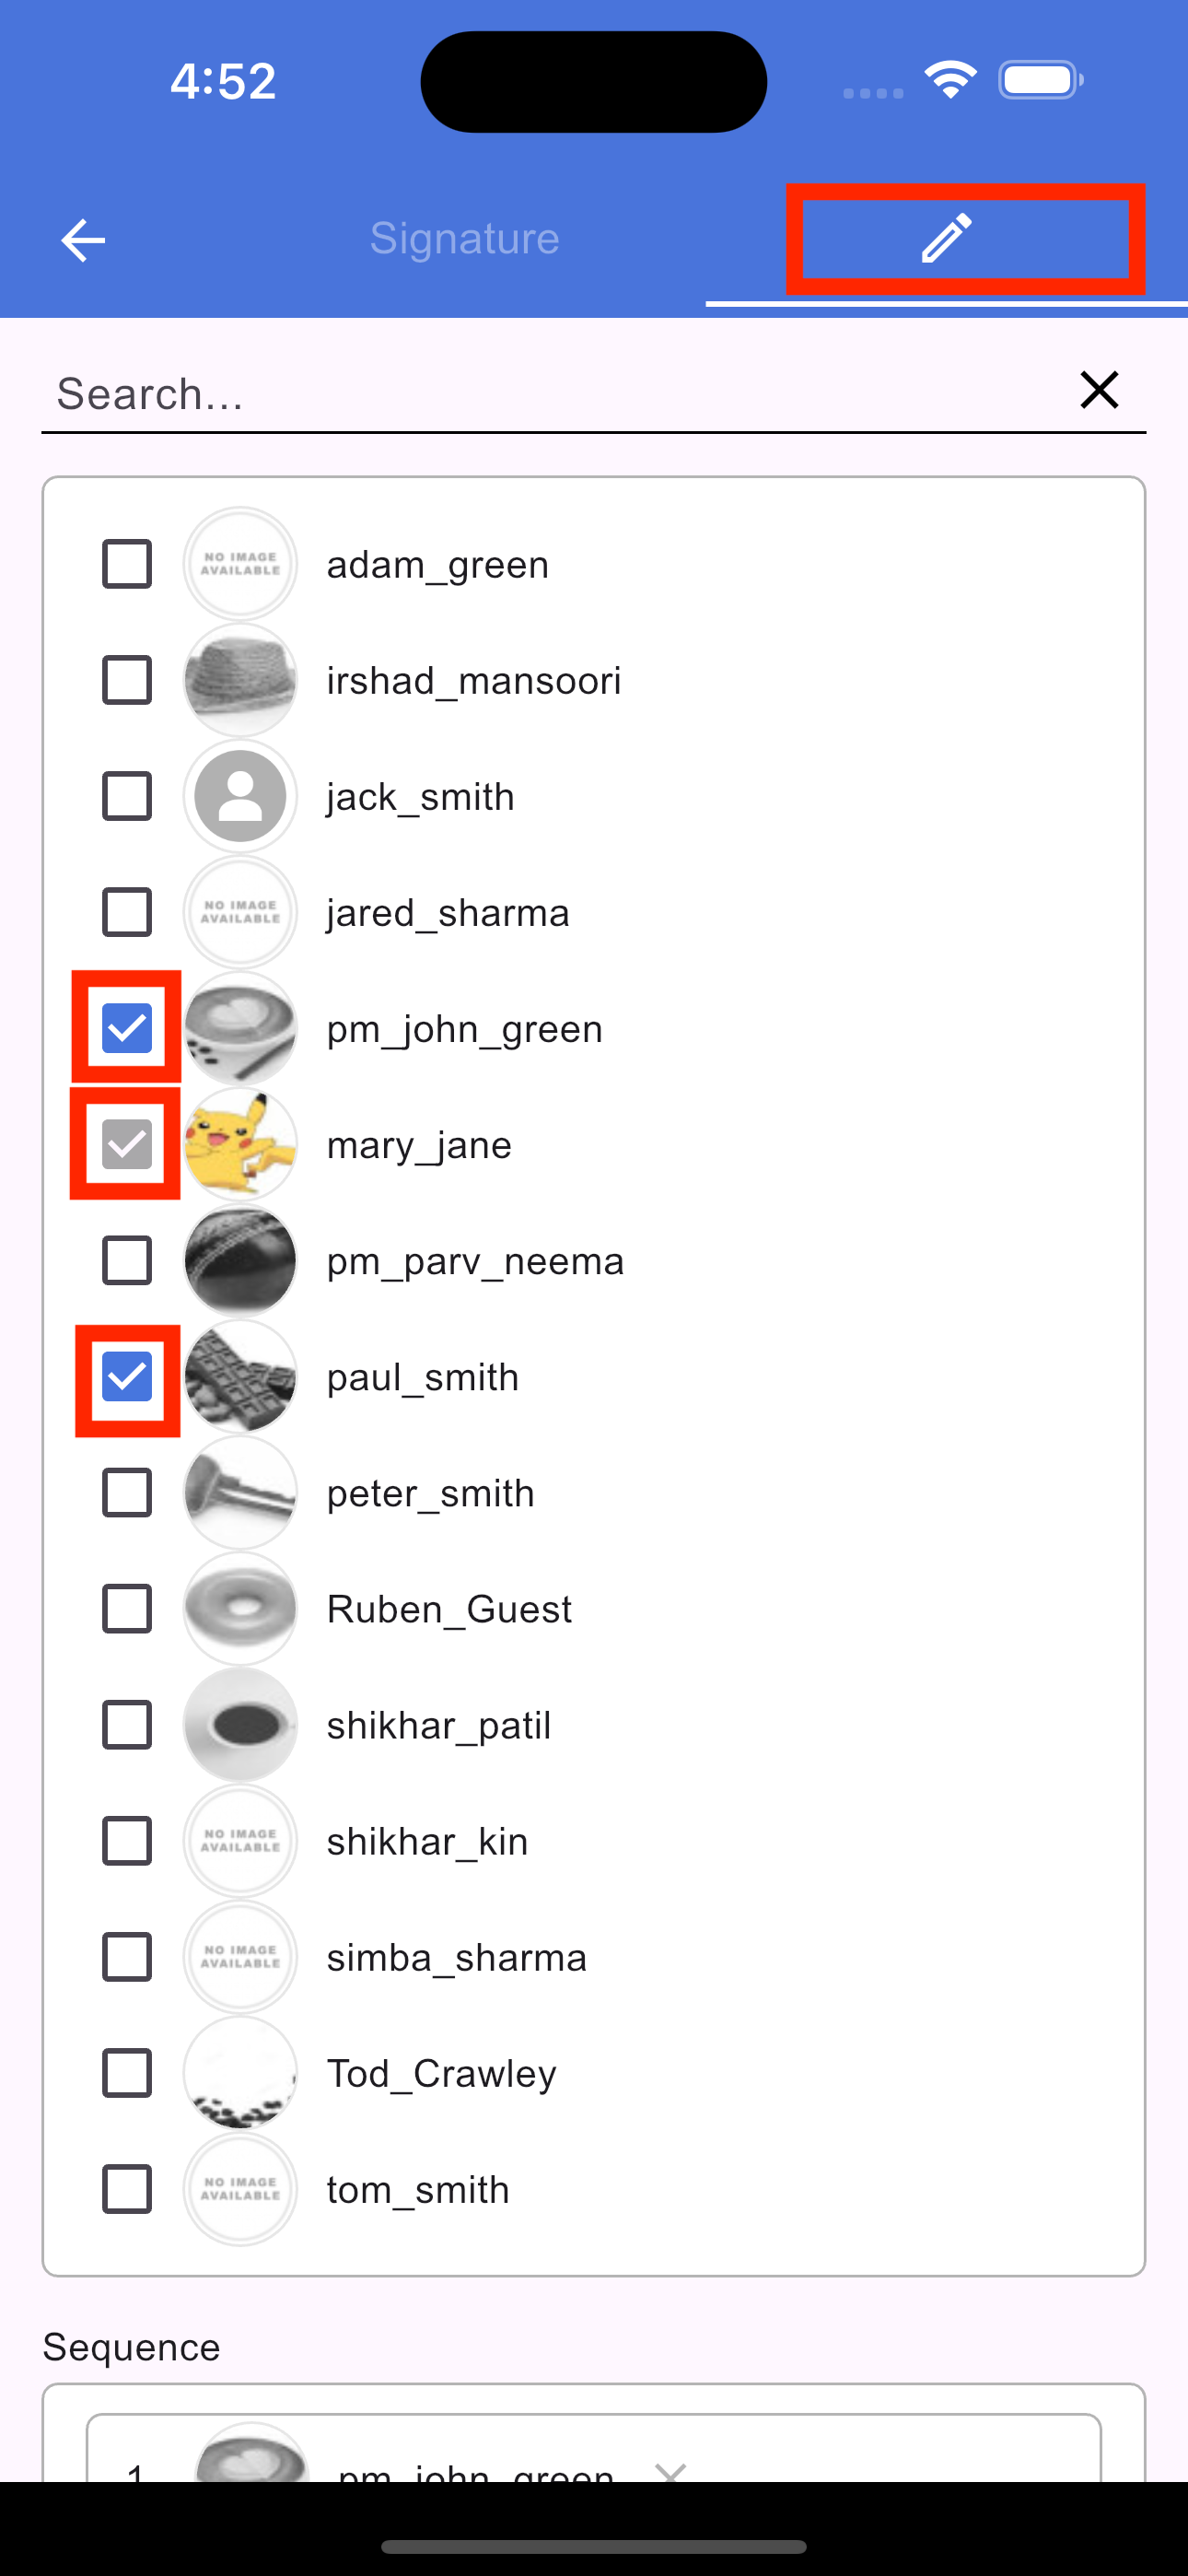
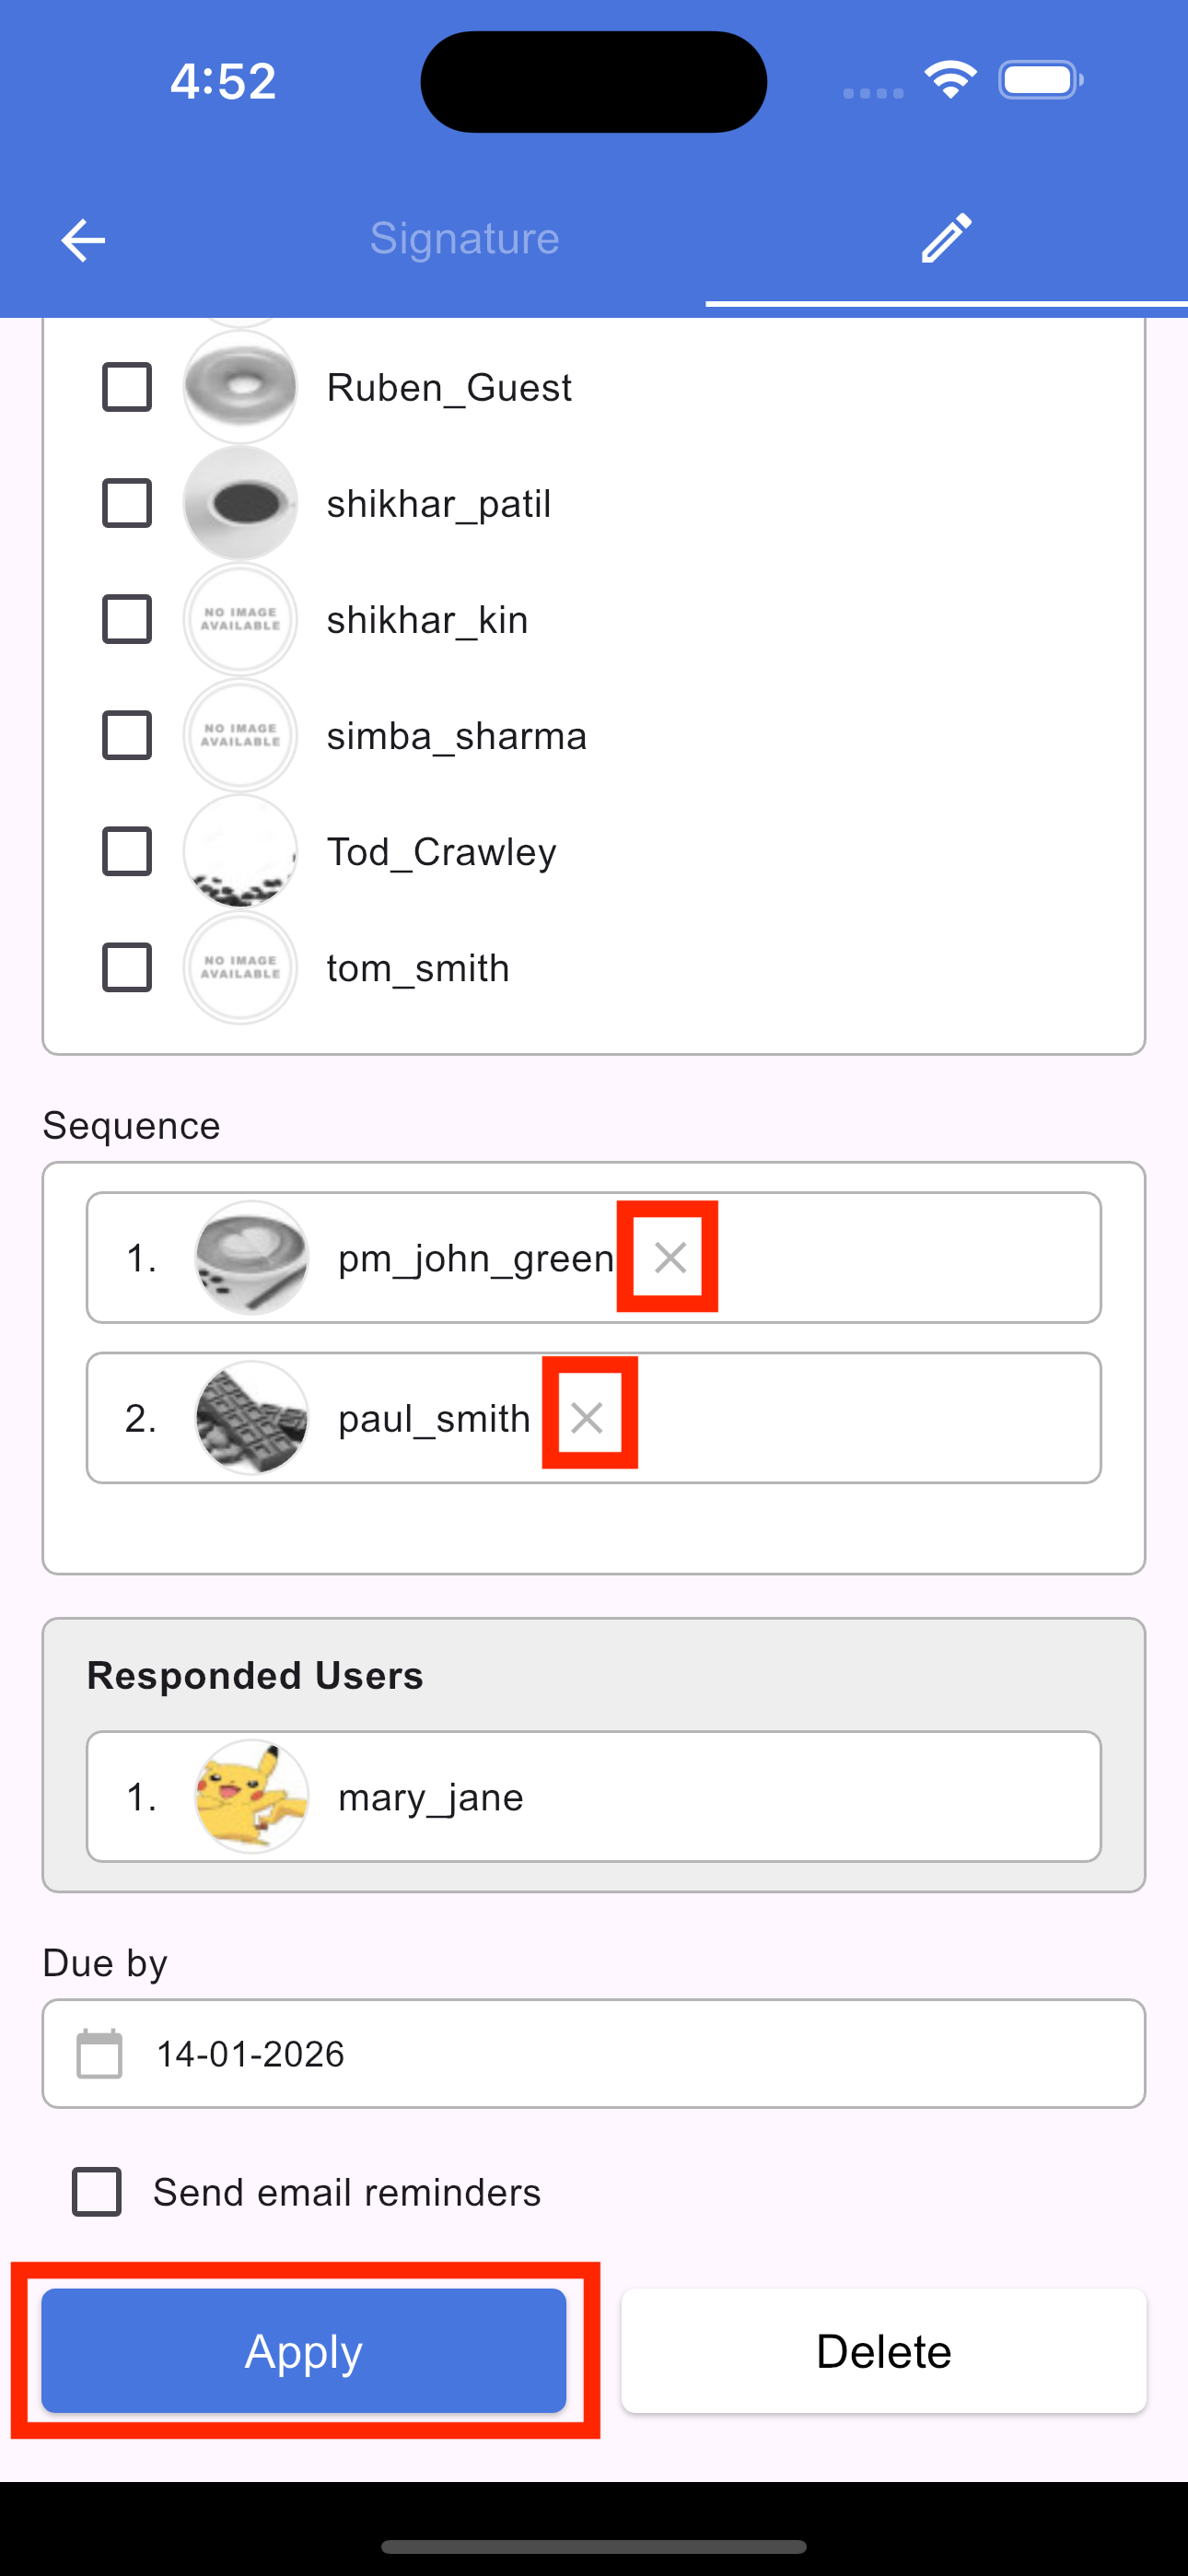
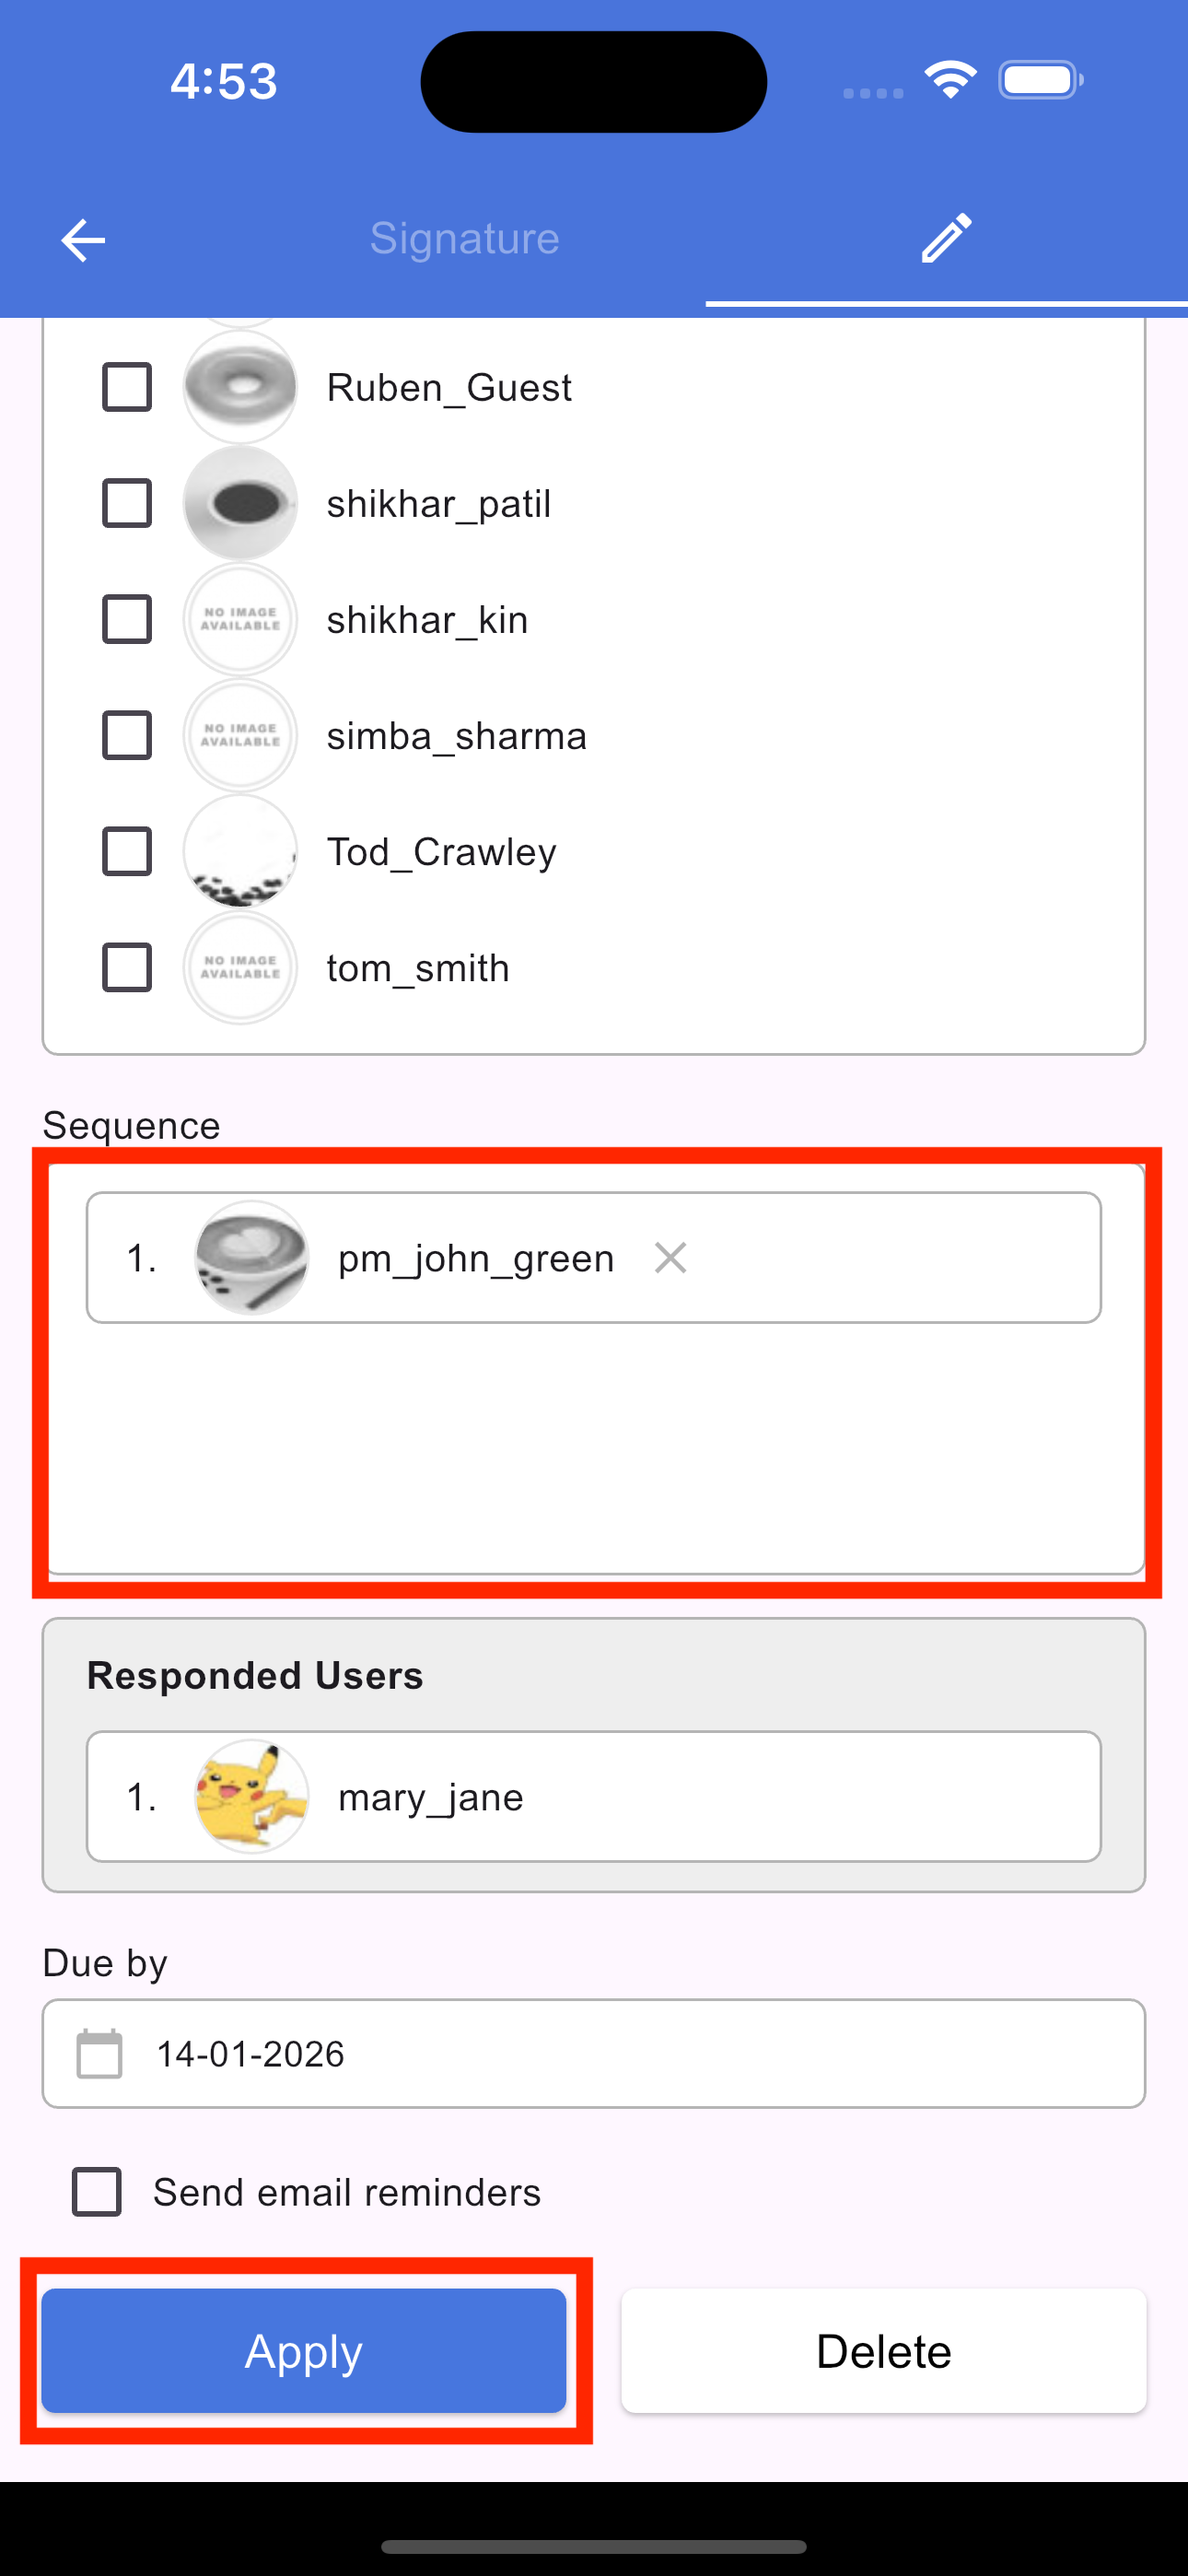
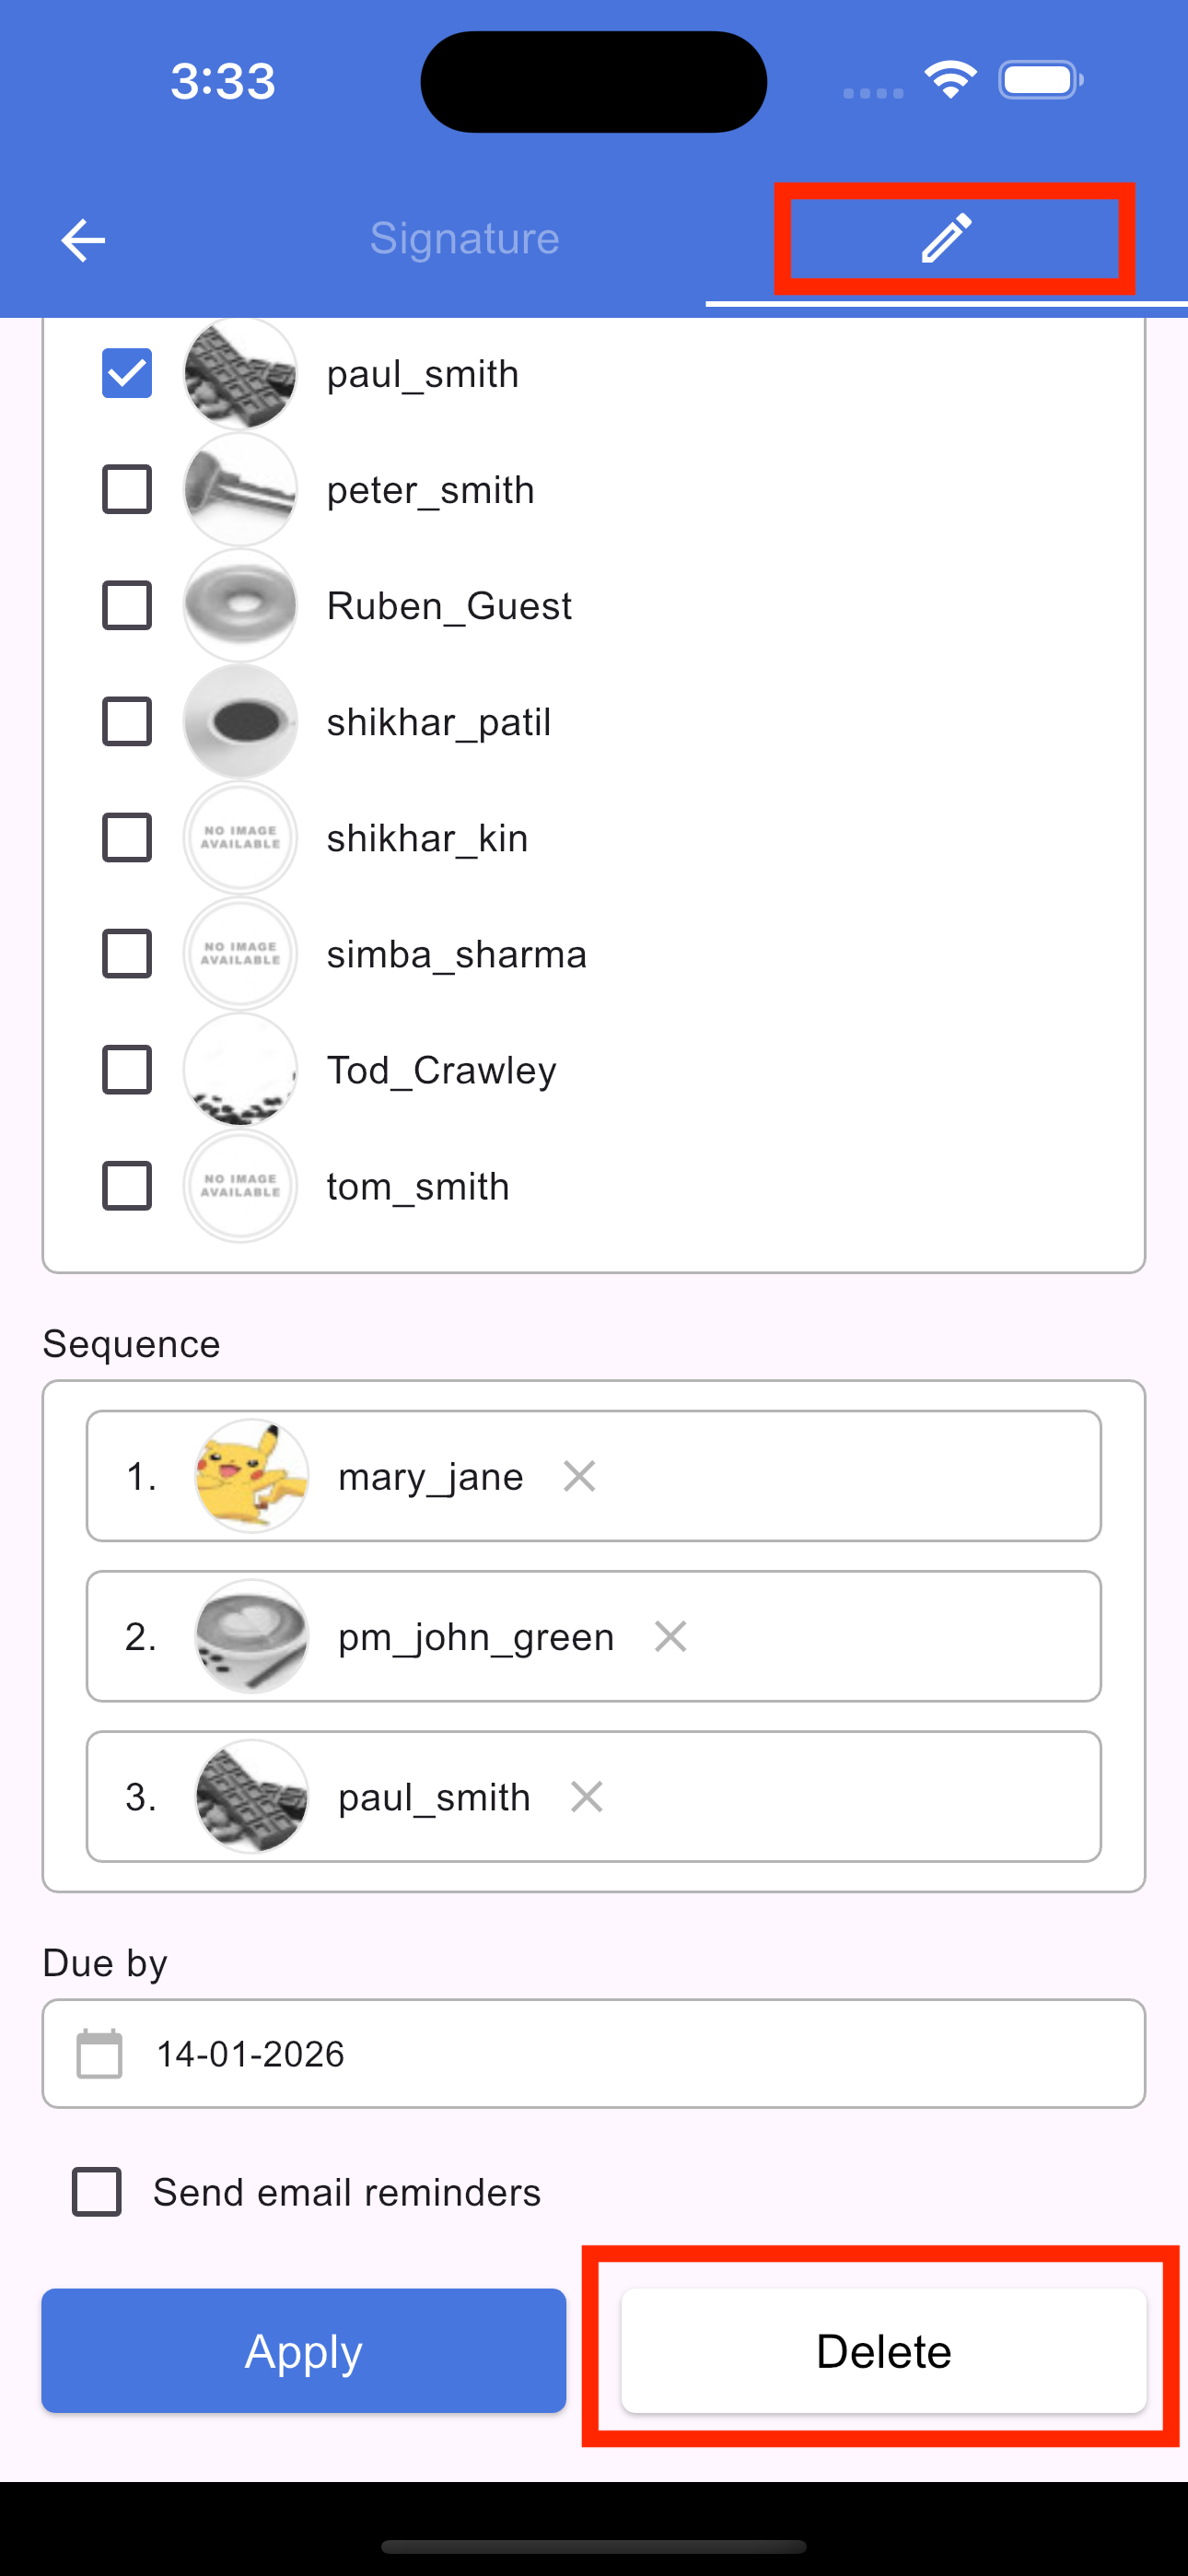
To modify an existing request, tap the Signature icon in the section footer. On the screen that opens, select the Pencil (Edit) icon. From here, you can update the due date, add new signers, or rearrange the signing sequence. Once you have made your changes, tap Apply to update the signature request and save your changes.
Add response in signature request
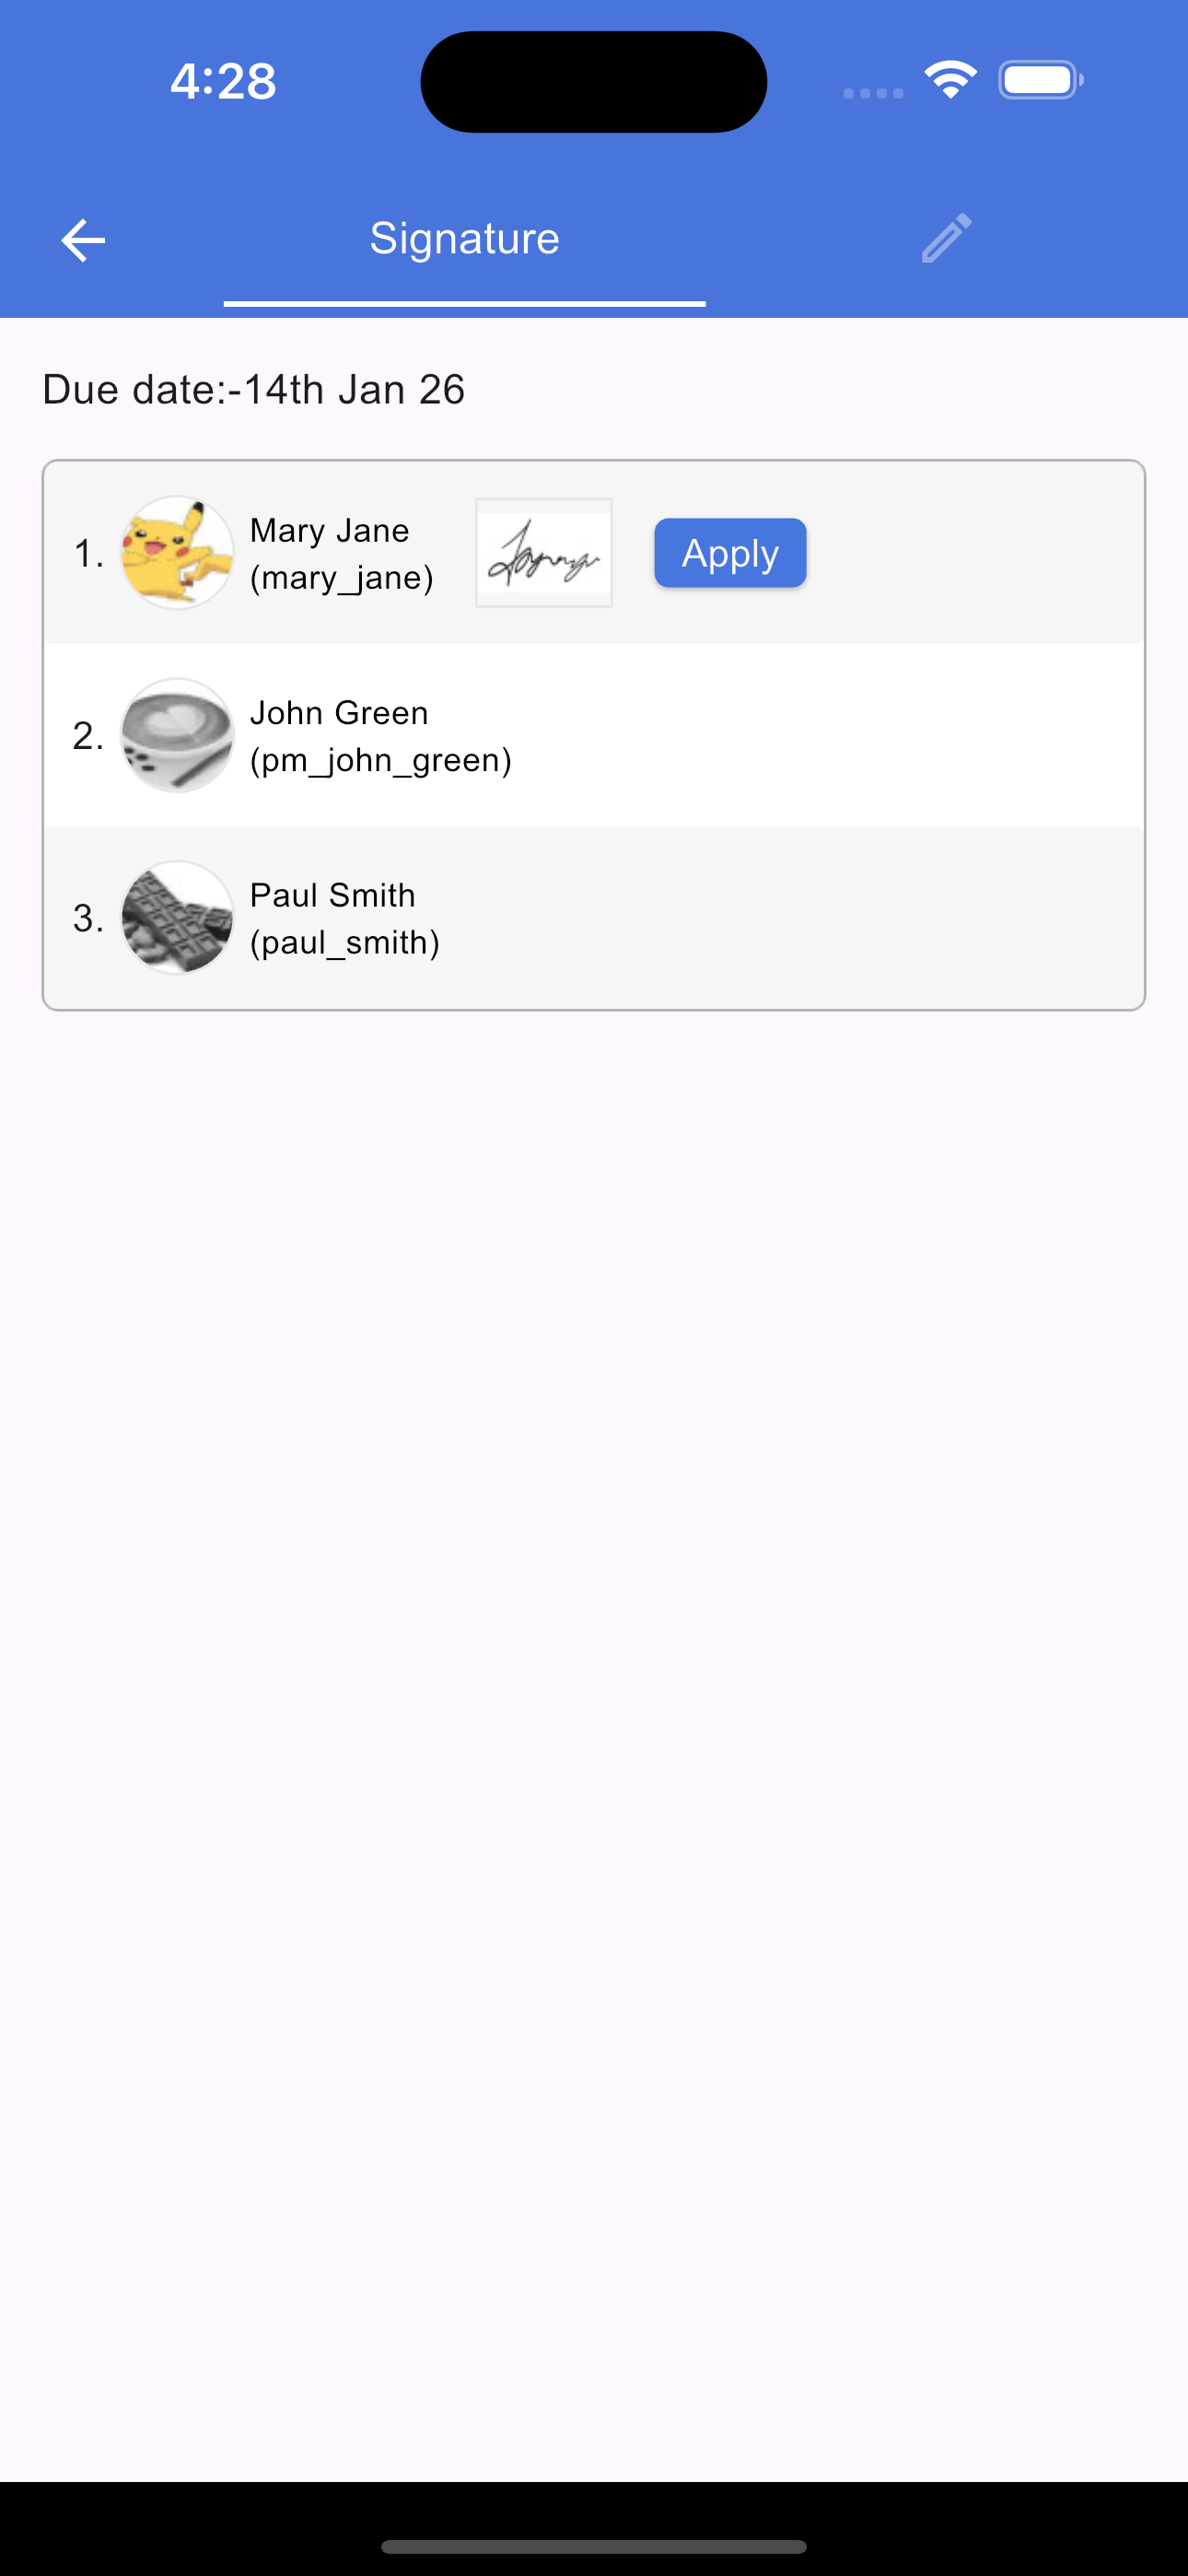
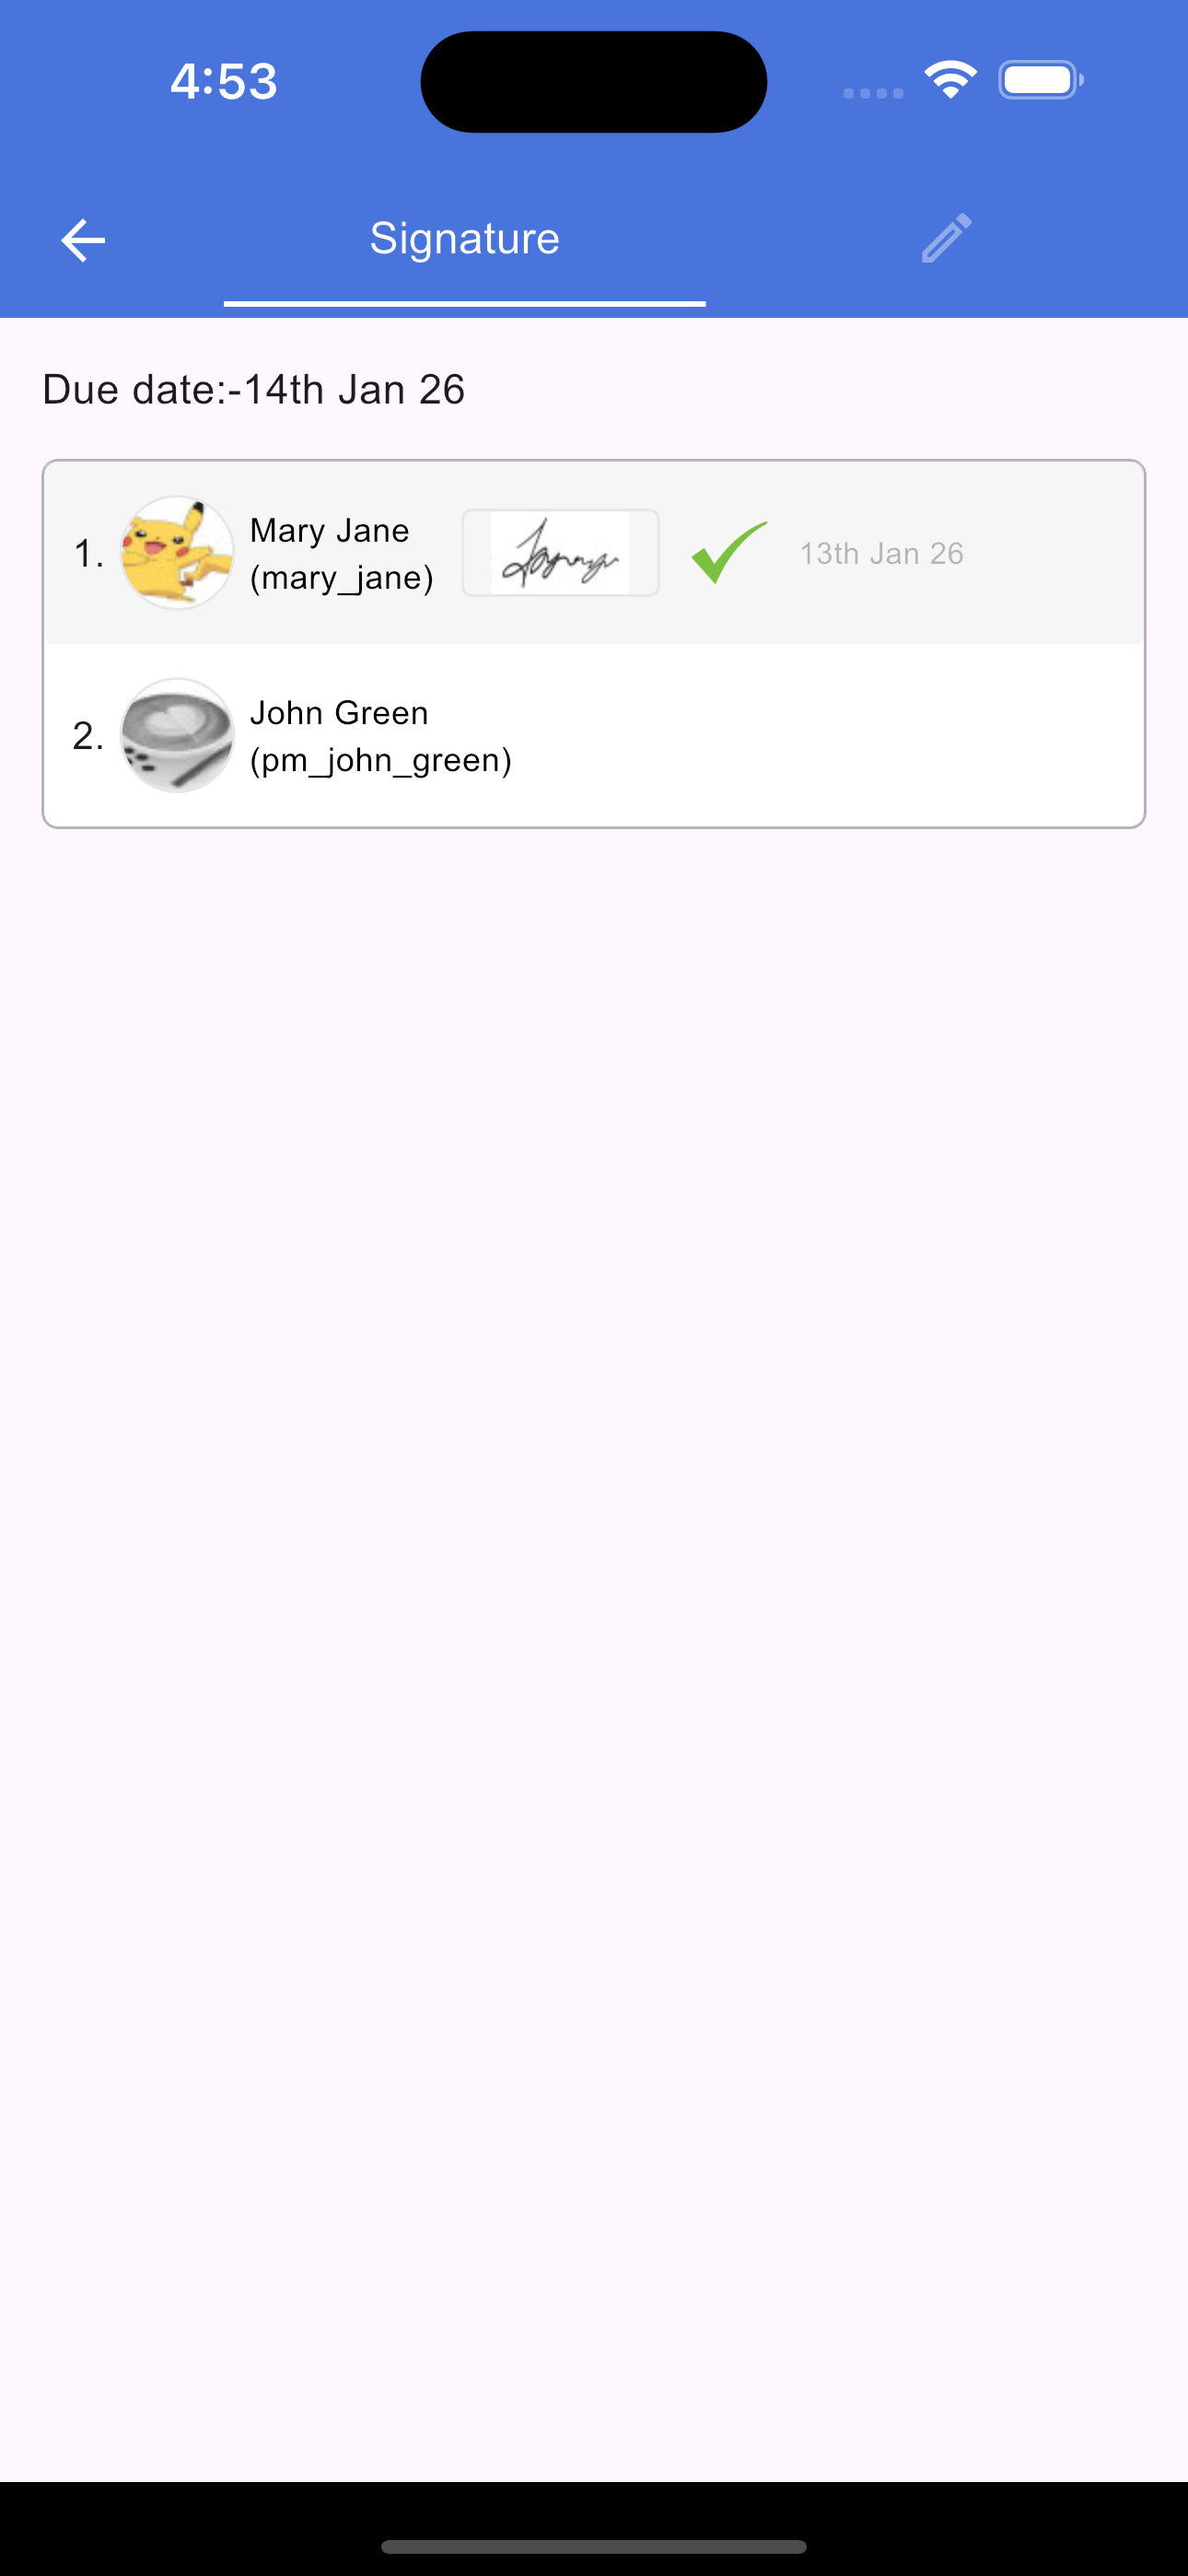
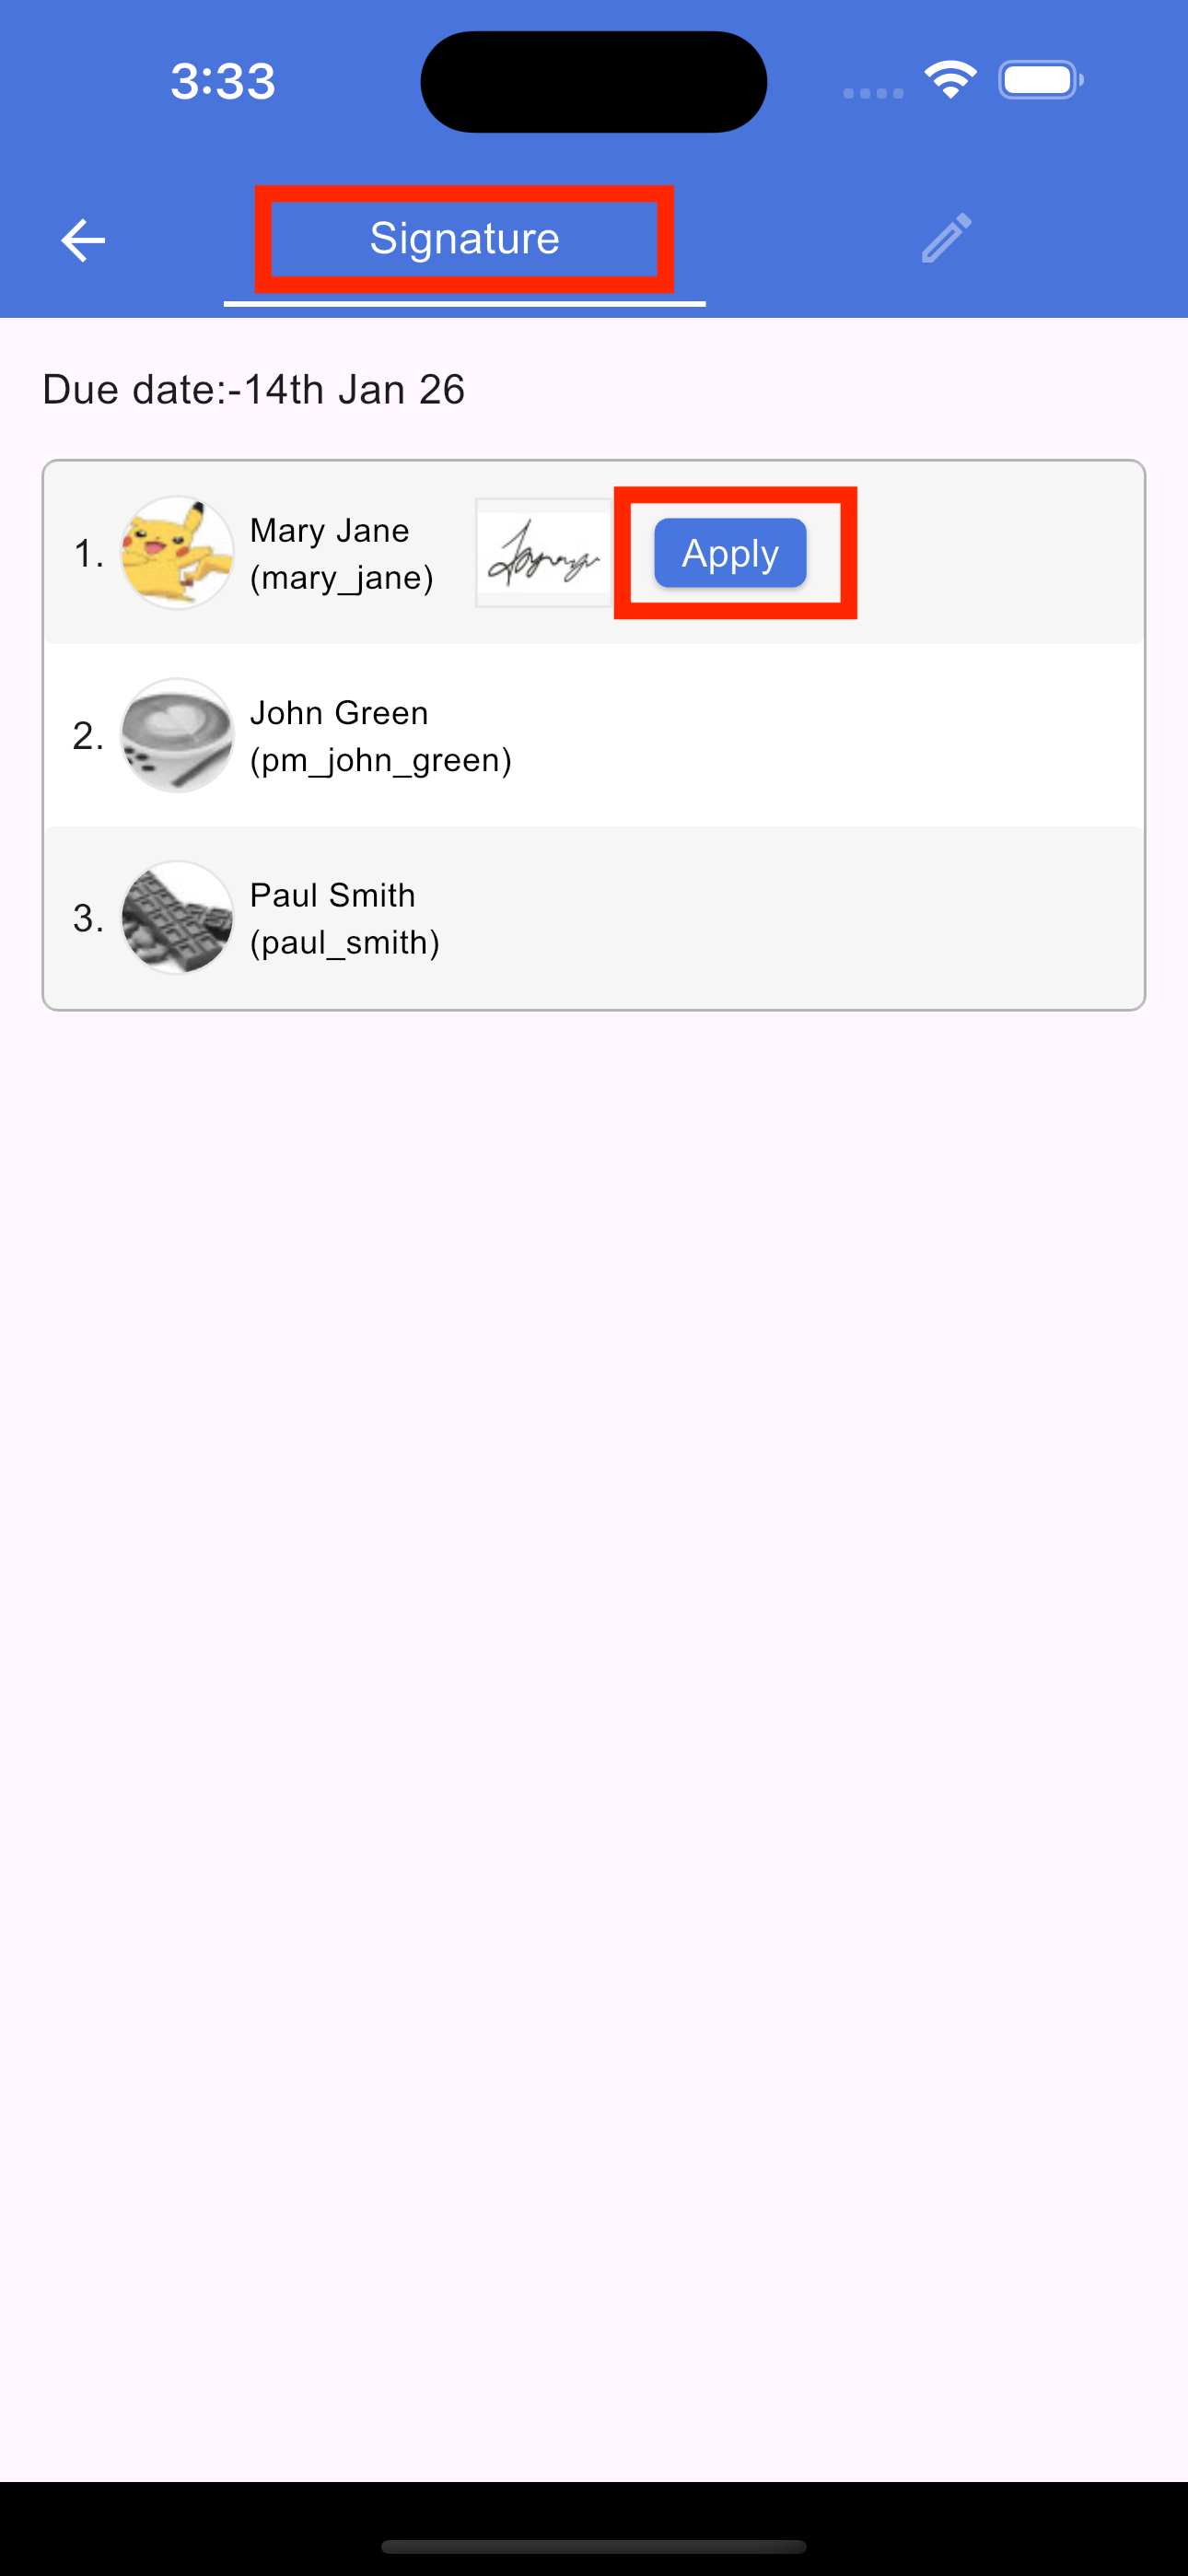
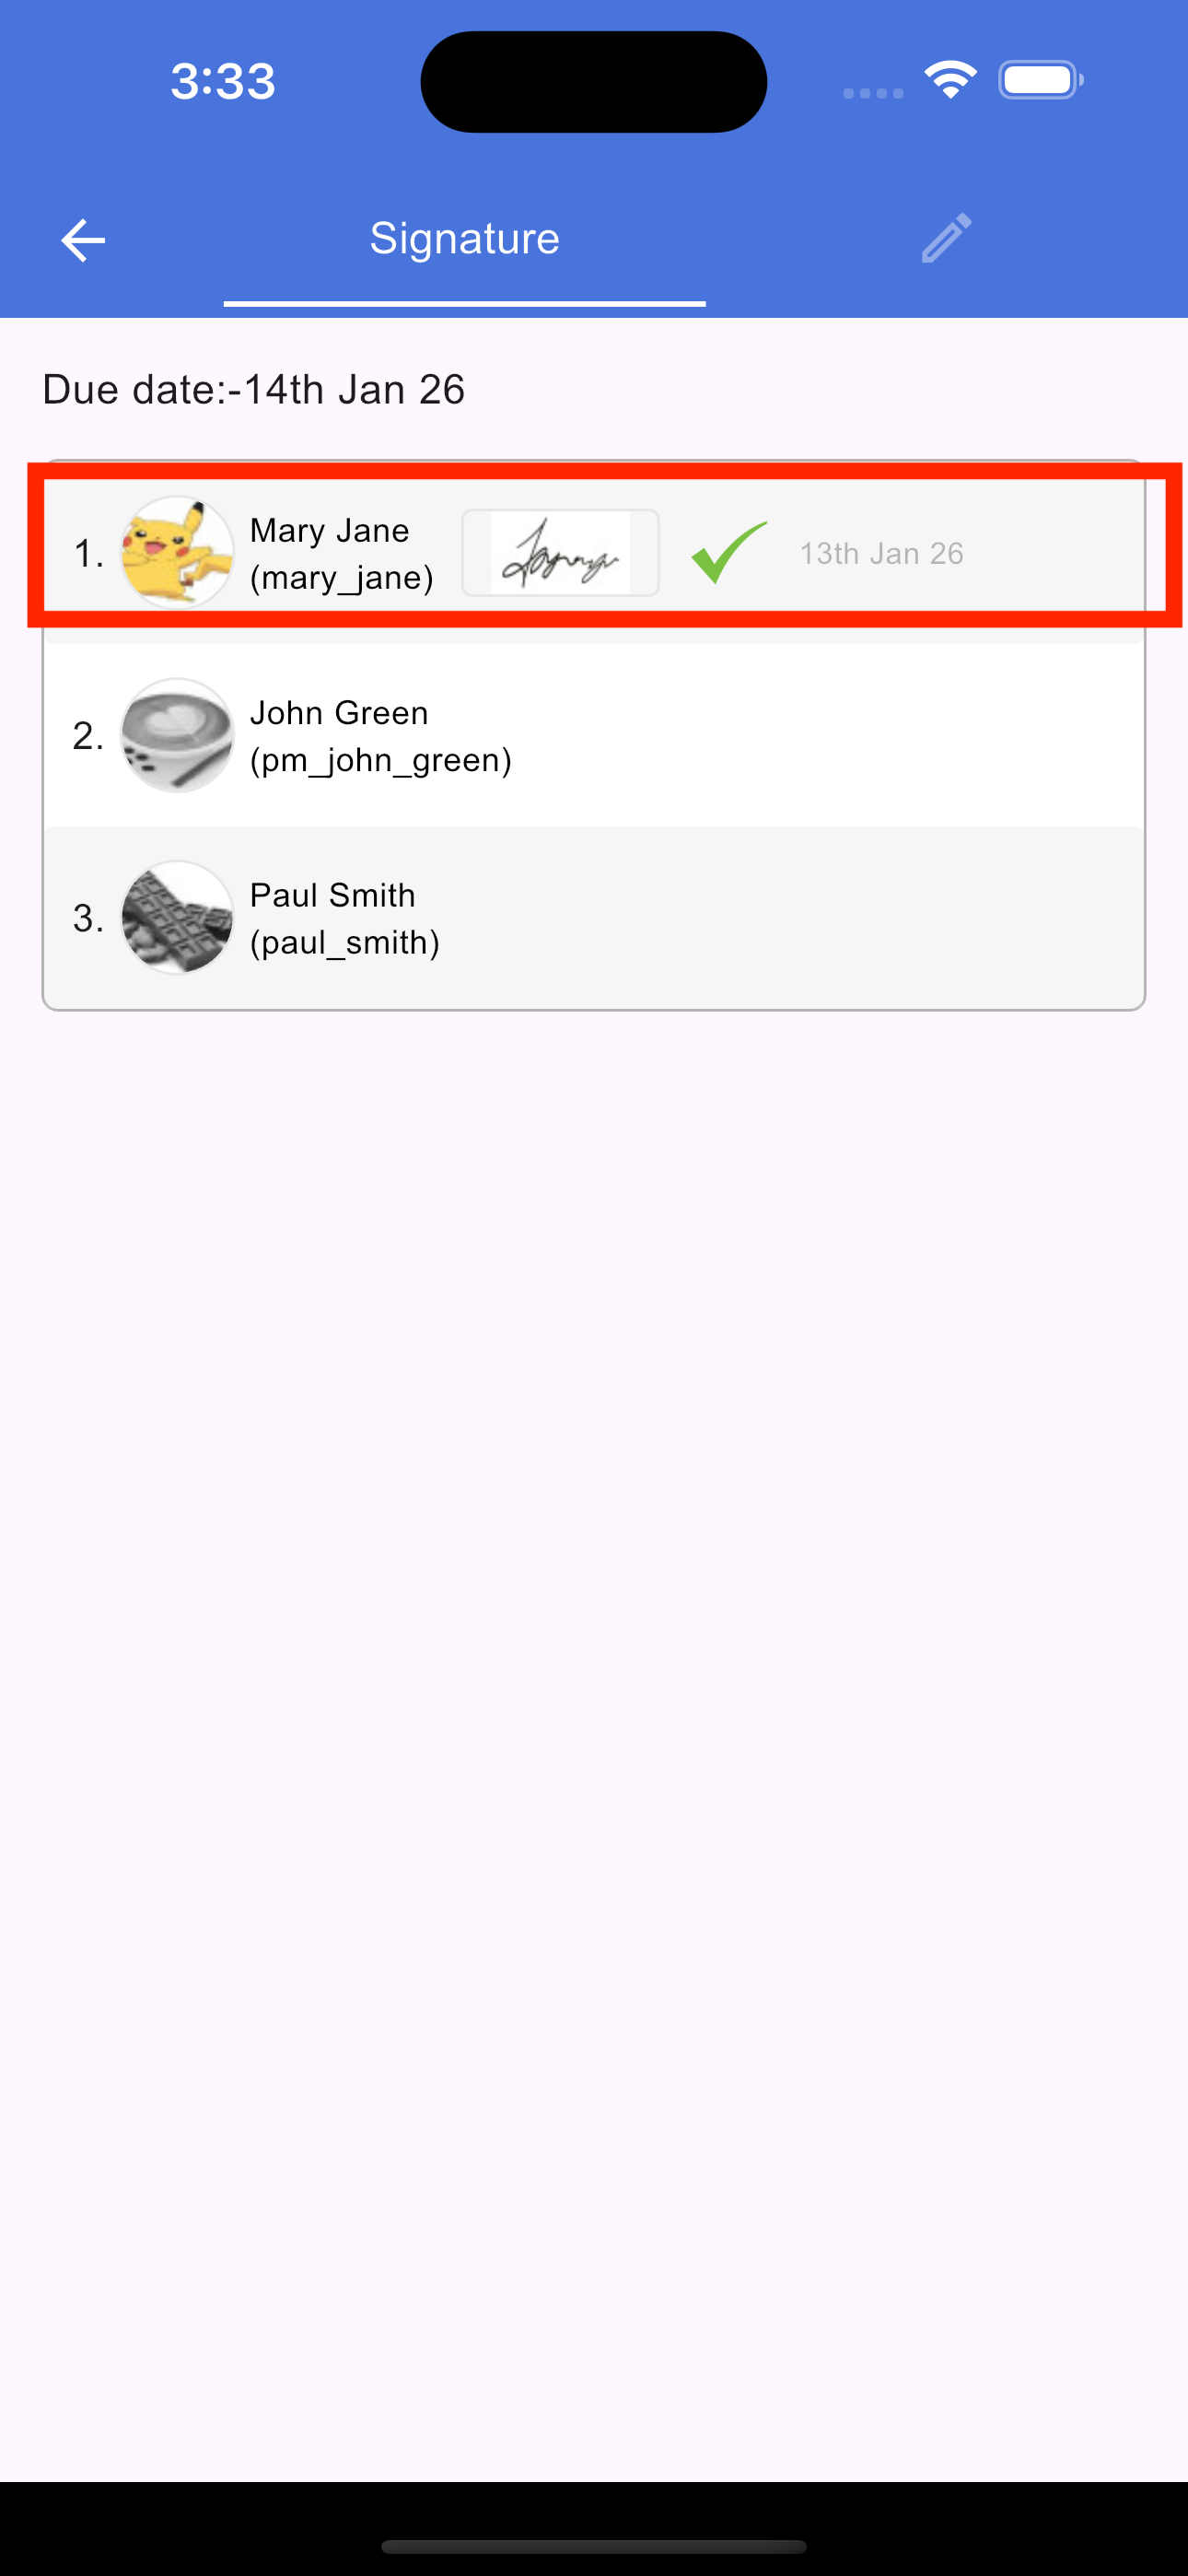
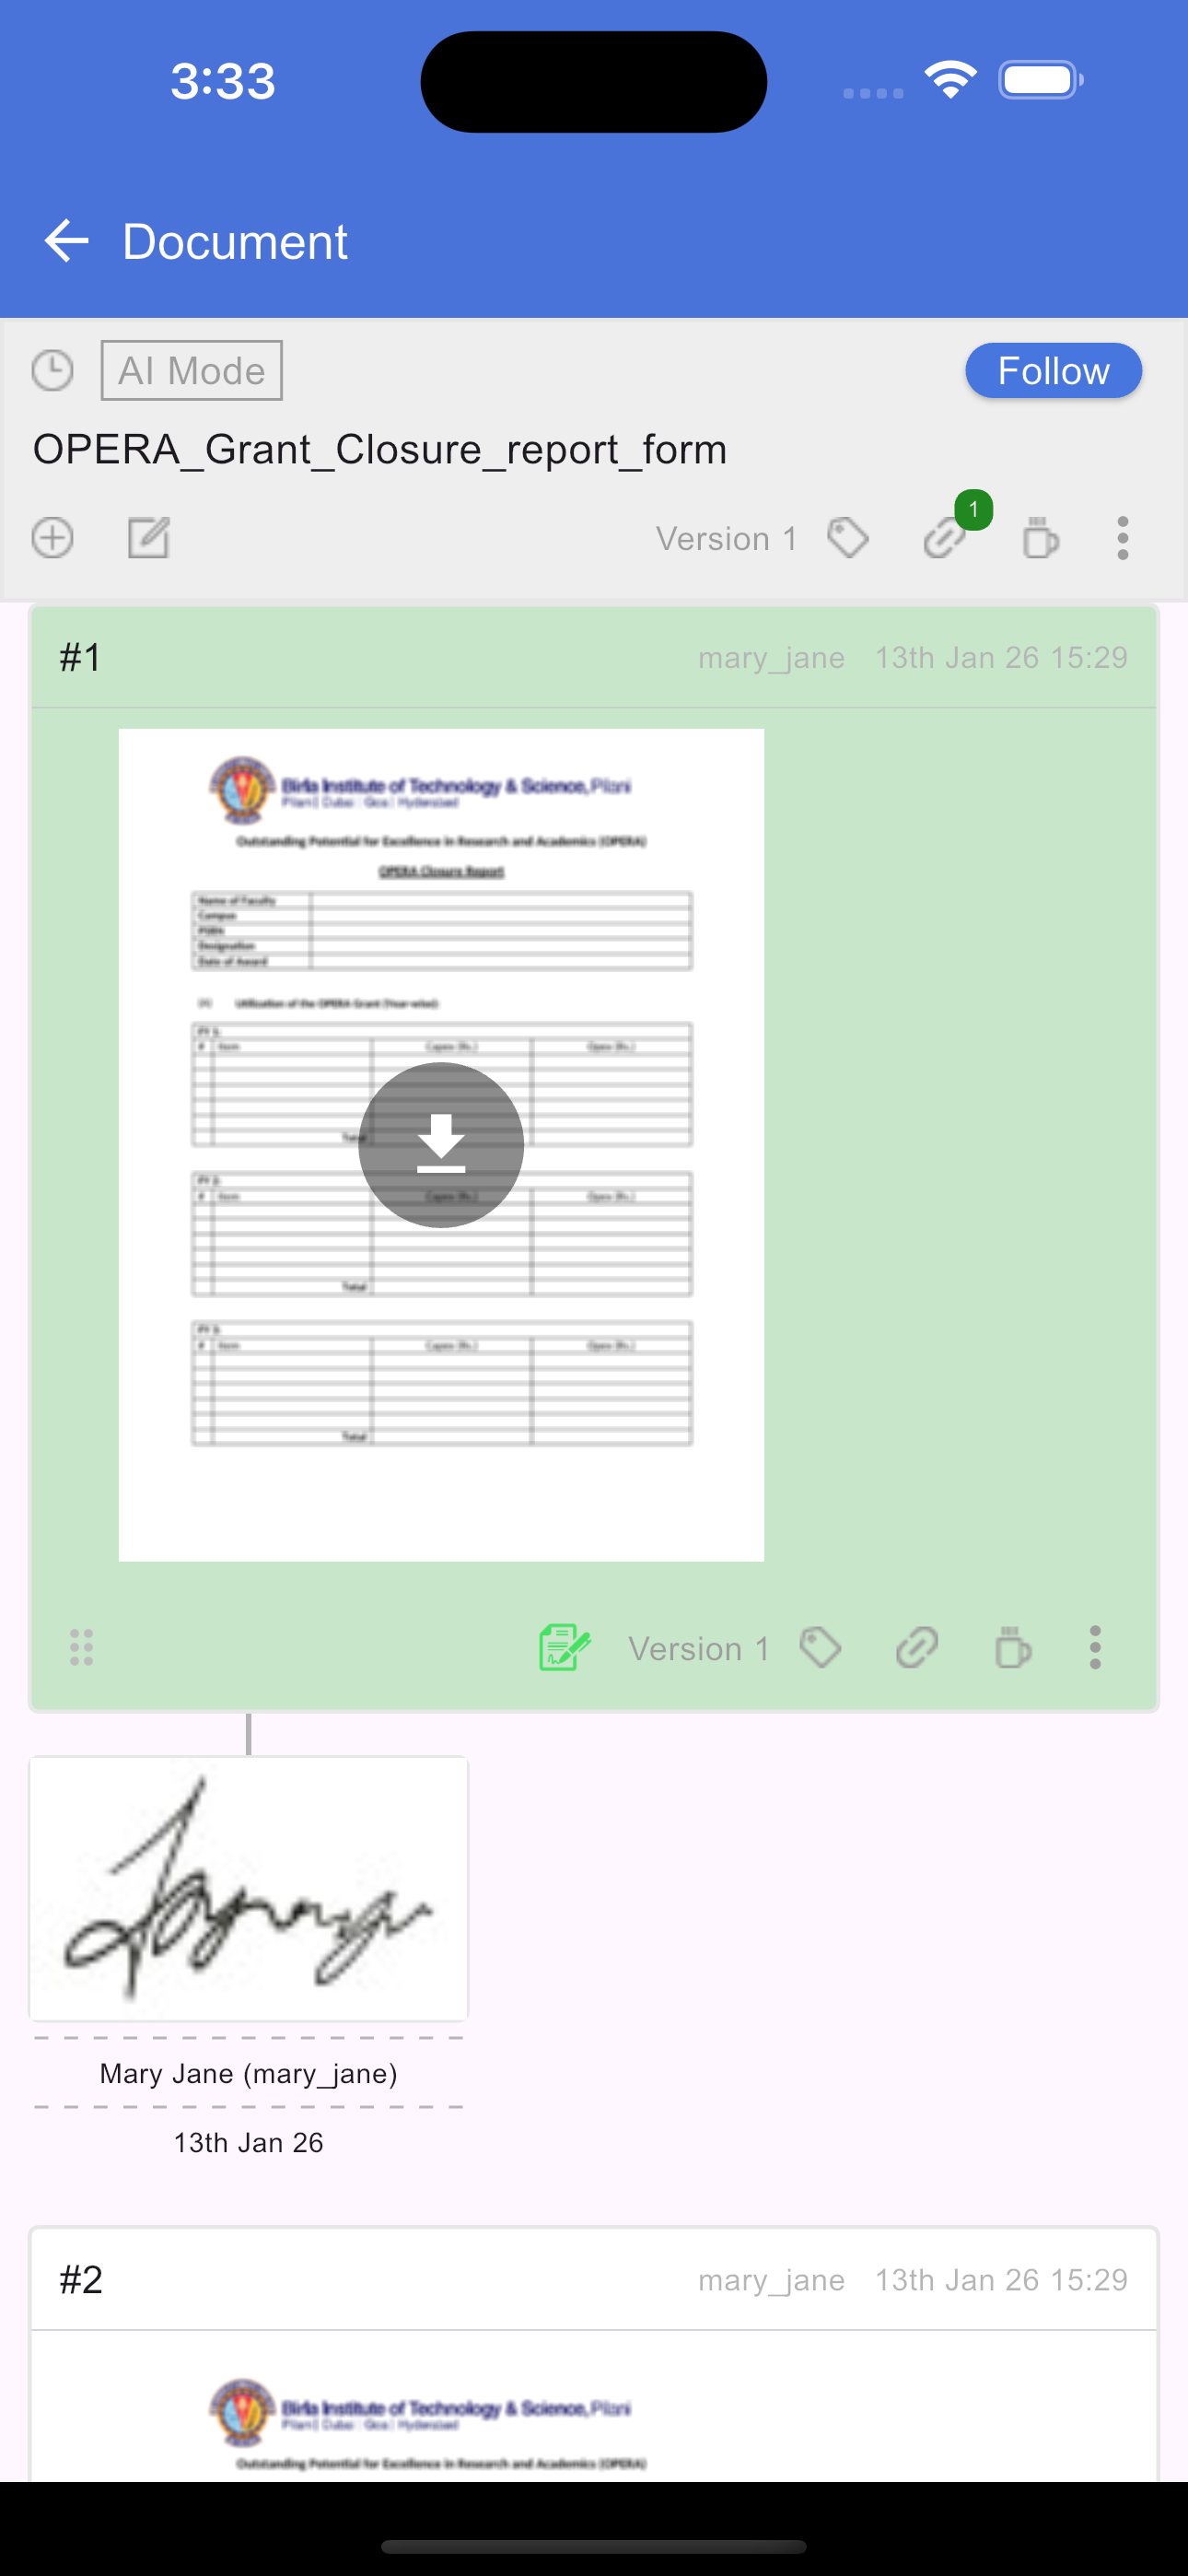
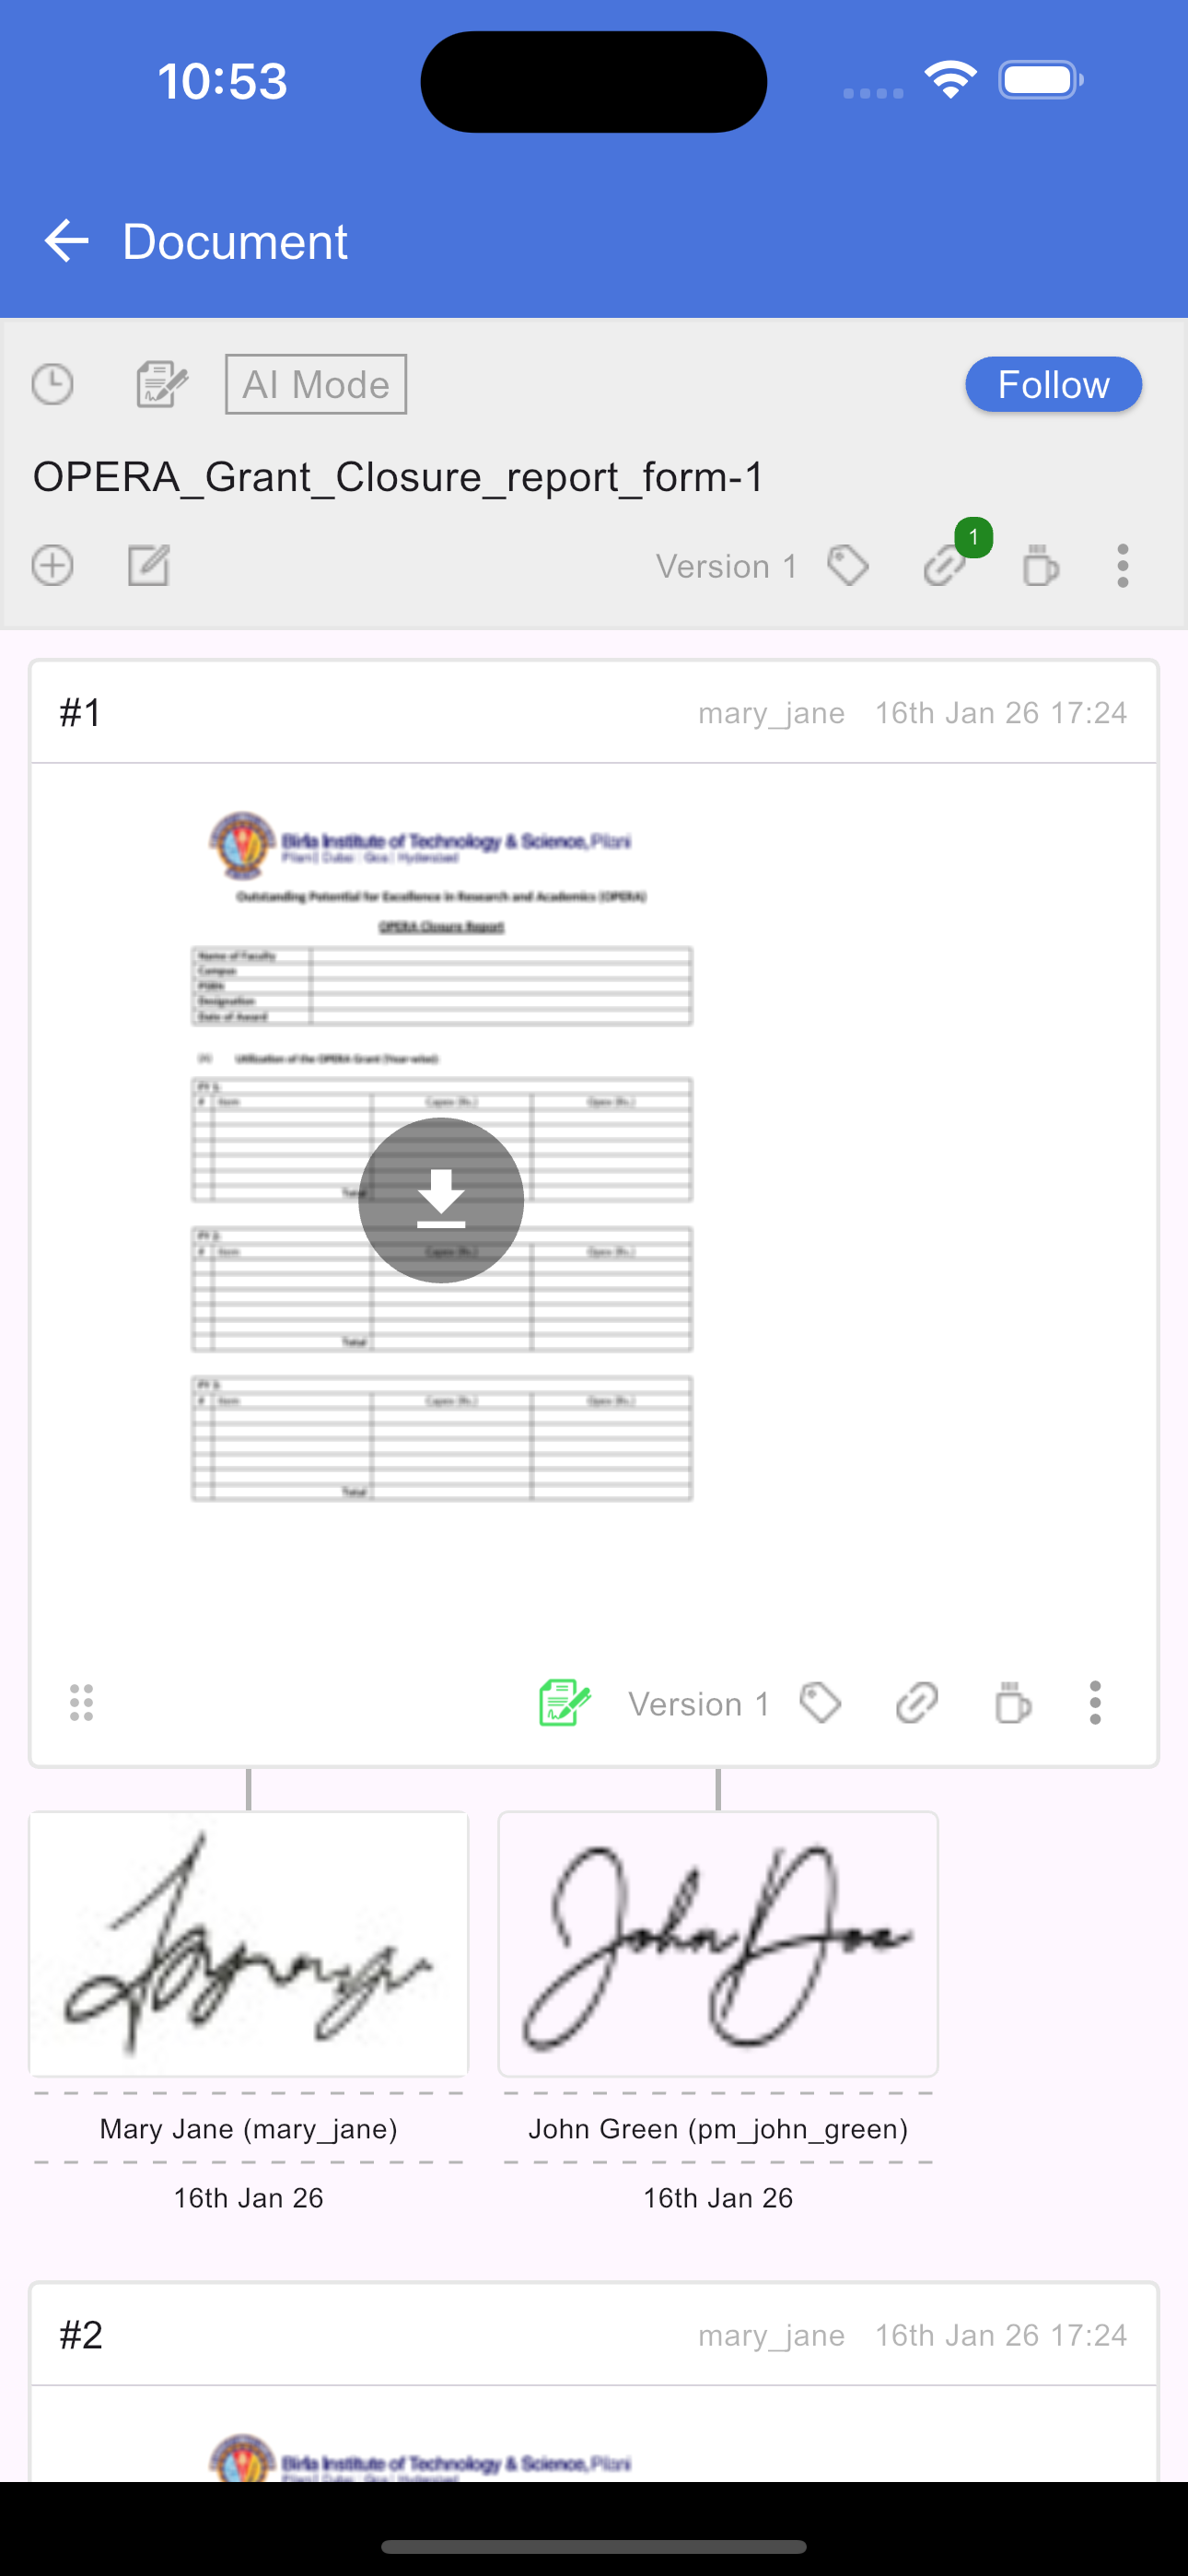
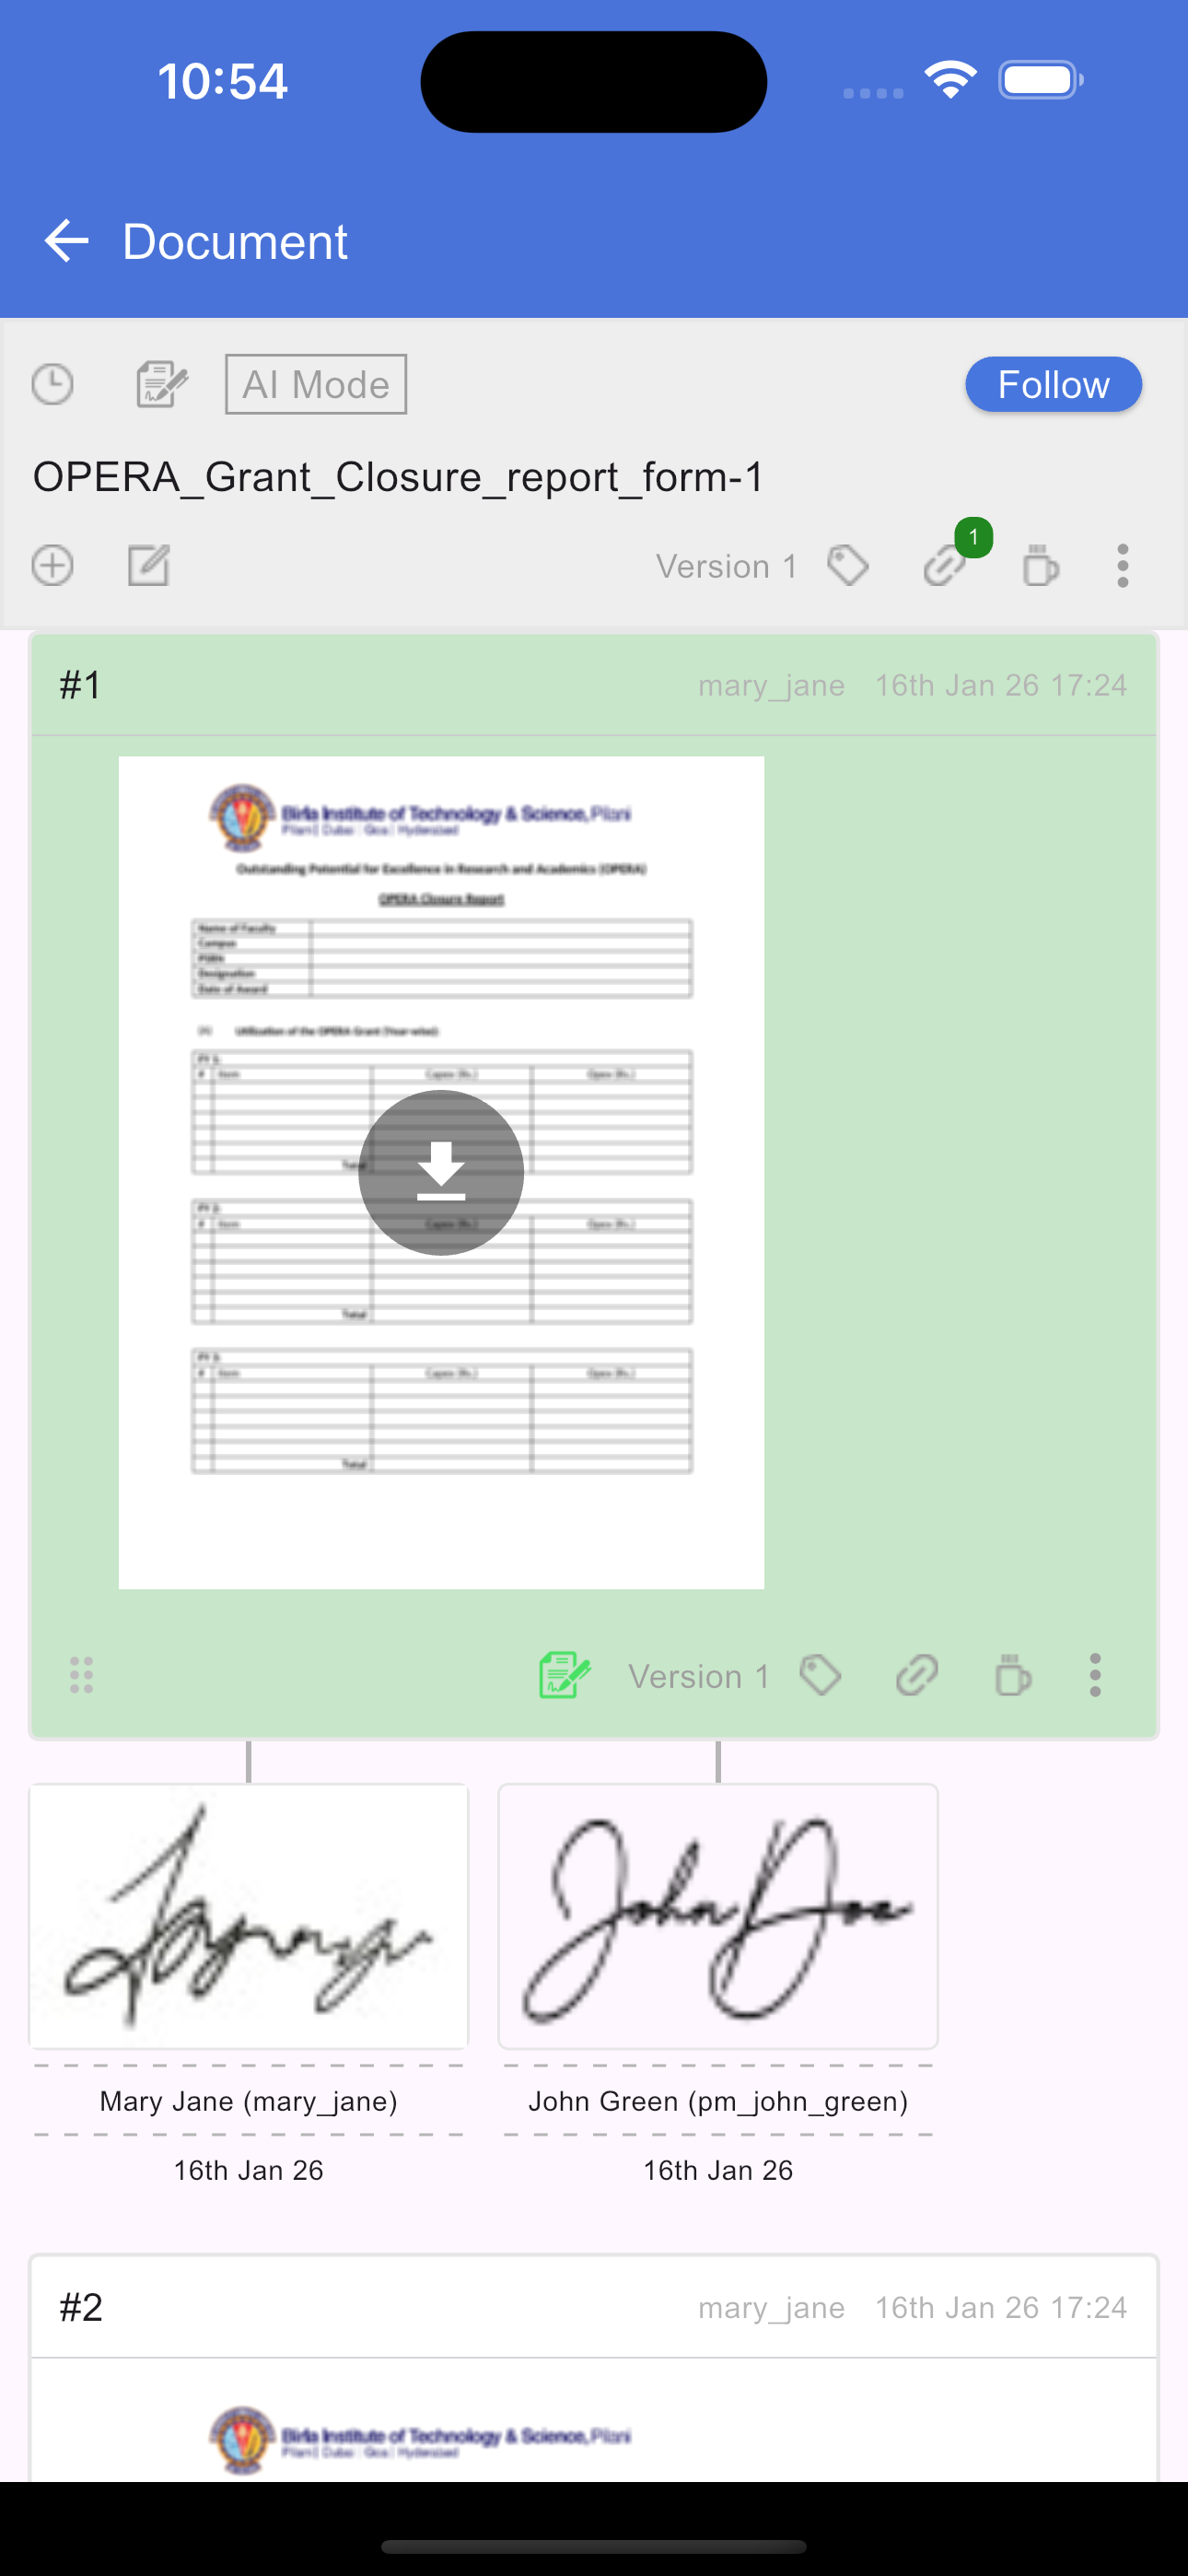
Once a signature request is applied to a section, assigned signers will see a Signature icon. Tapping this icon opens a new screen where you will find your name, your signature image, and an Apply button. If the request is sequenced, you will only be able to sign when it is your turn; the system requires all previous signers to finish before the signing option becomes active for you. If the request is not sequenced, you may sign at any time. After tapping Apply, your signature is recorded, and a tick mark along with the signing date will appear to confirm your response.
Your signatures
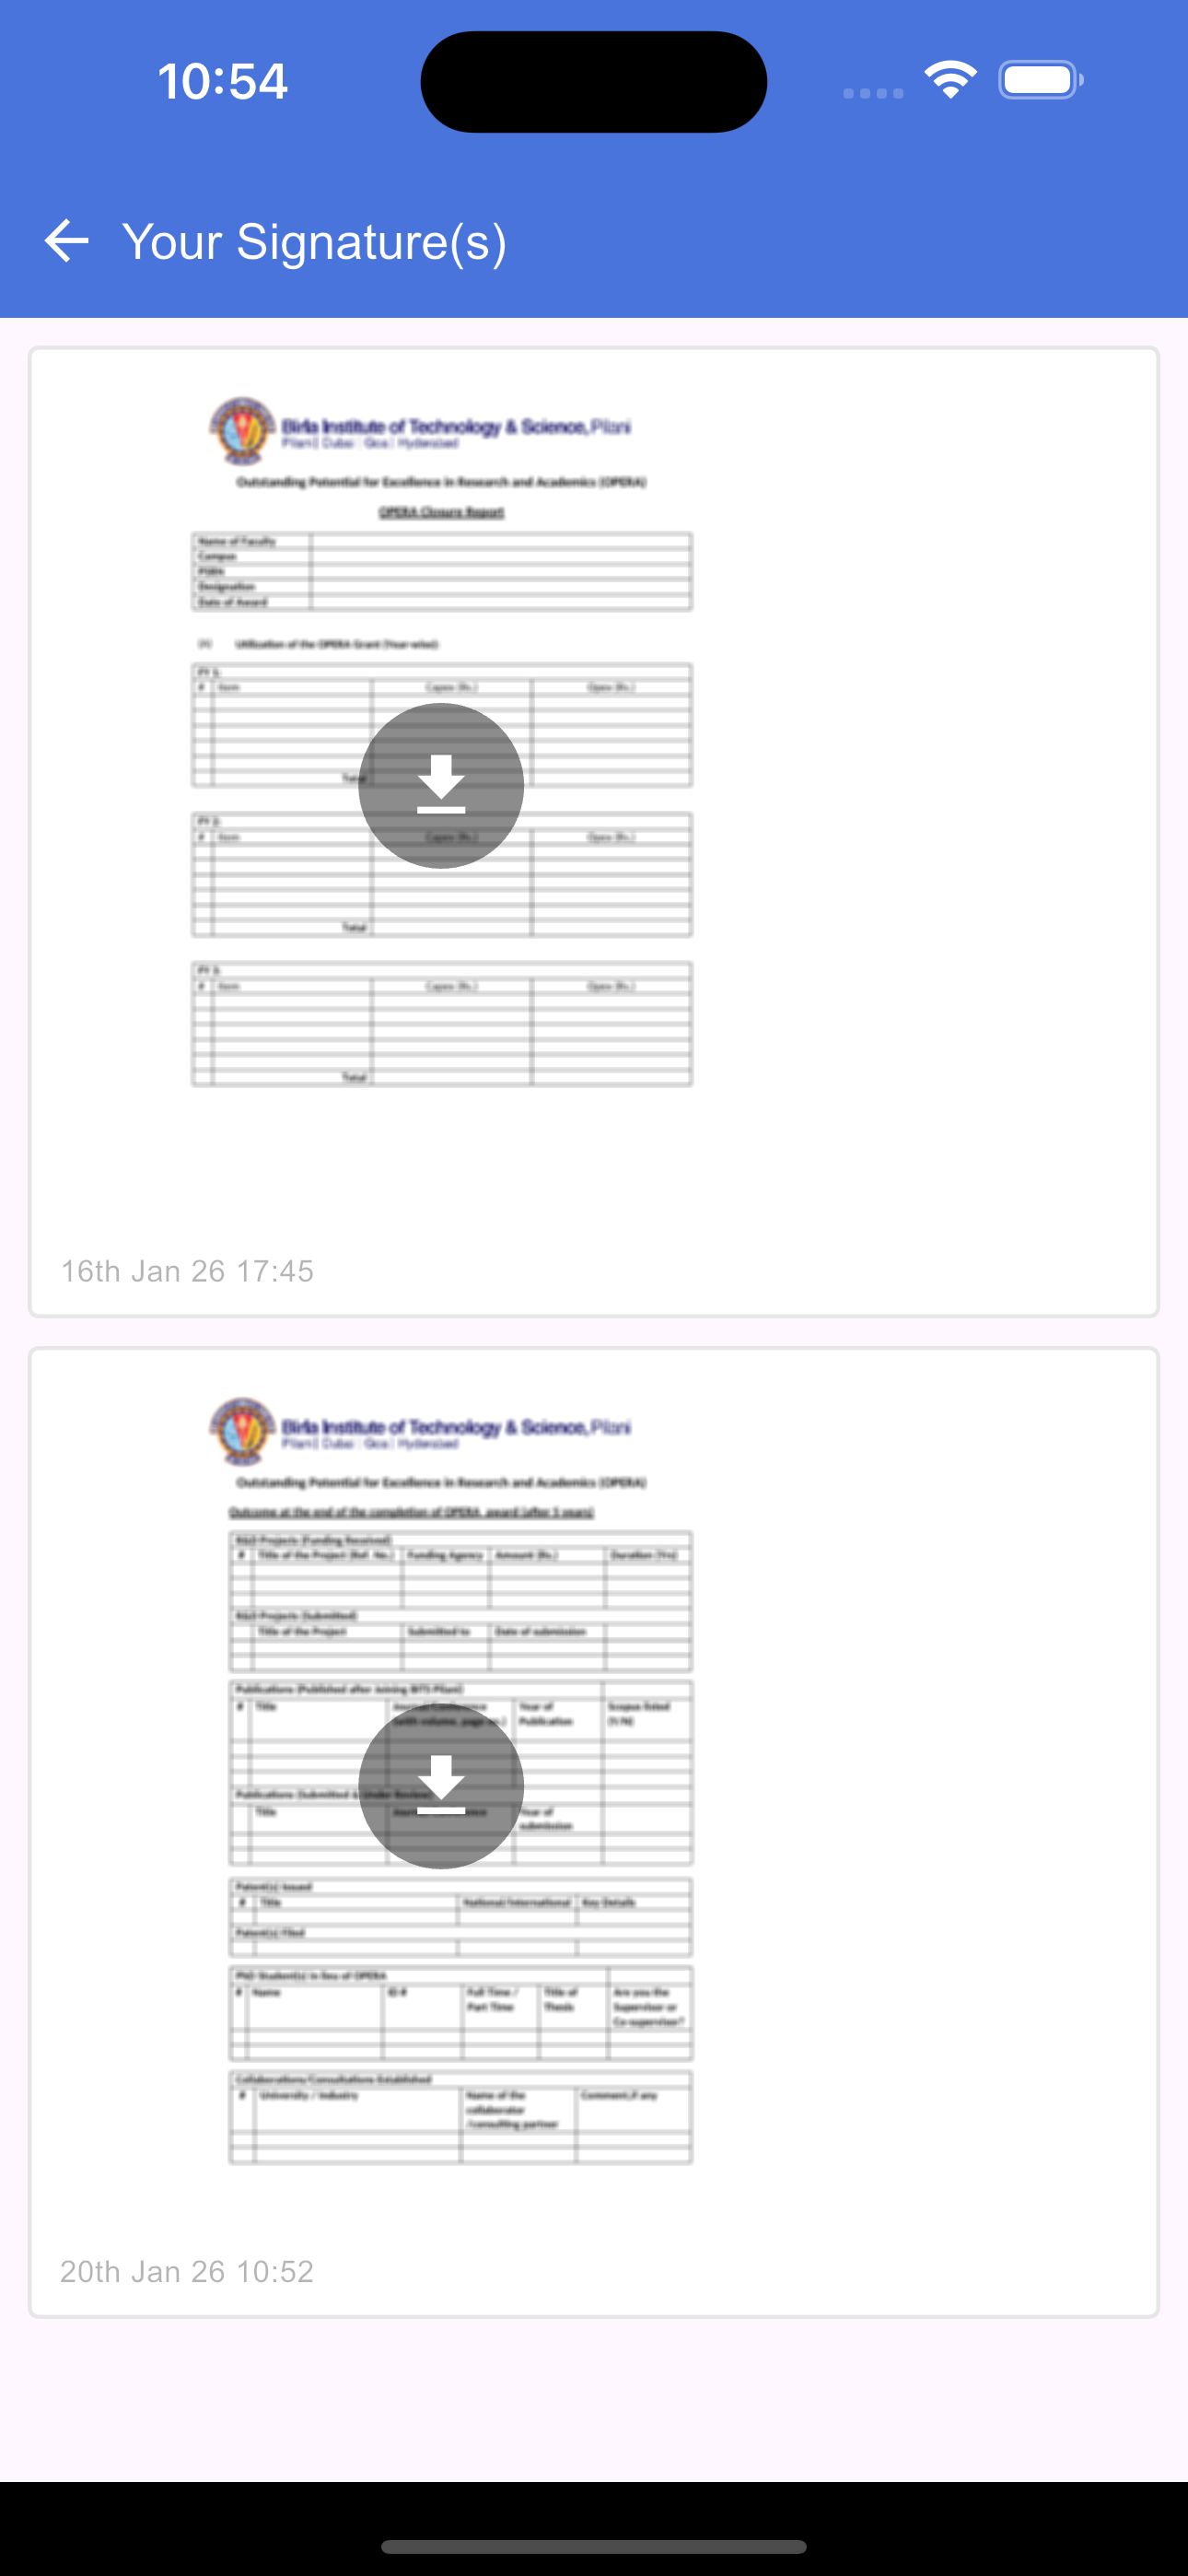
To view all signatures assigned to you, tap the Signature icon in the document header. This opens a new screen titled "Your Signatures," which displays a list of every request in the document where you are a signee. Tapping any item in this list will redirect you back to the document screen and automatically scroll to highlight the specific section that requires your signature.
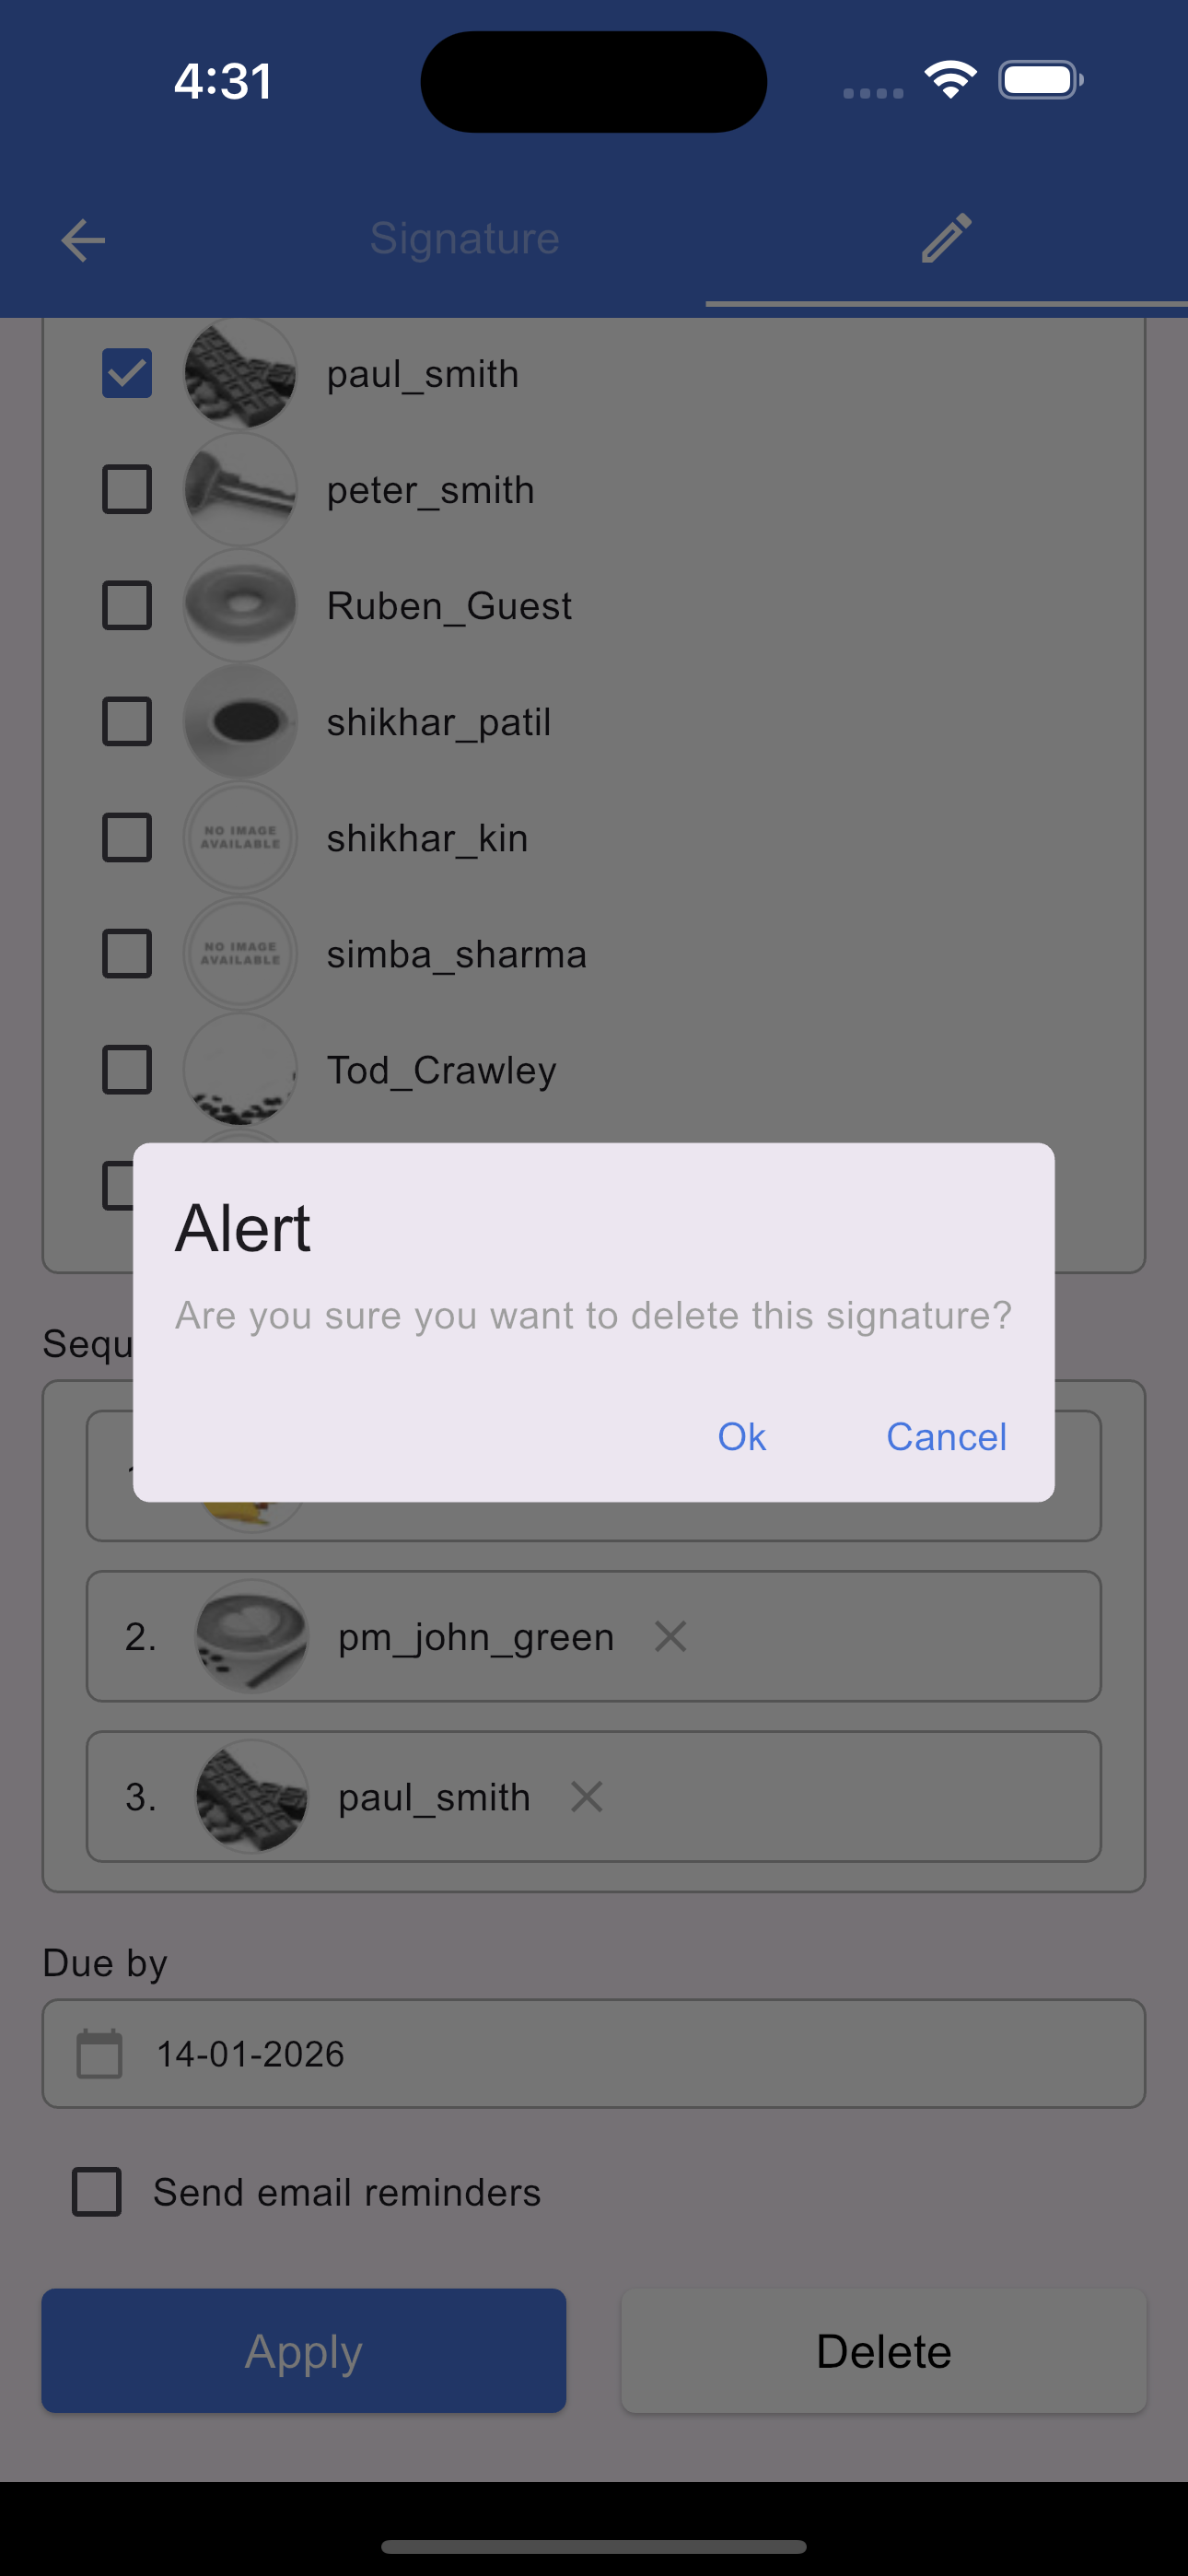
Delete signature request
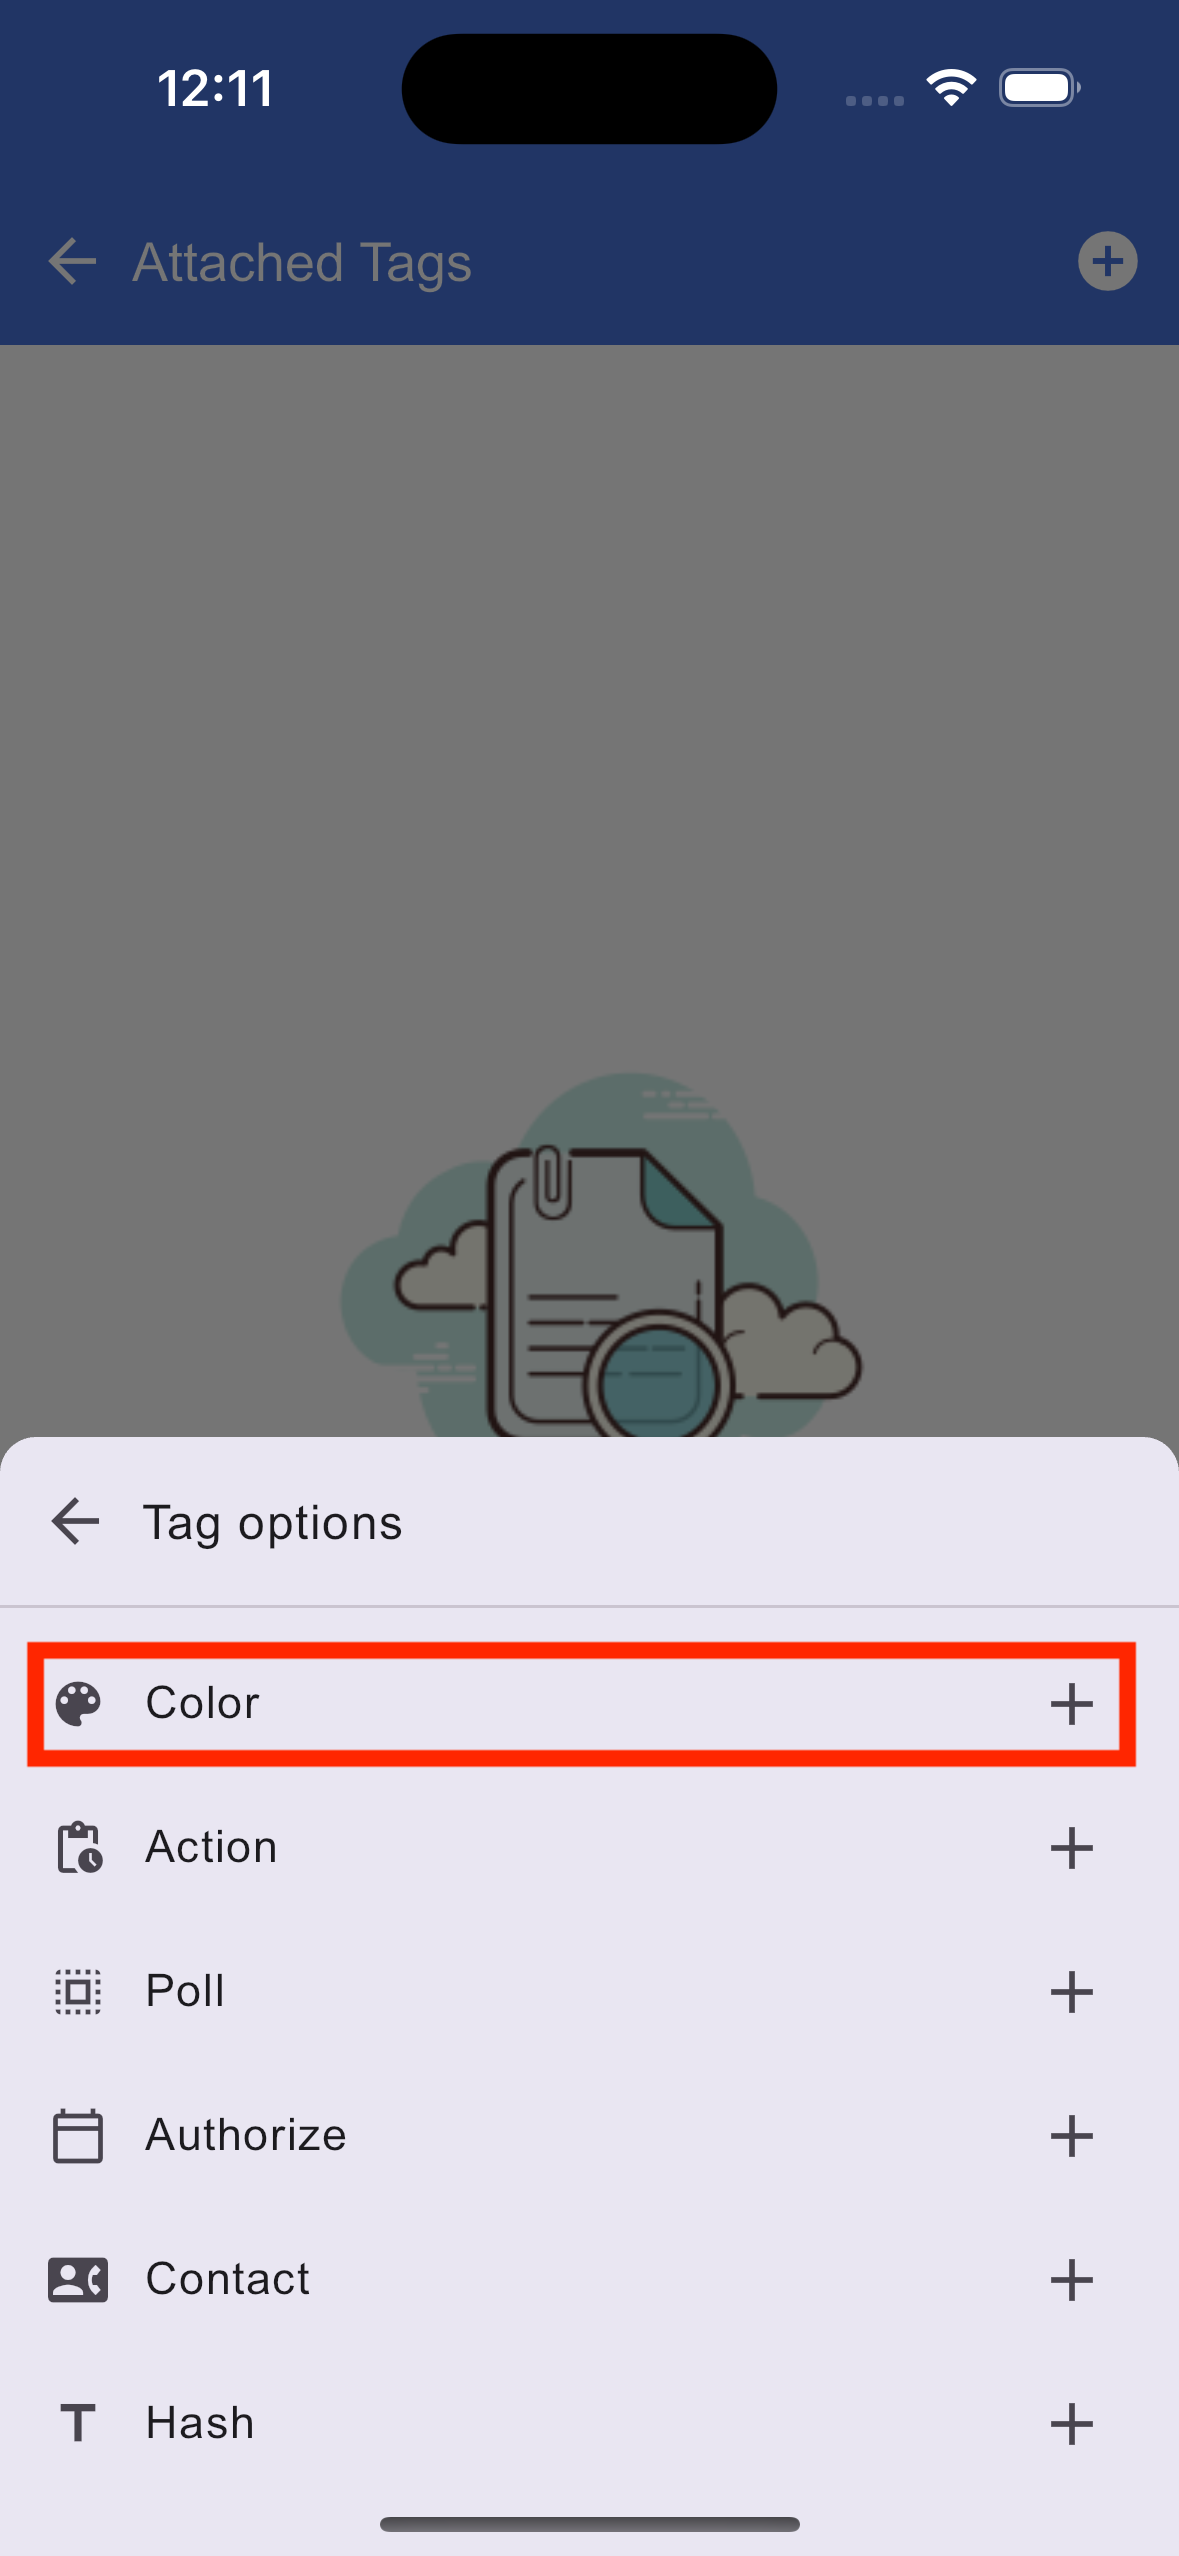
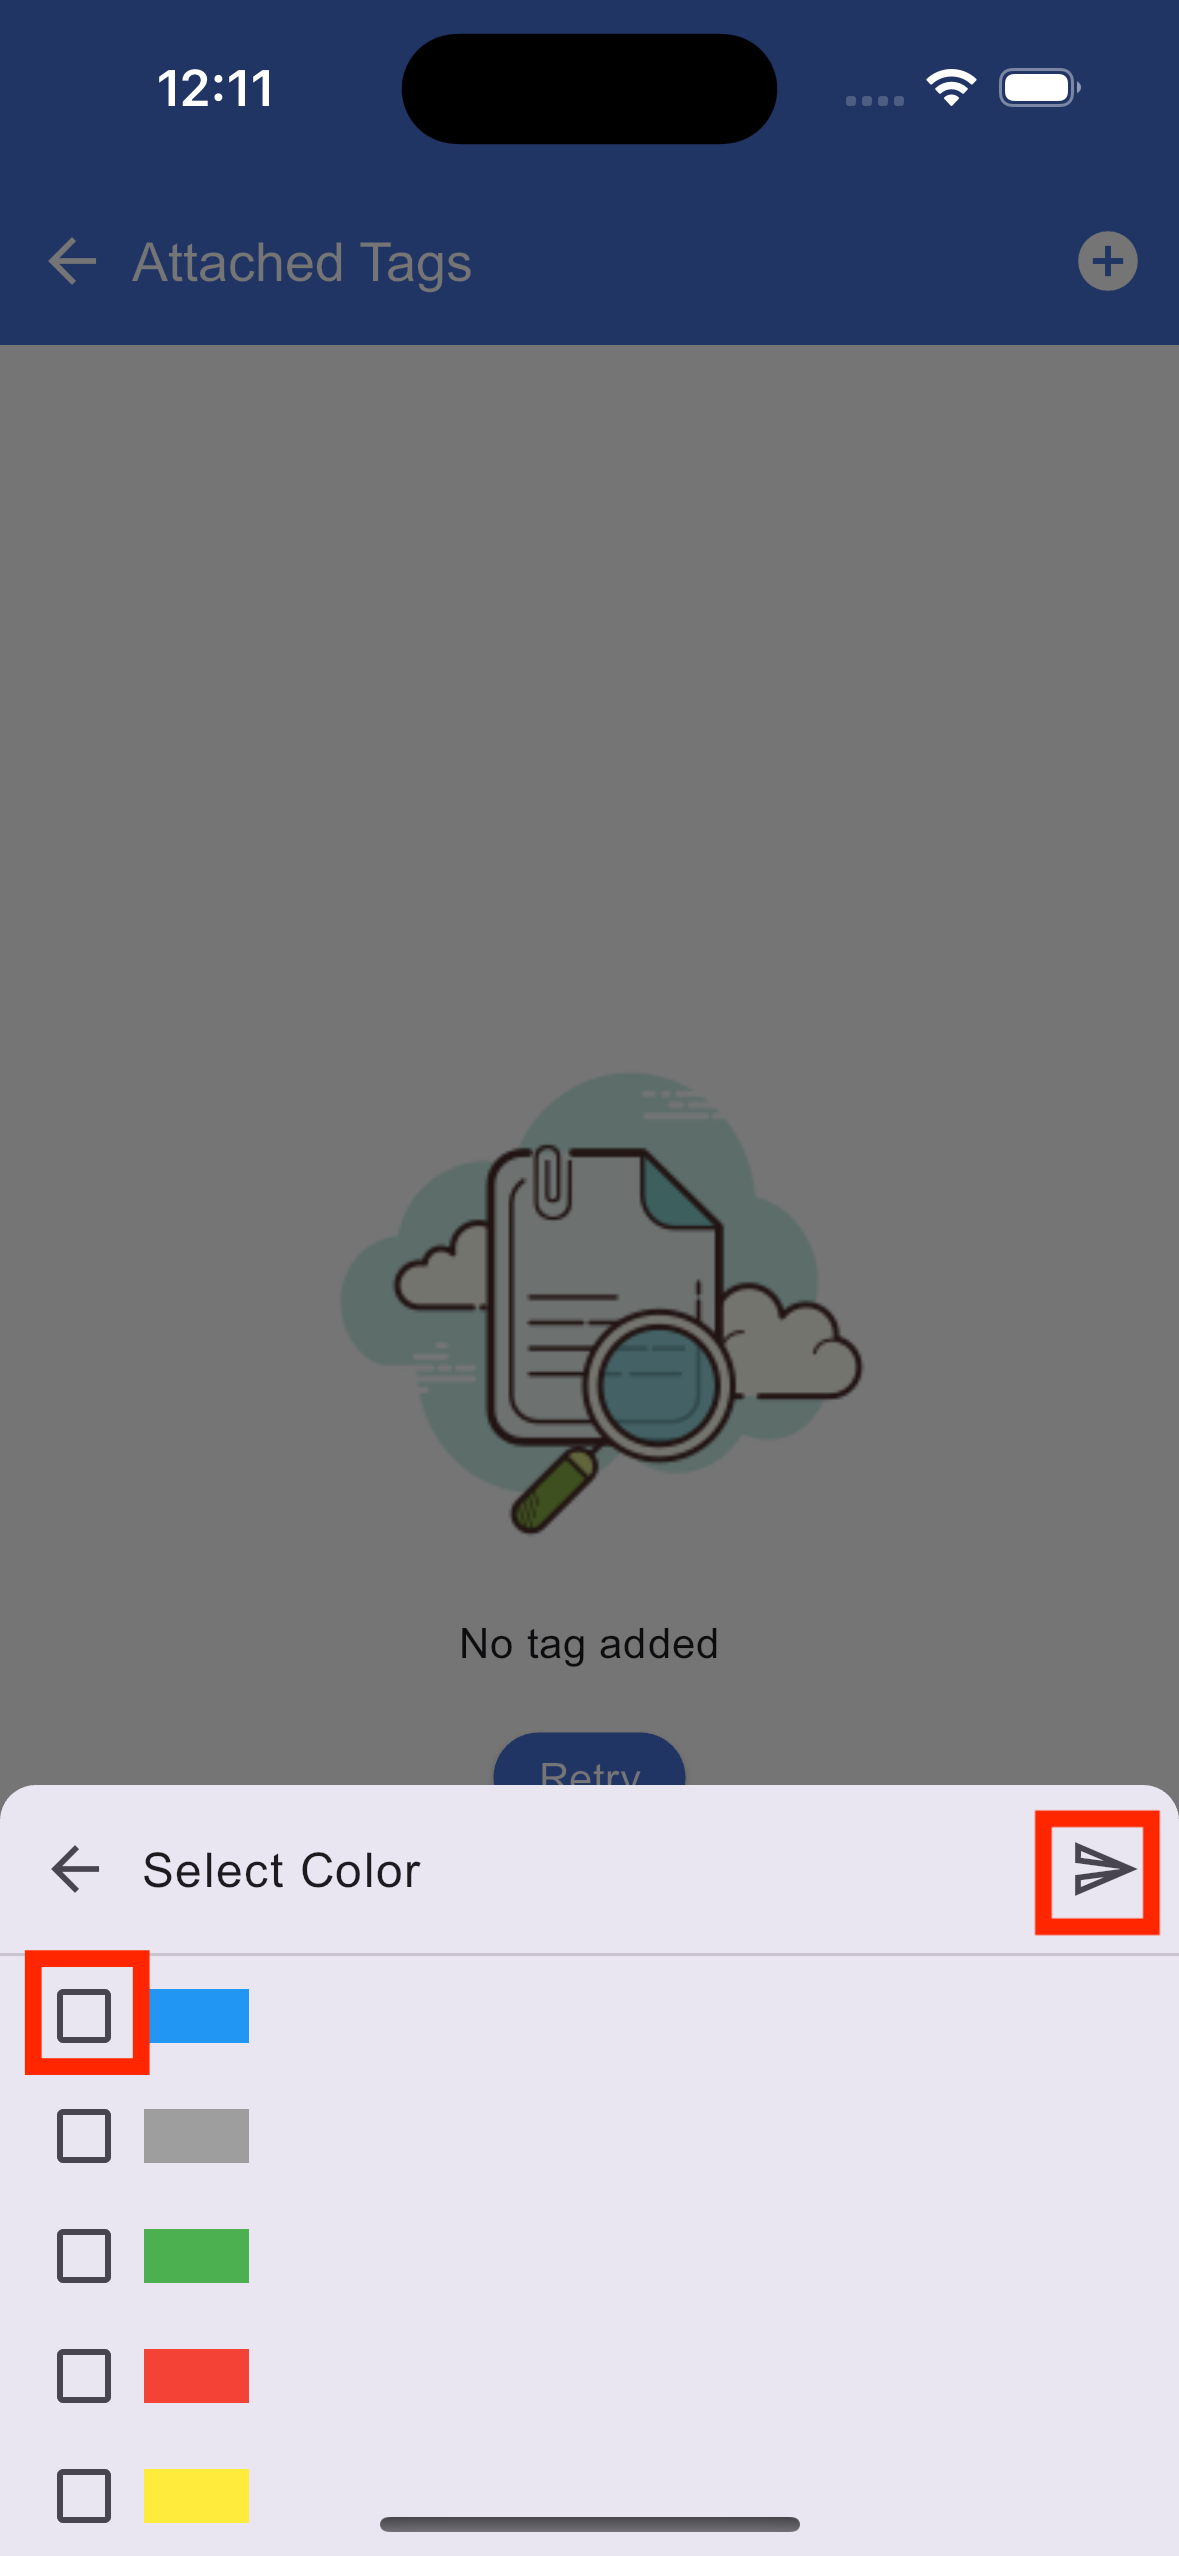
Color tagging a section
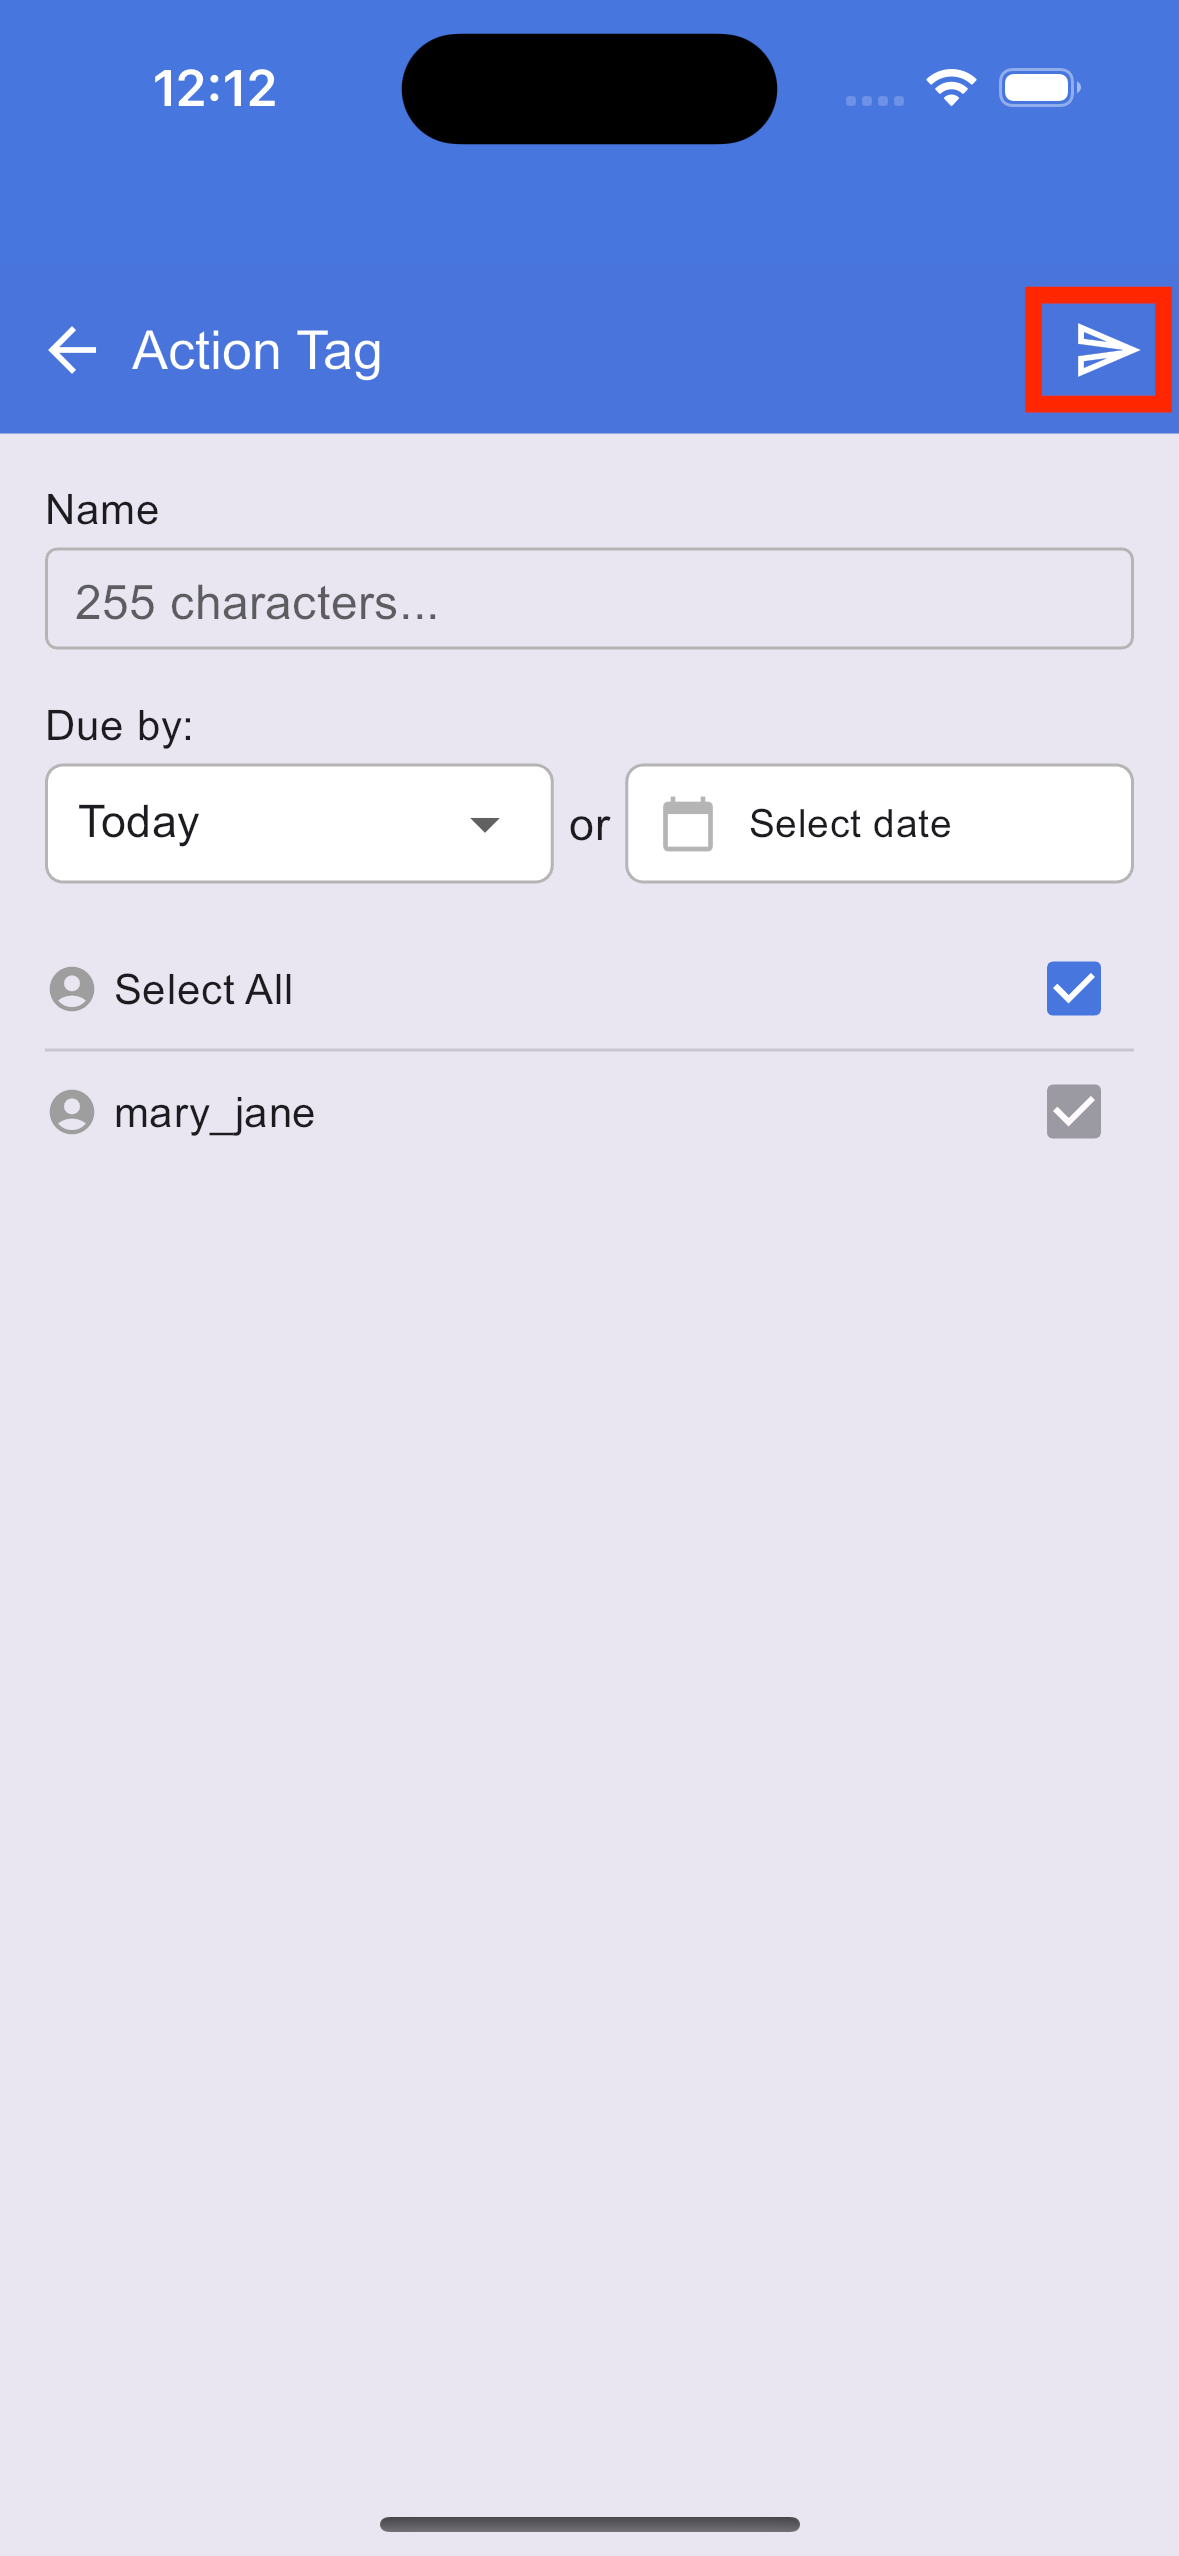
Action tagging a section
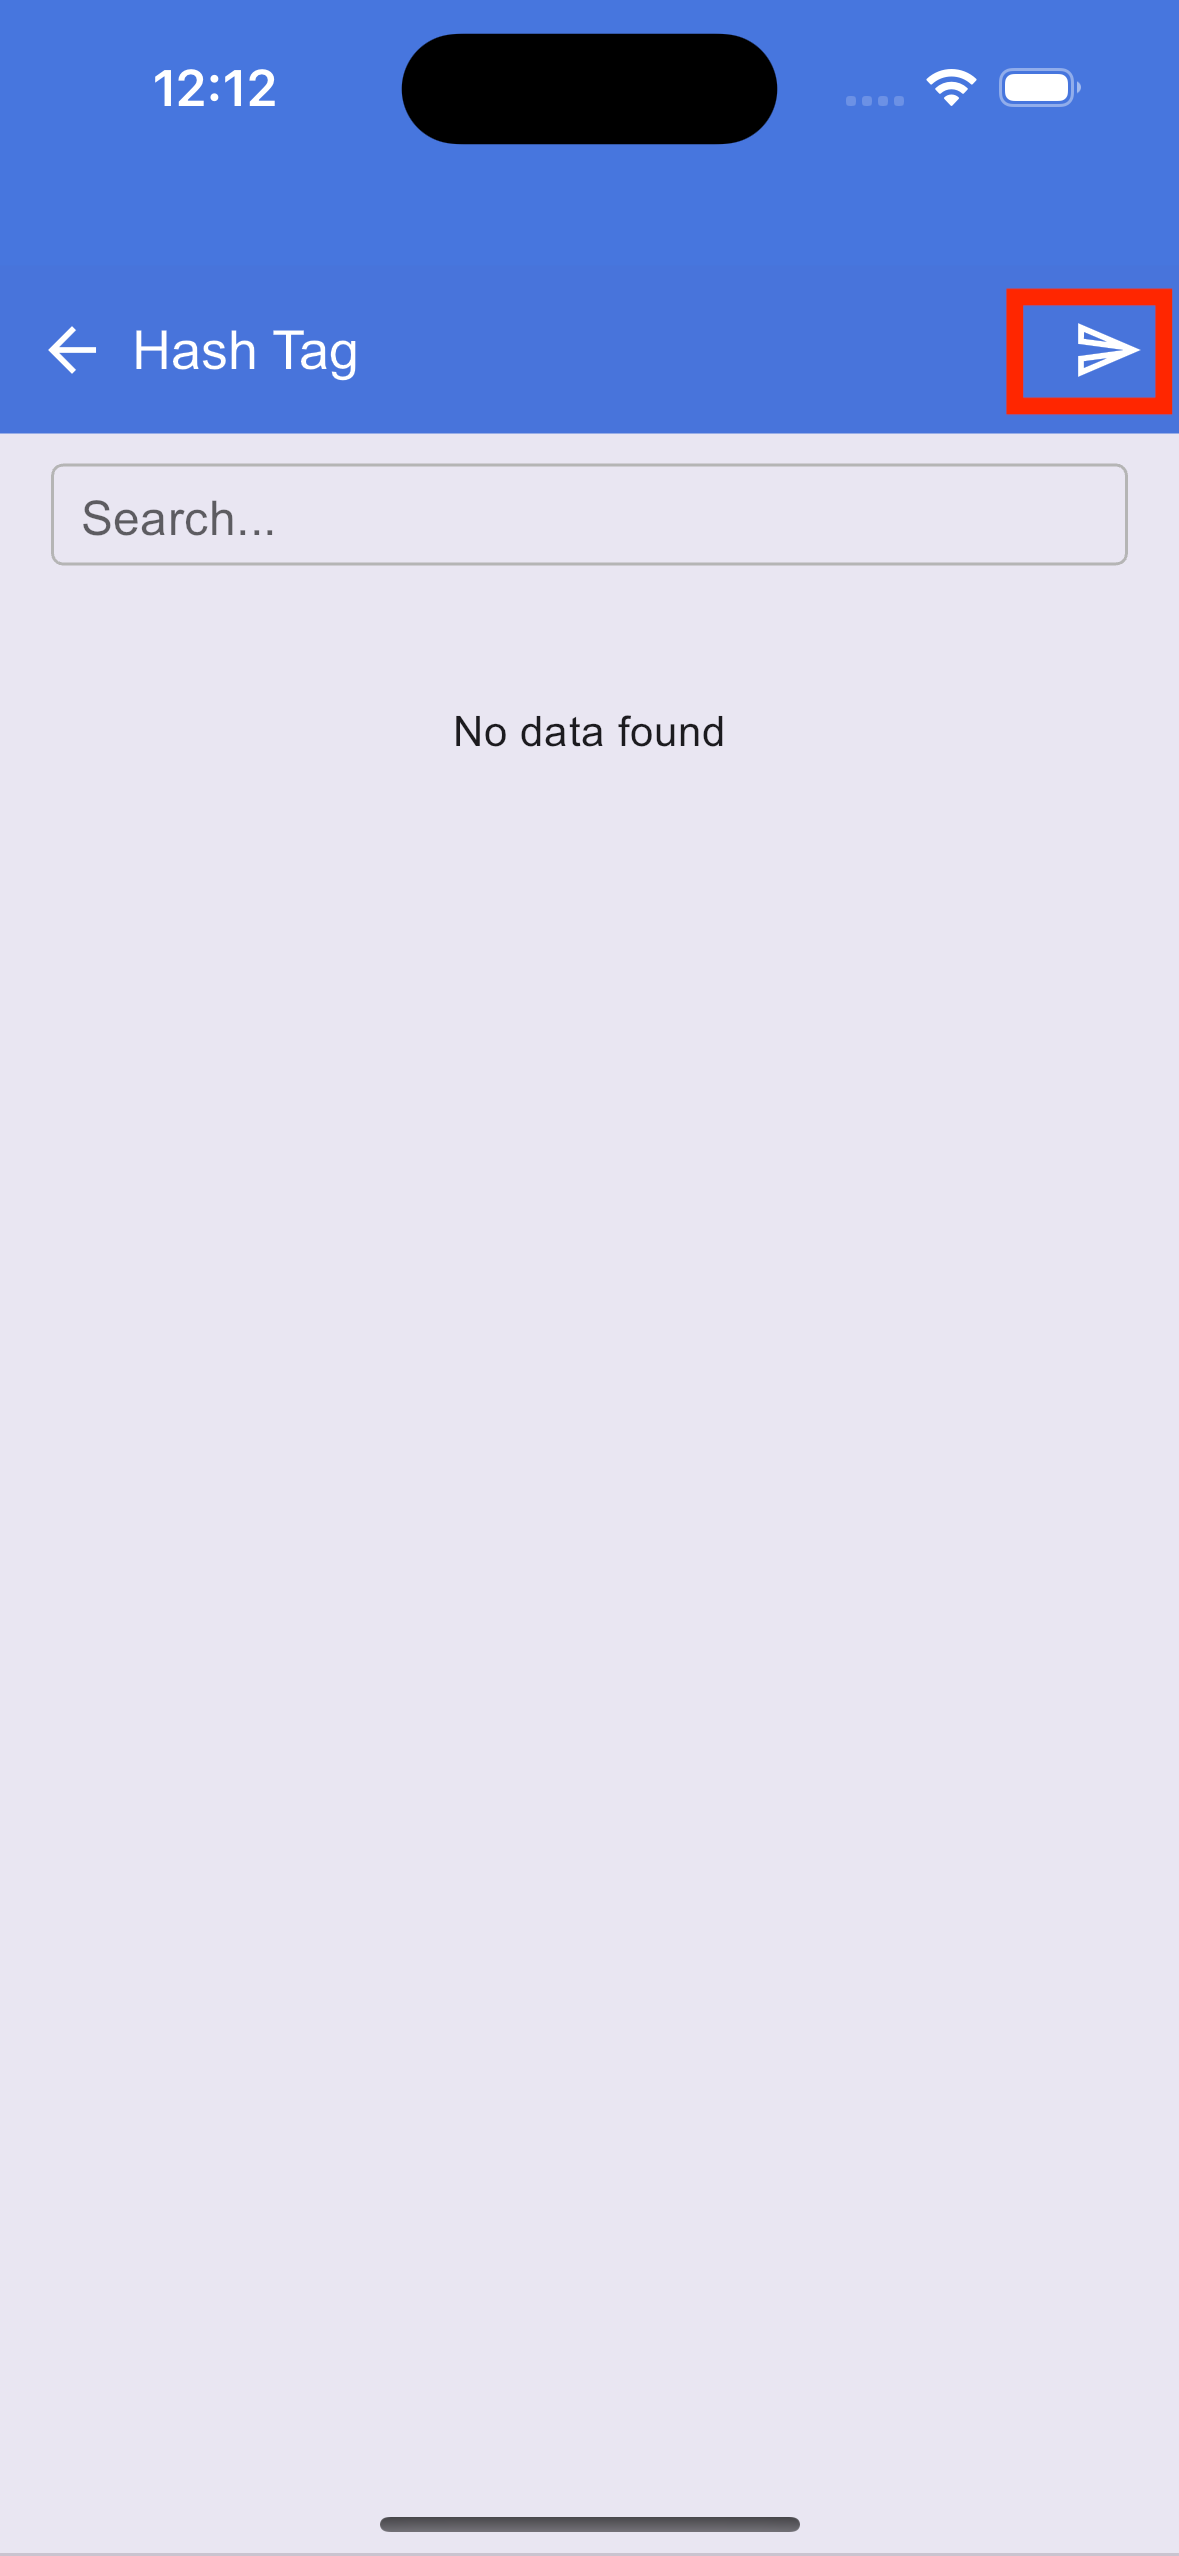
Hash tagging a section
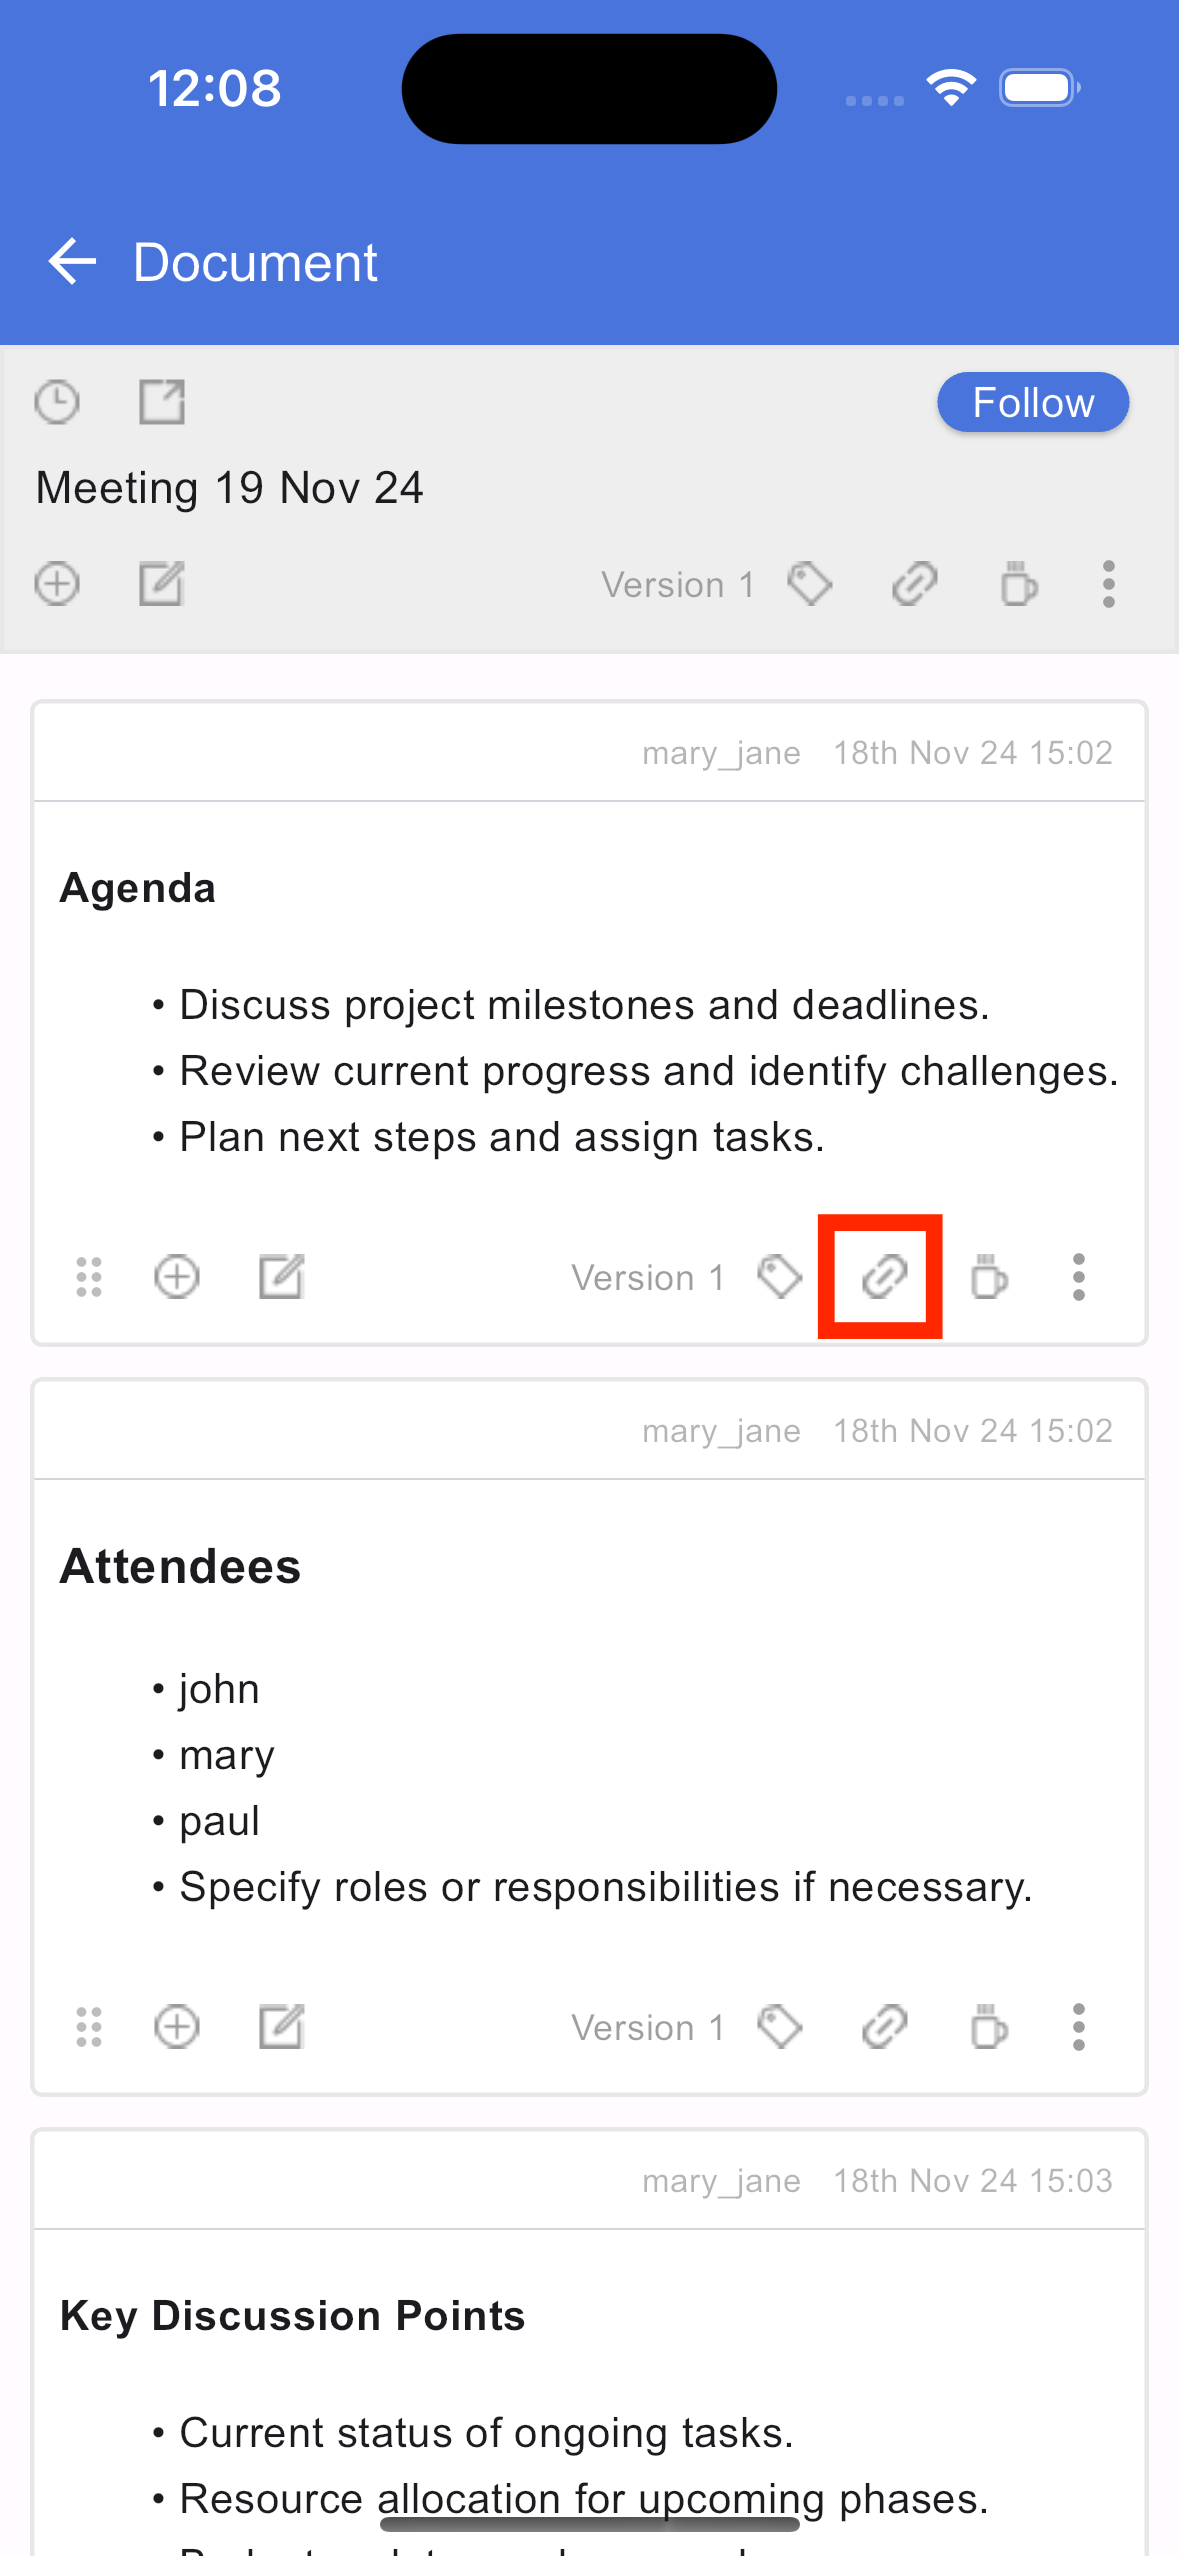
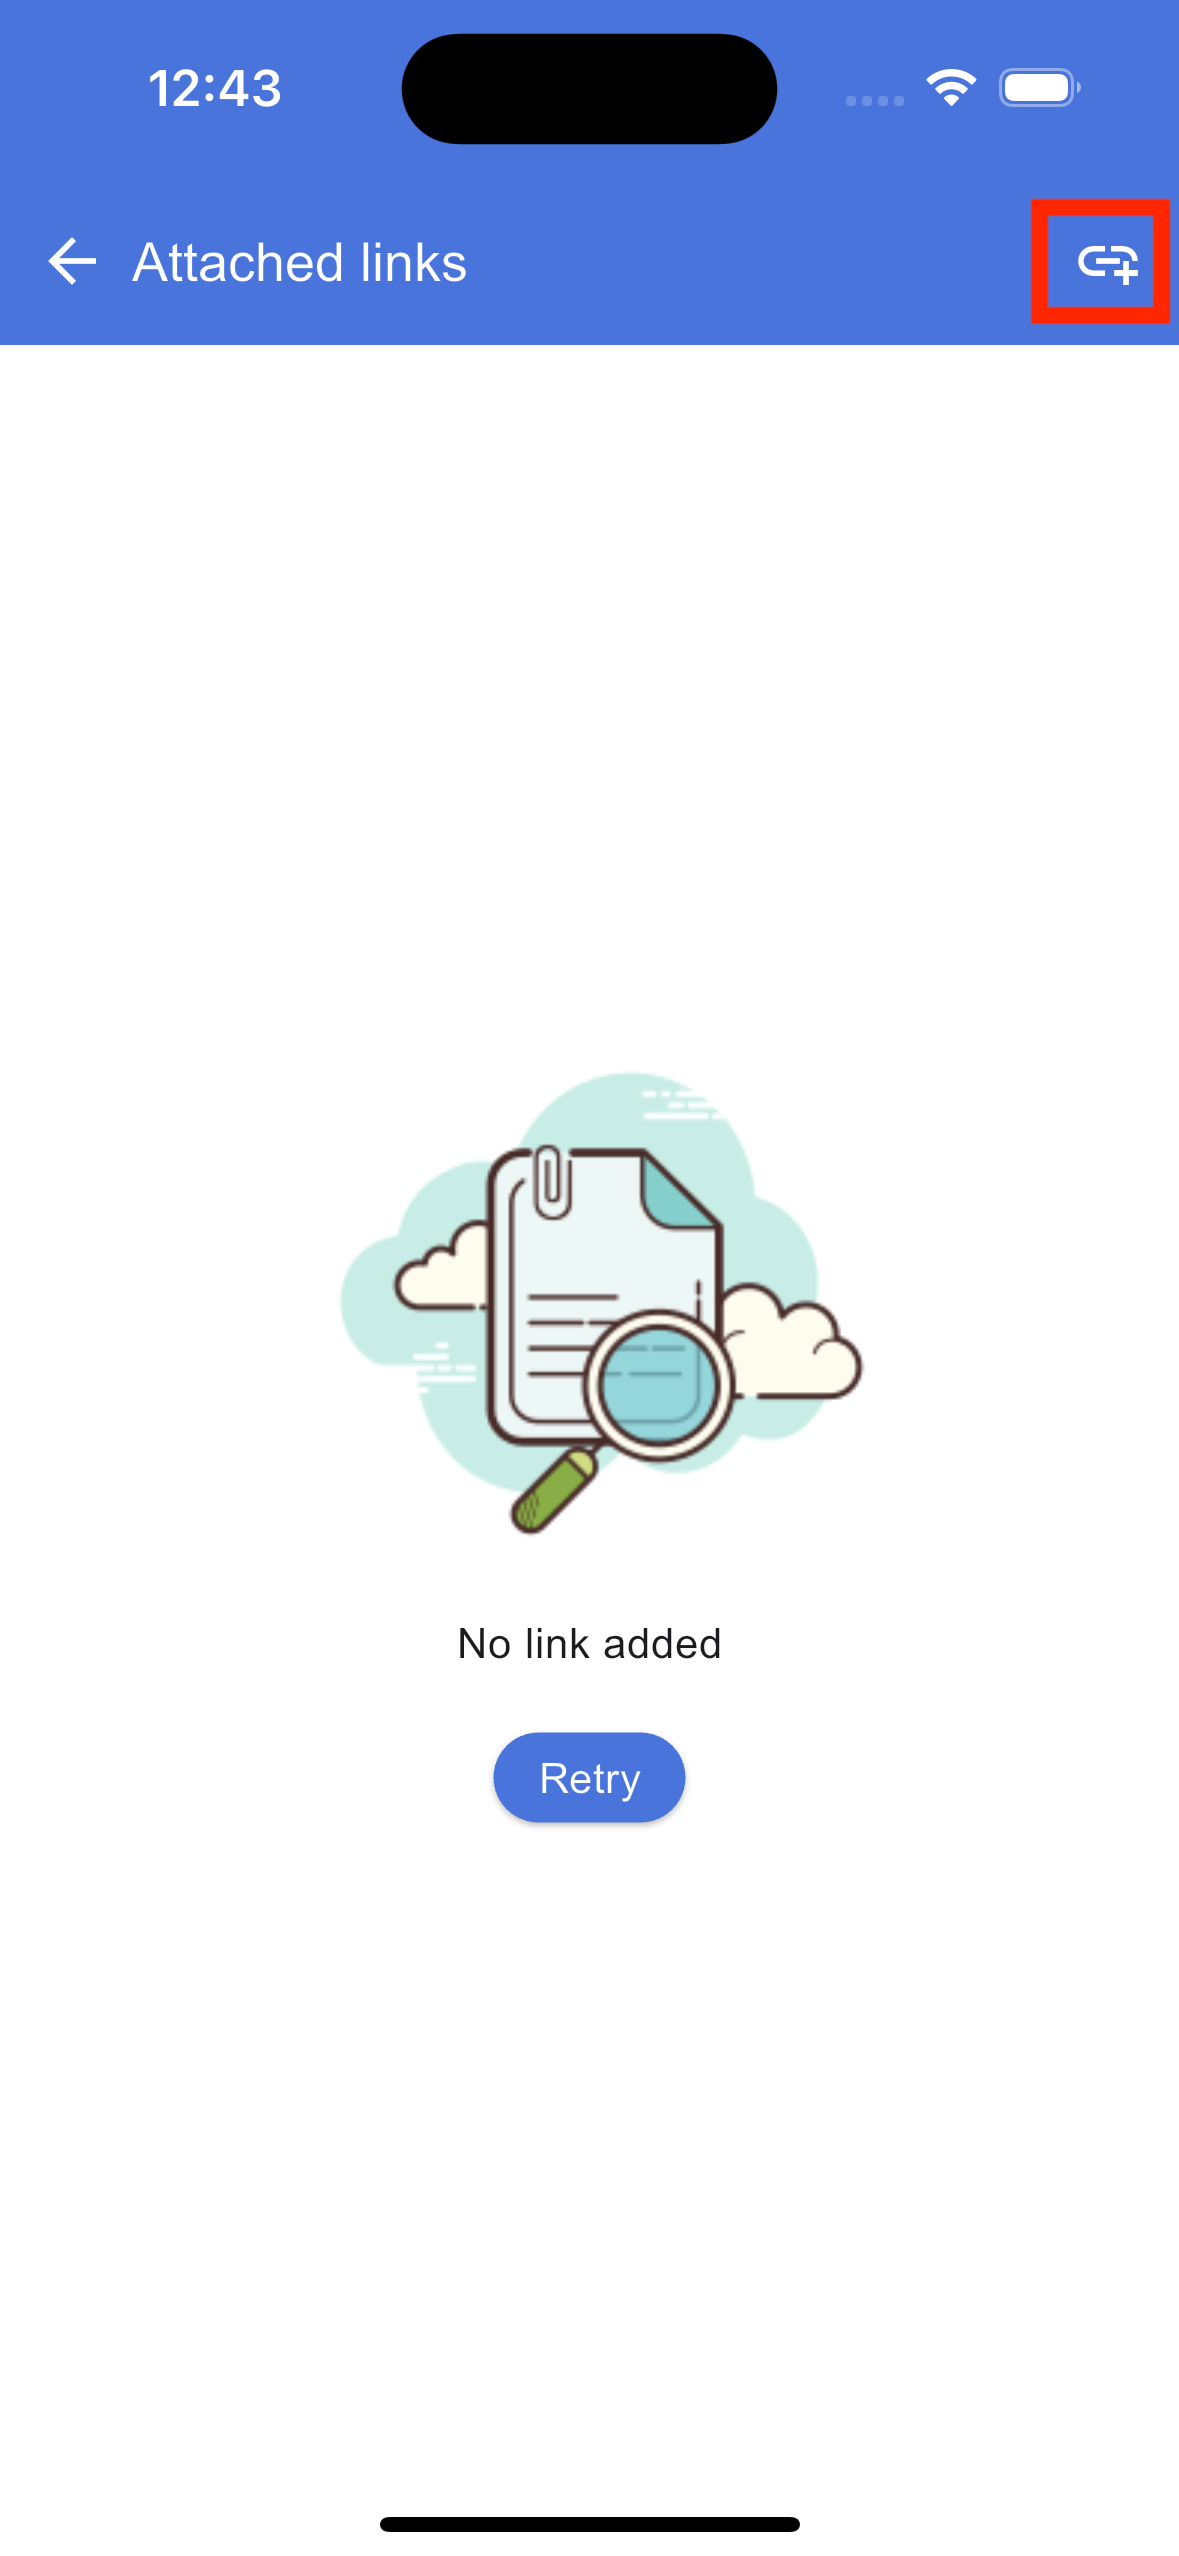
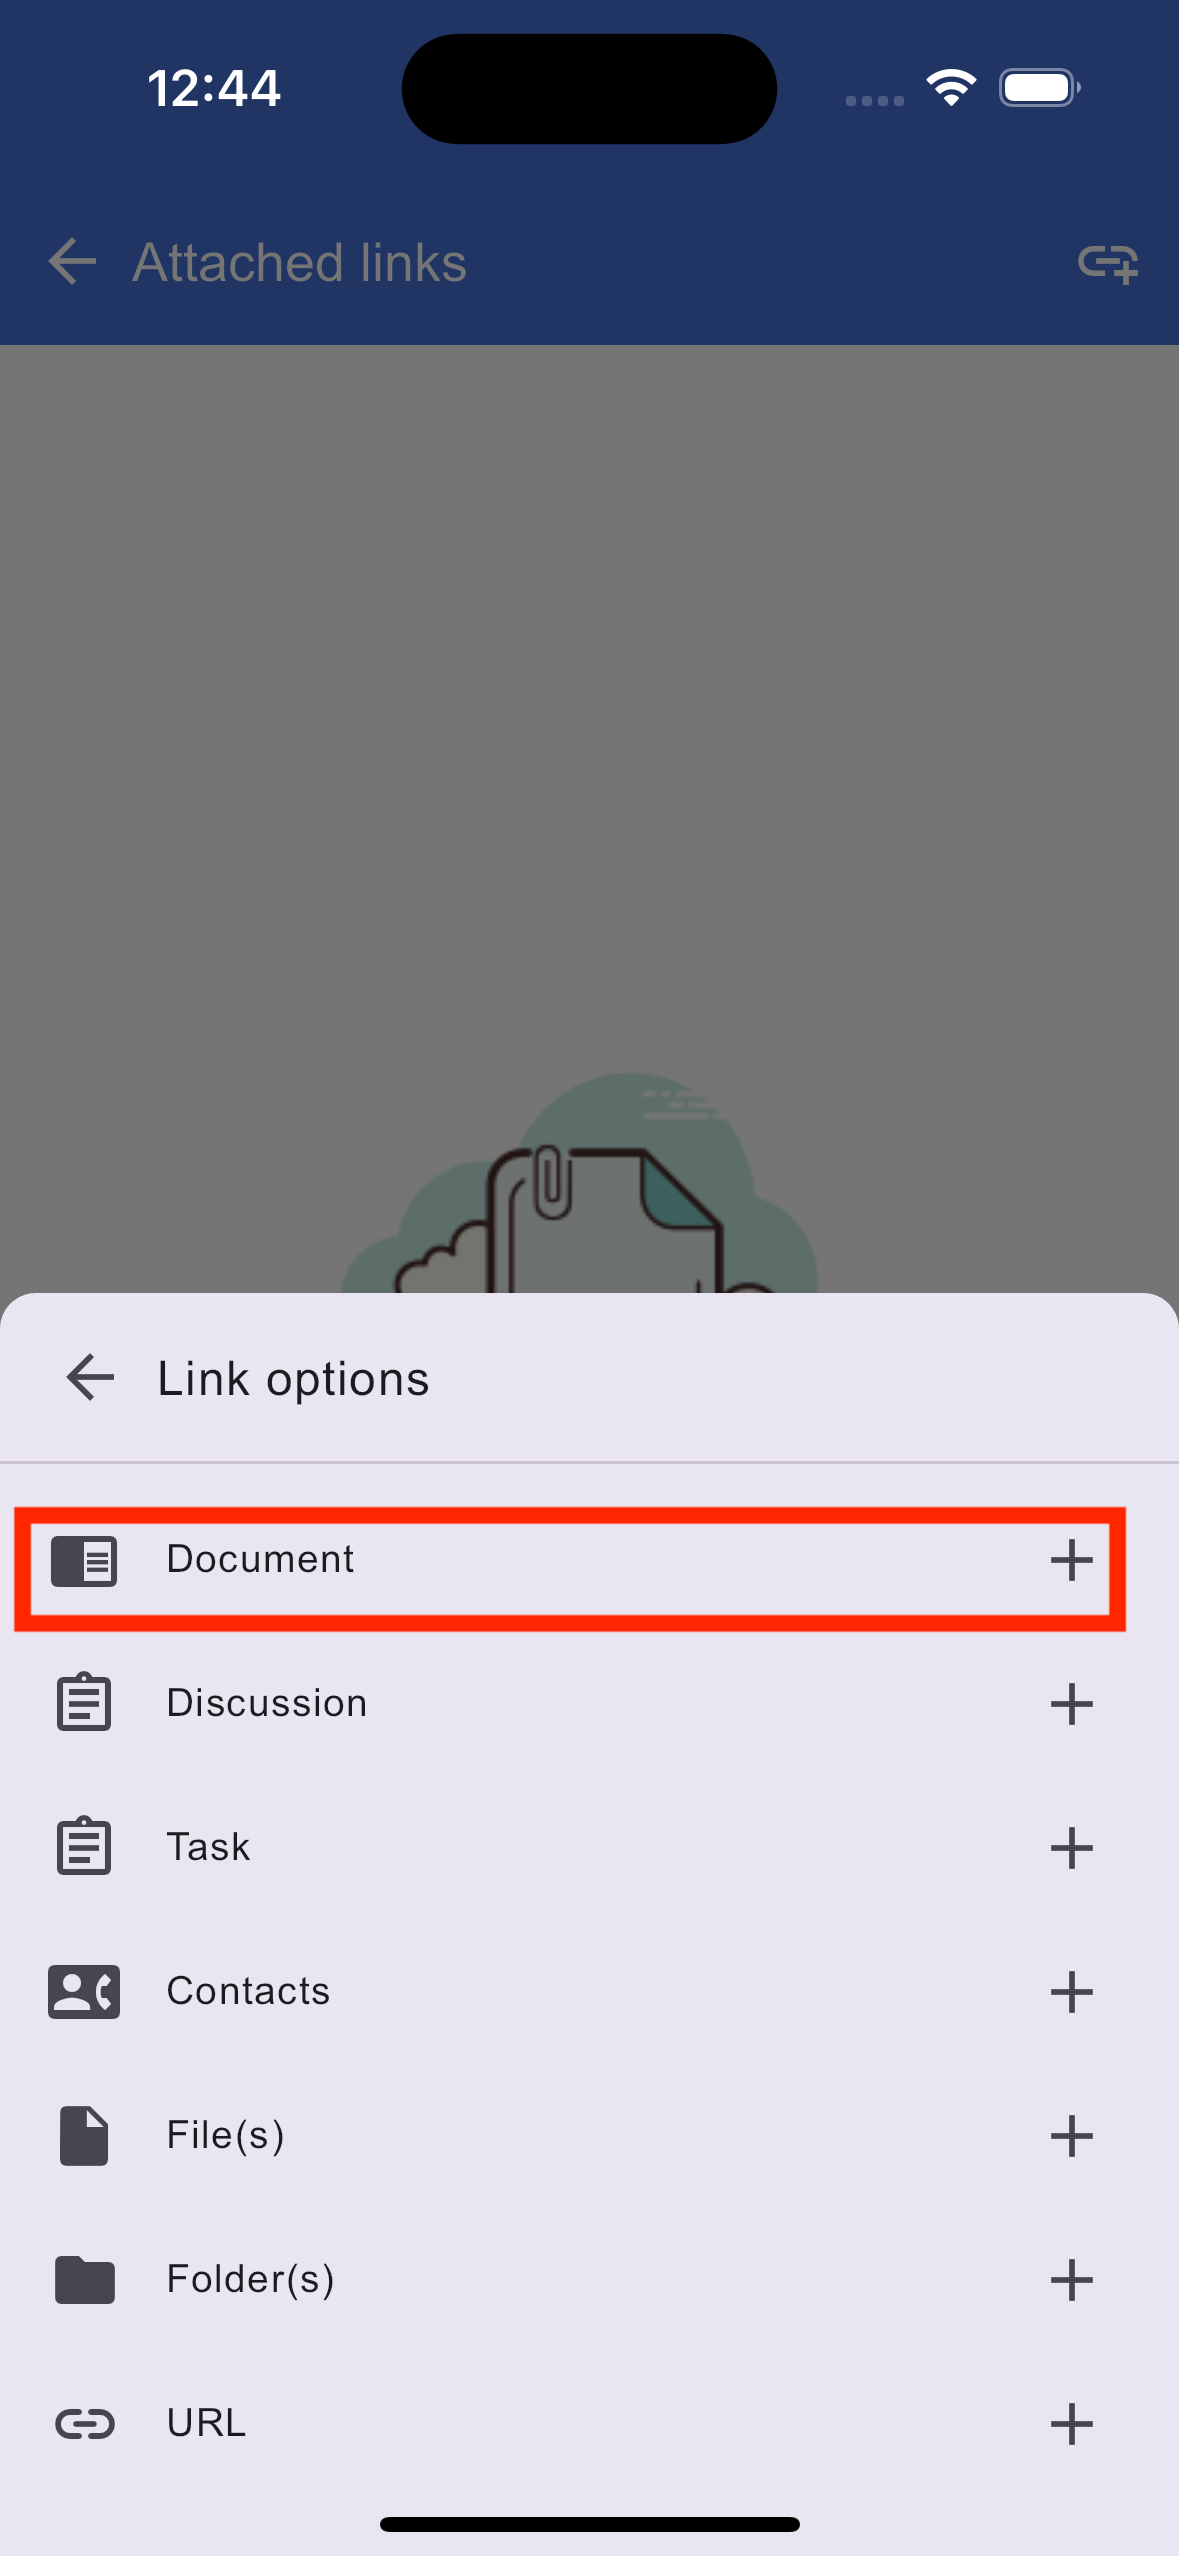
Linking in document section
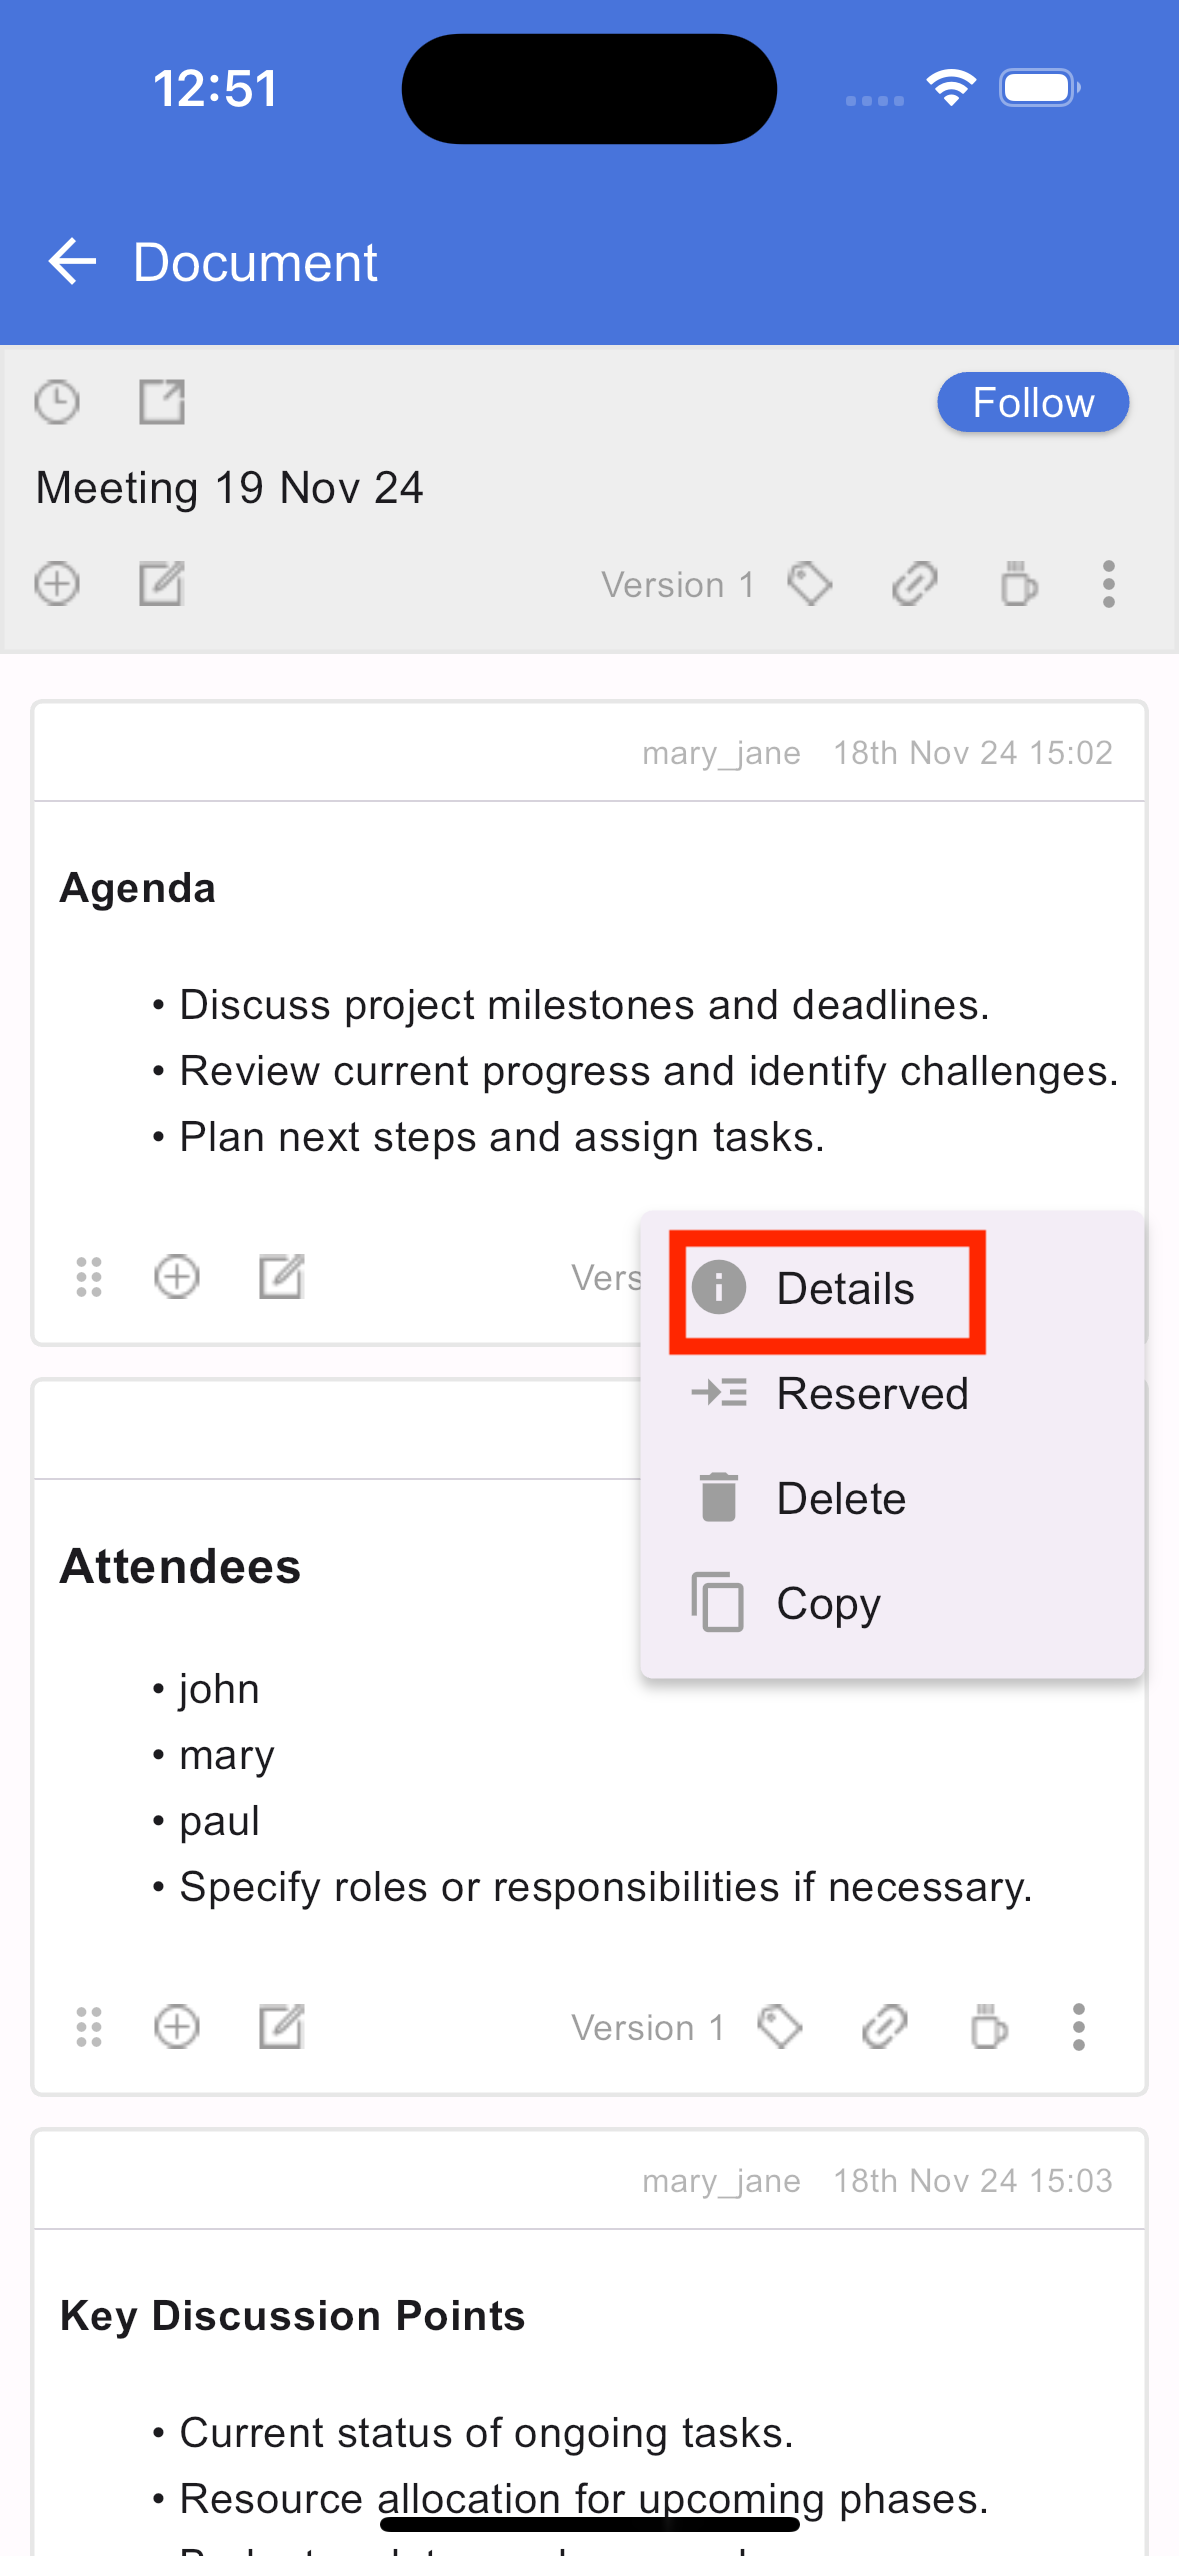
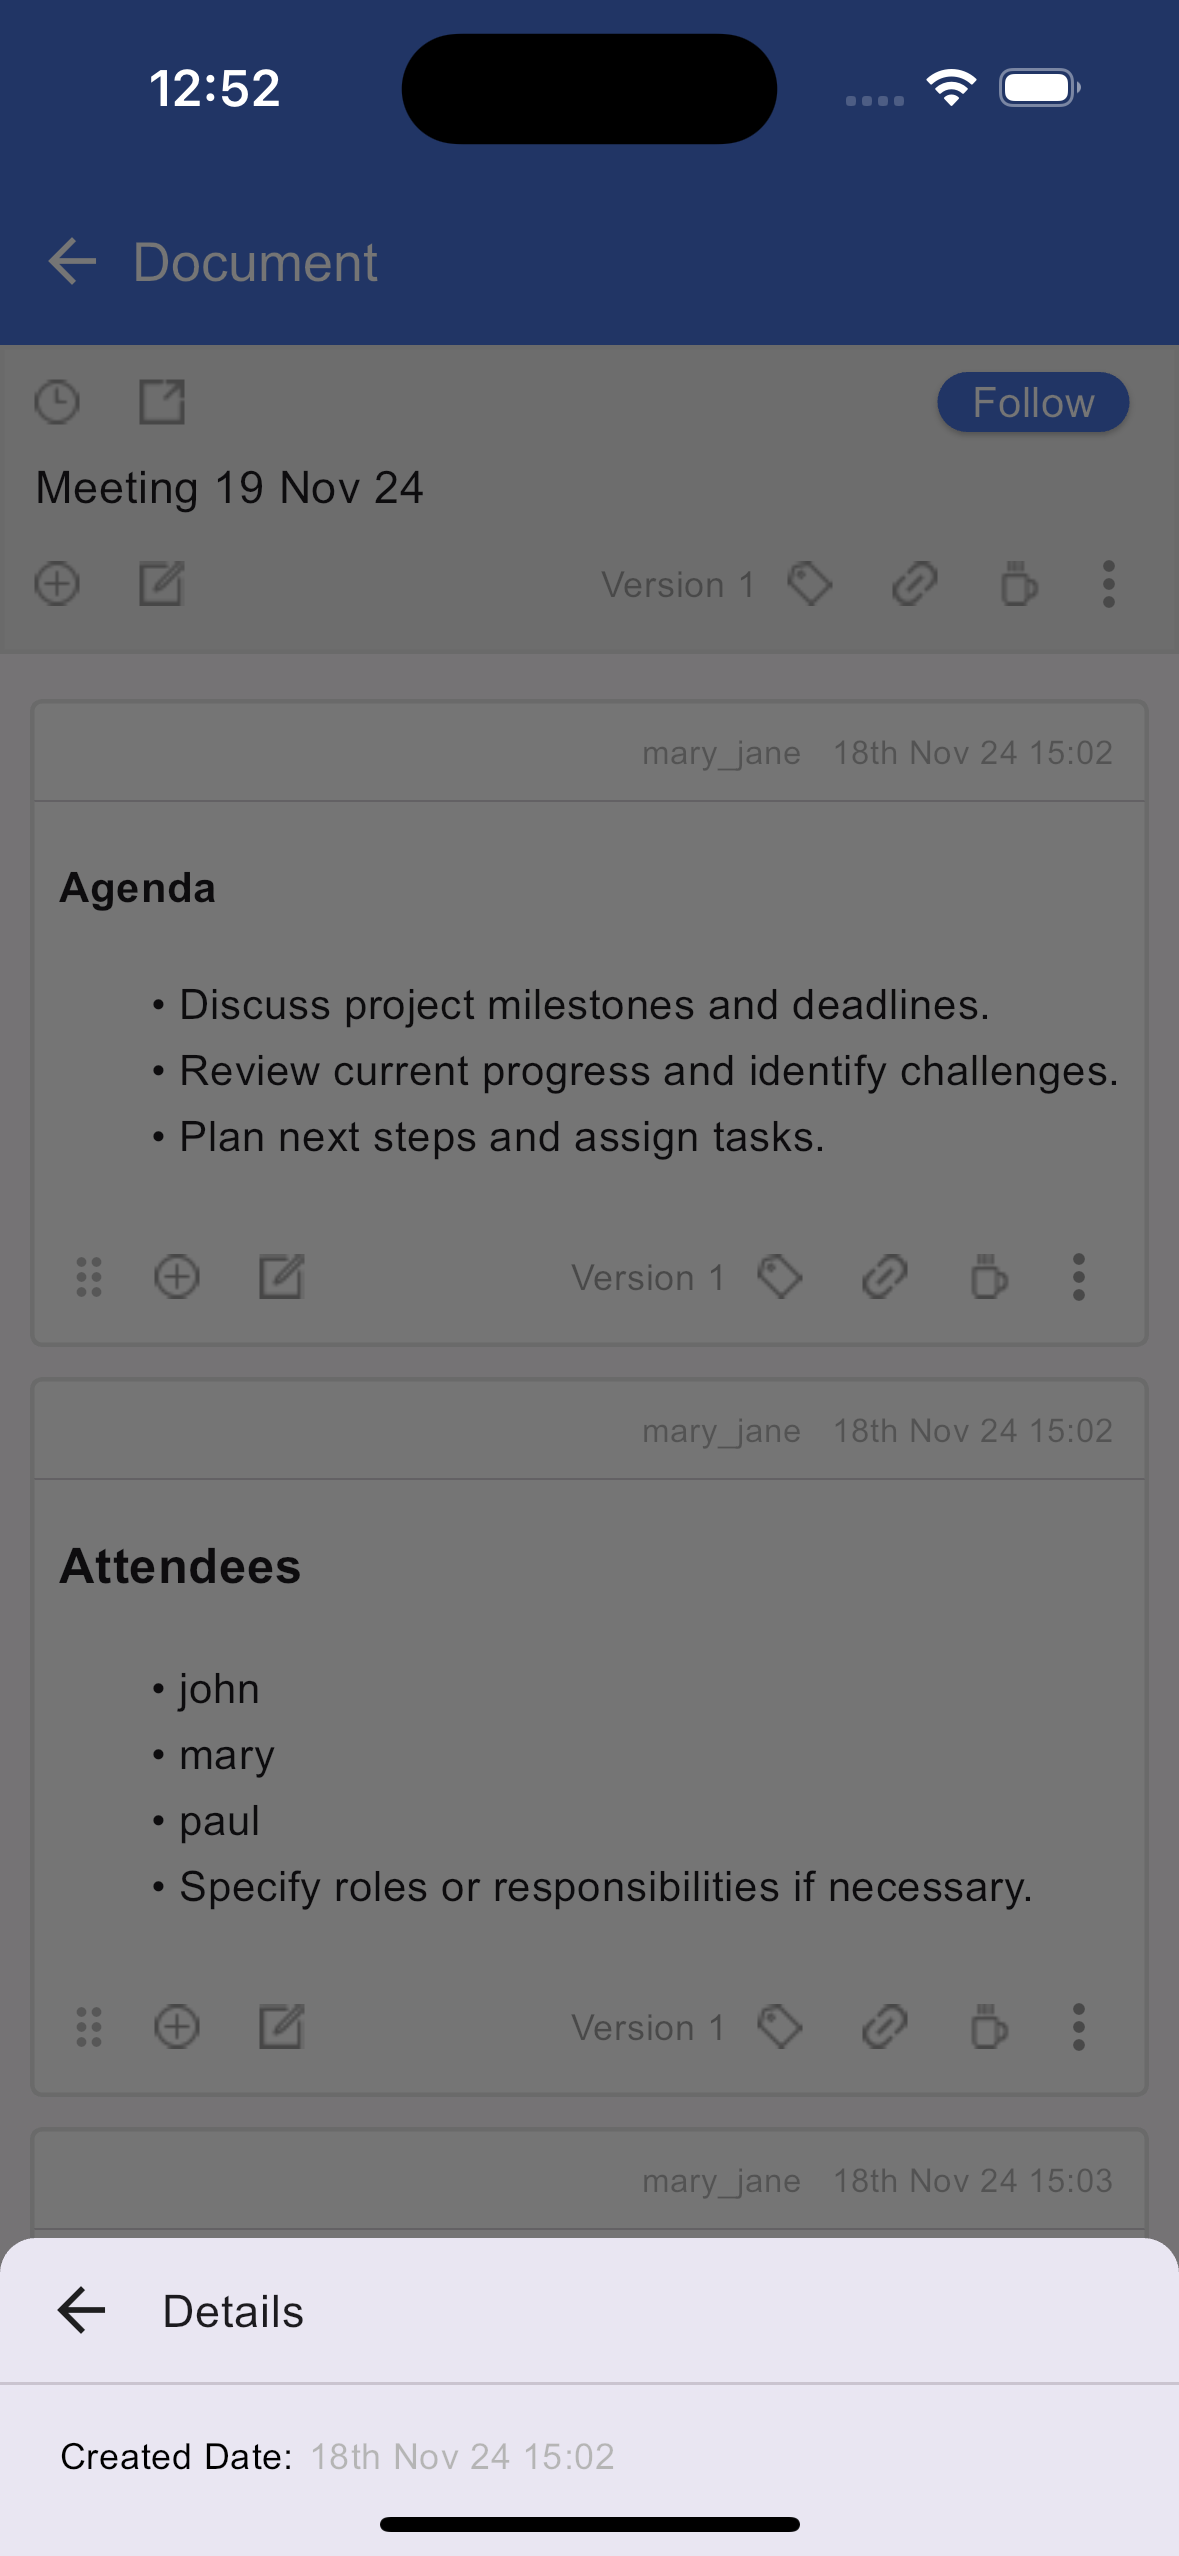
More details of a section
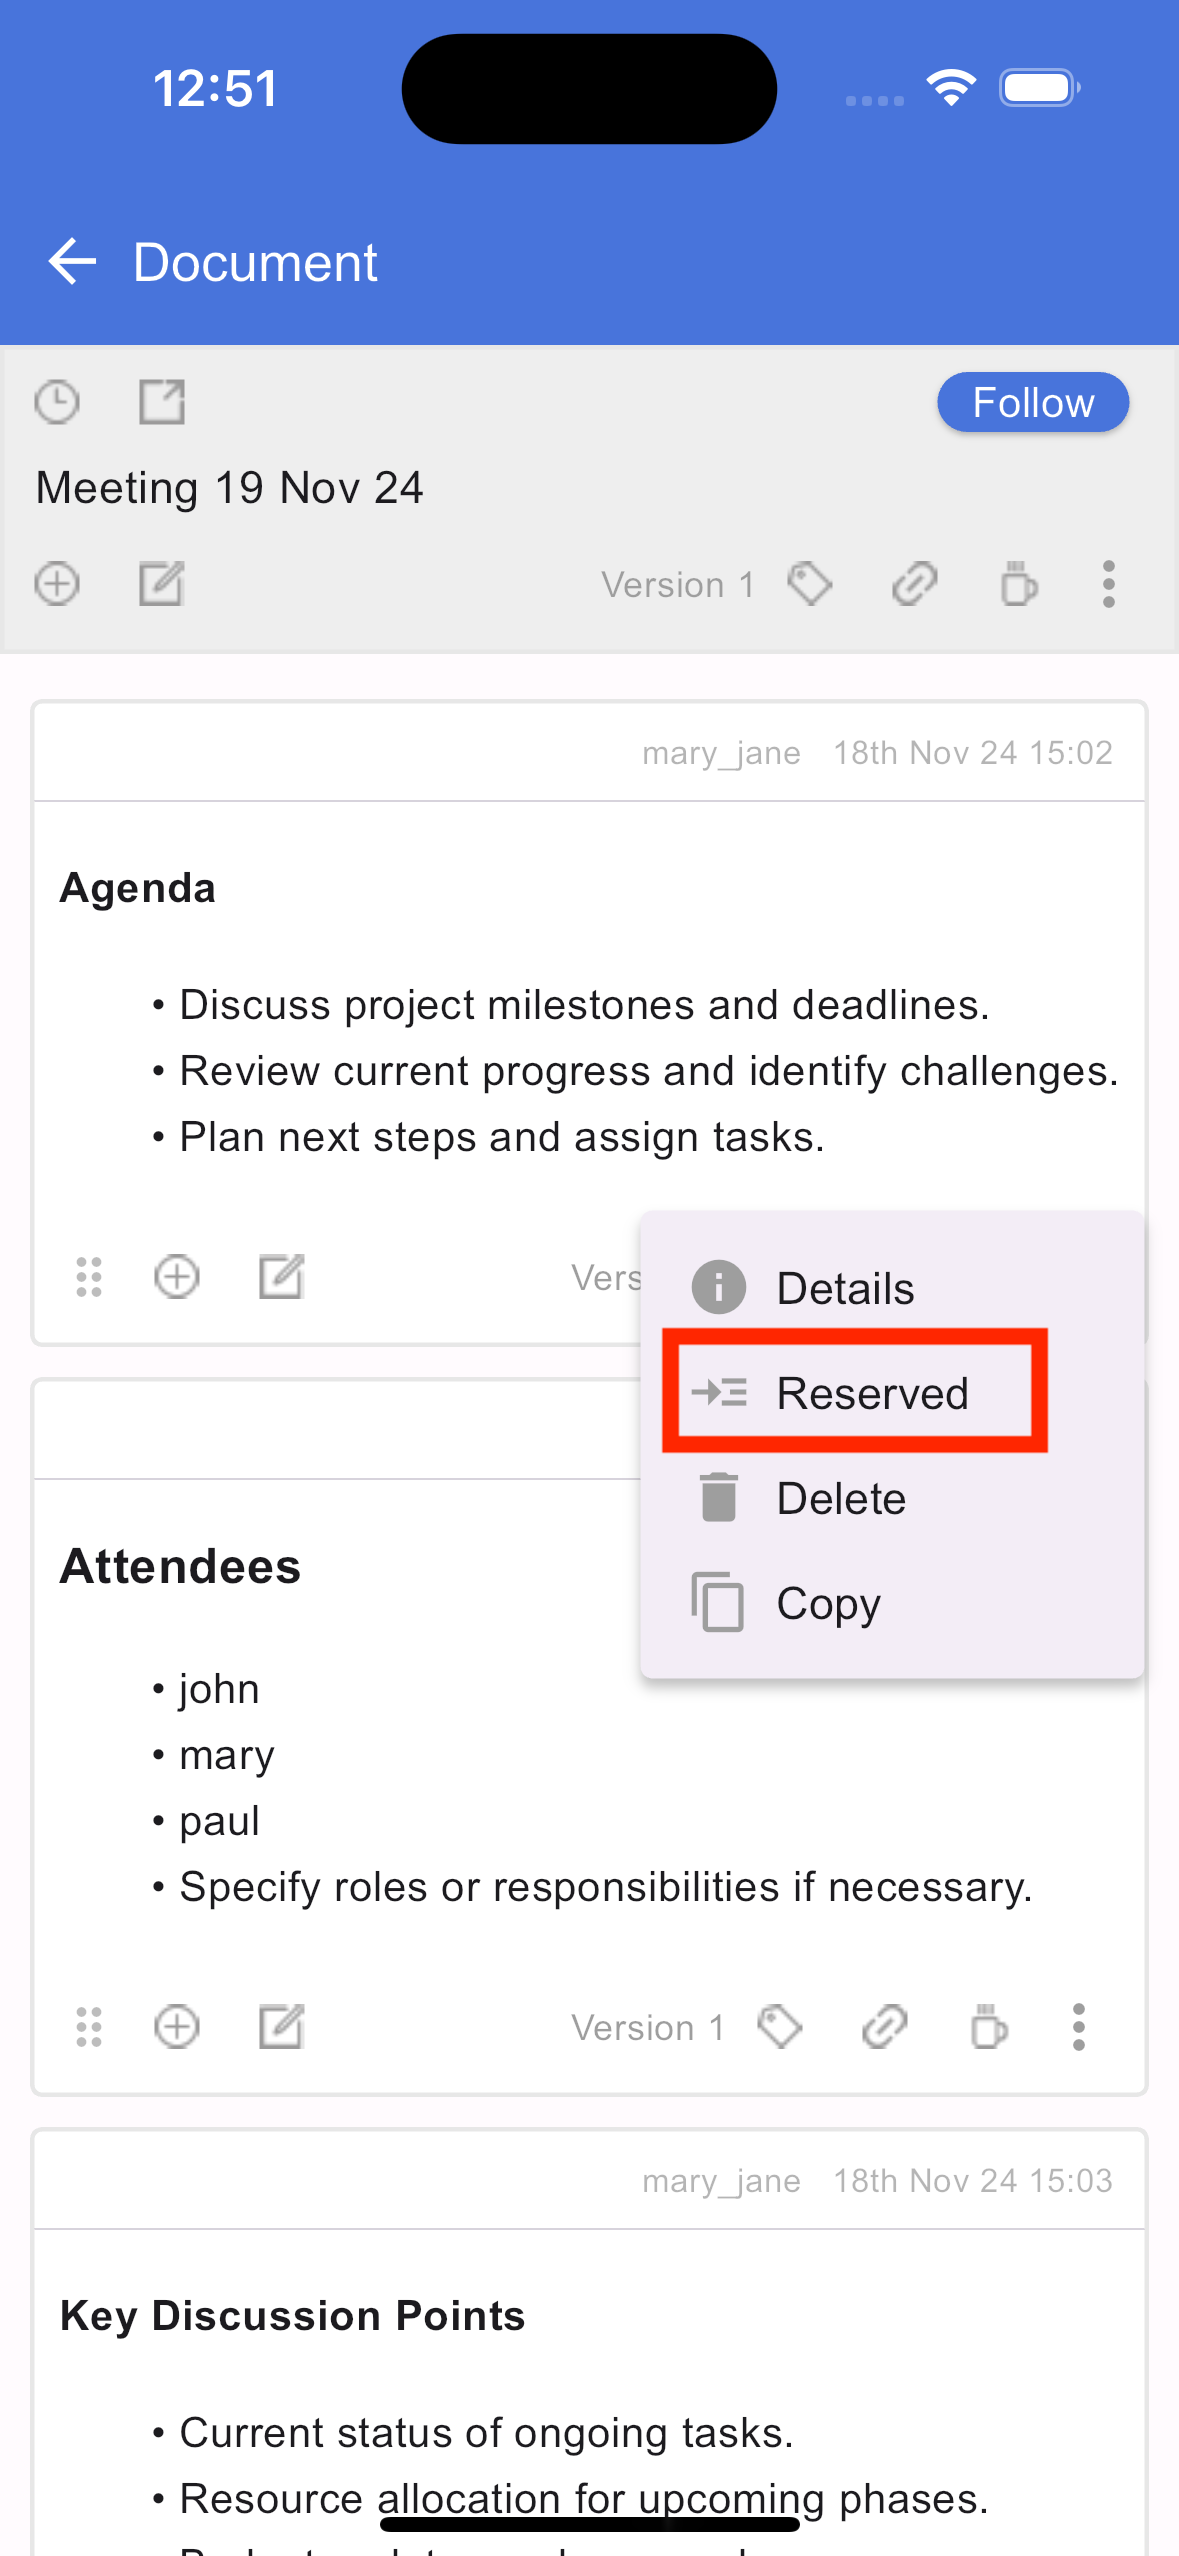
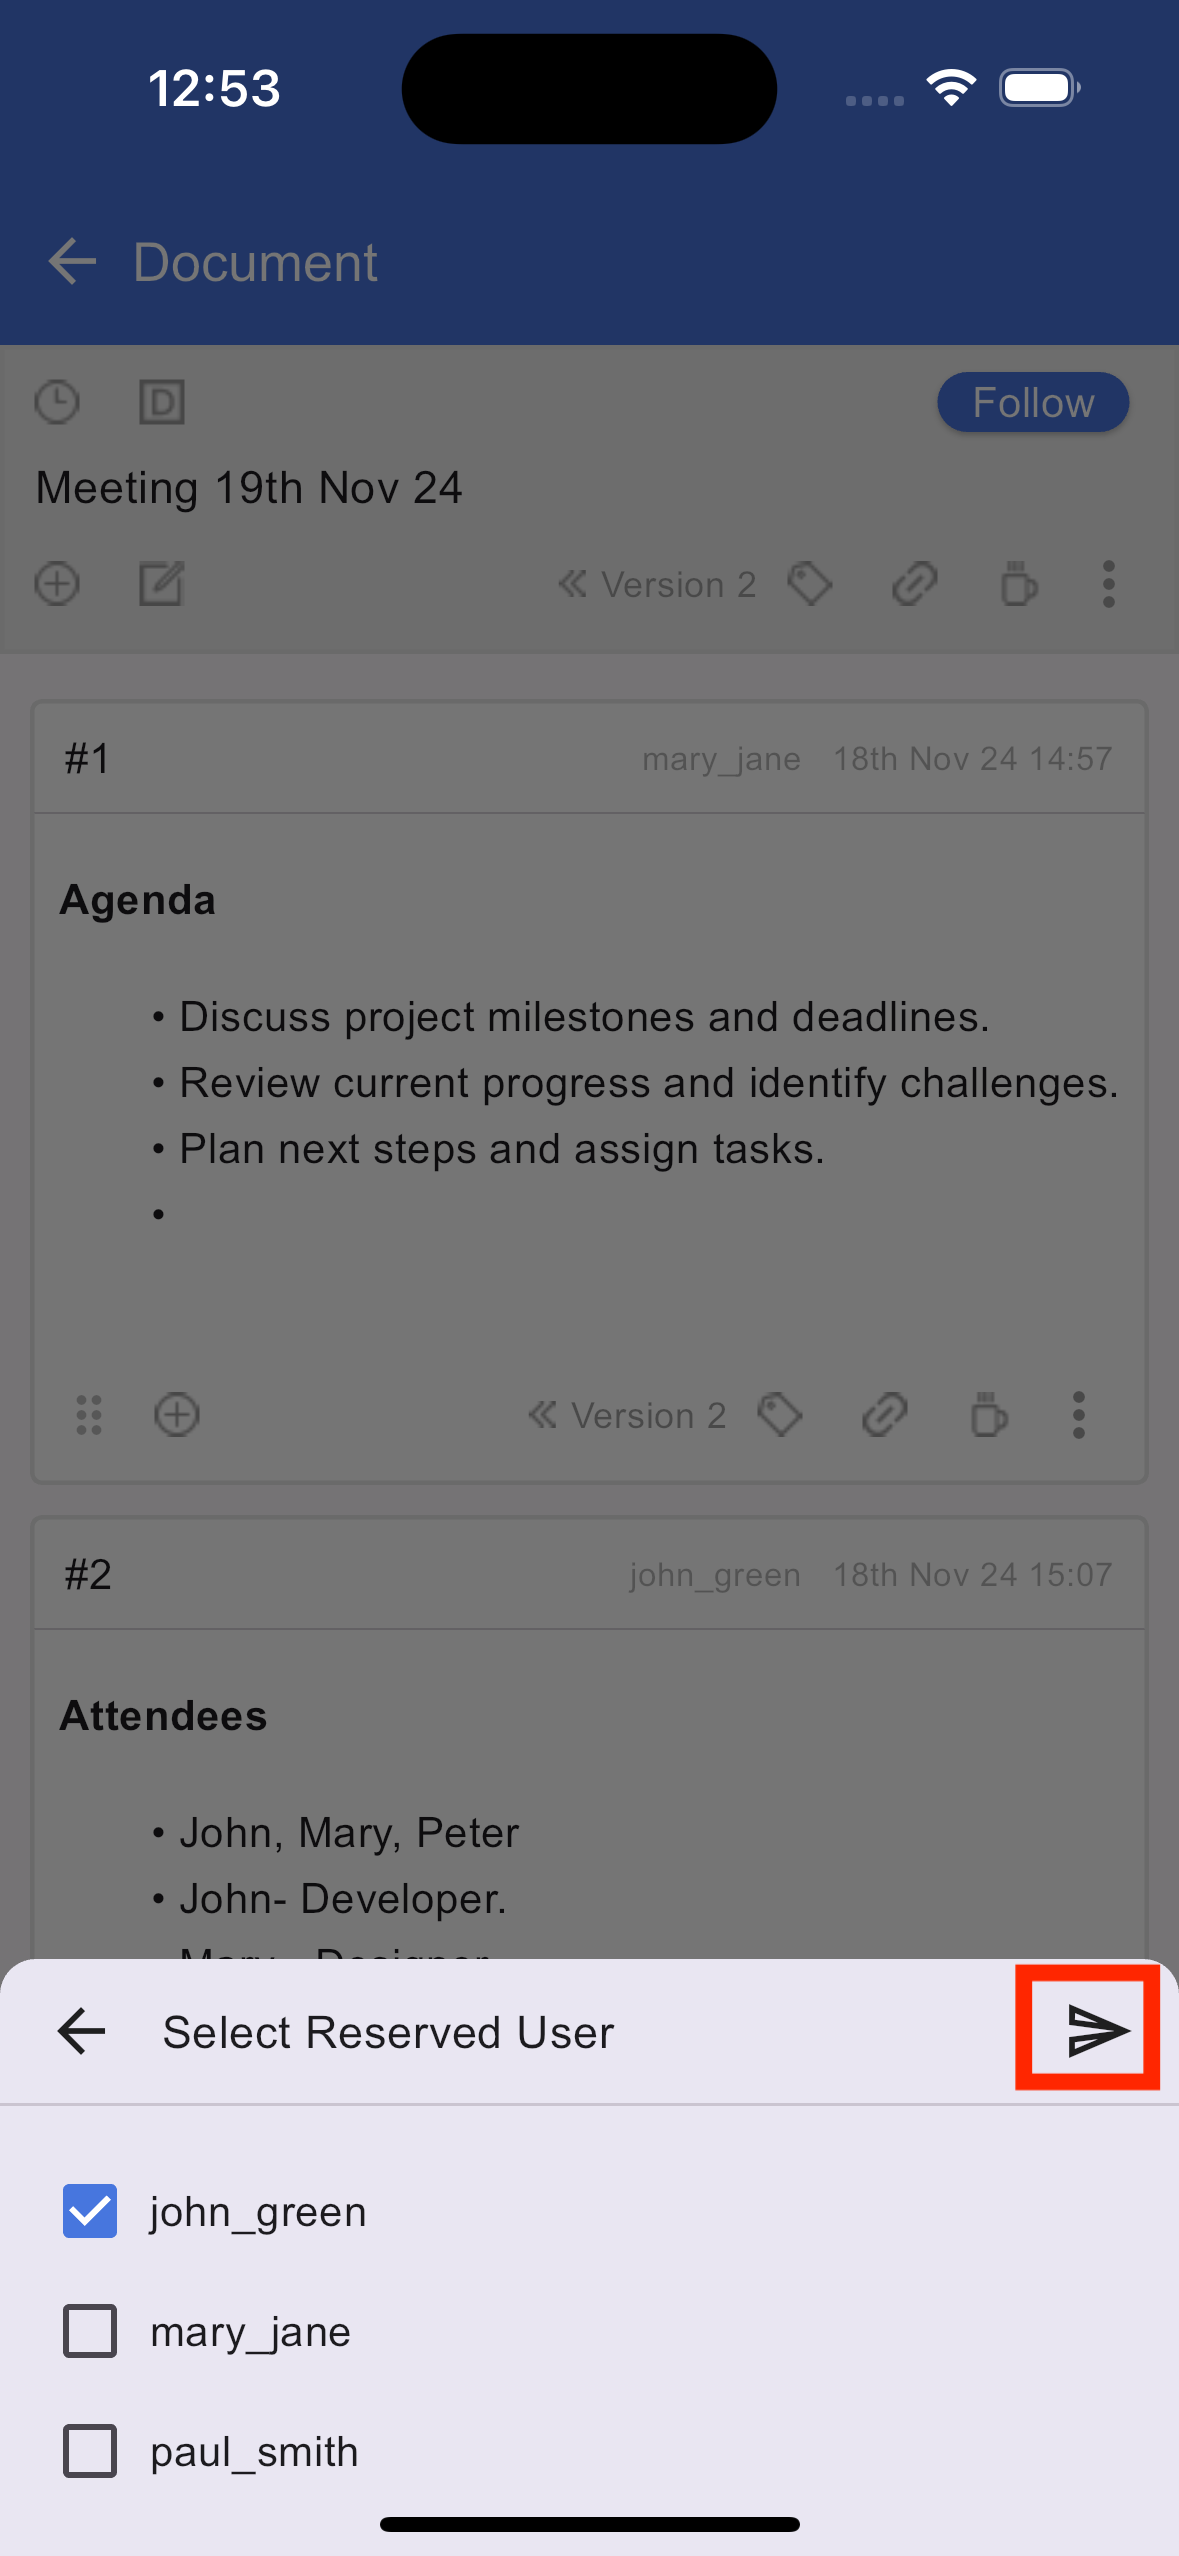
Reserve, unreserved editors of a section
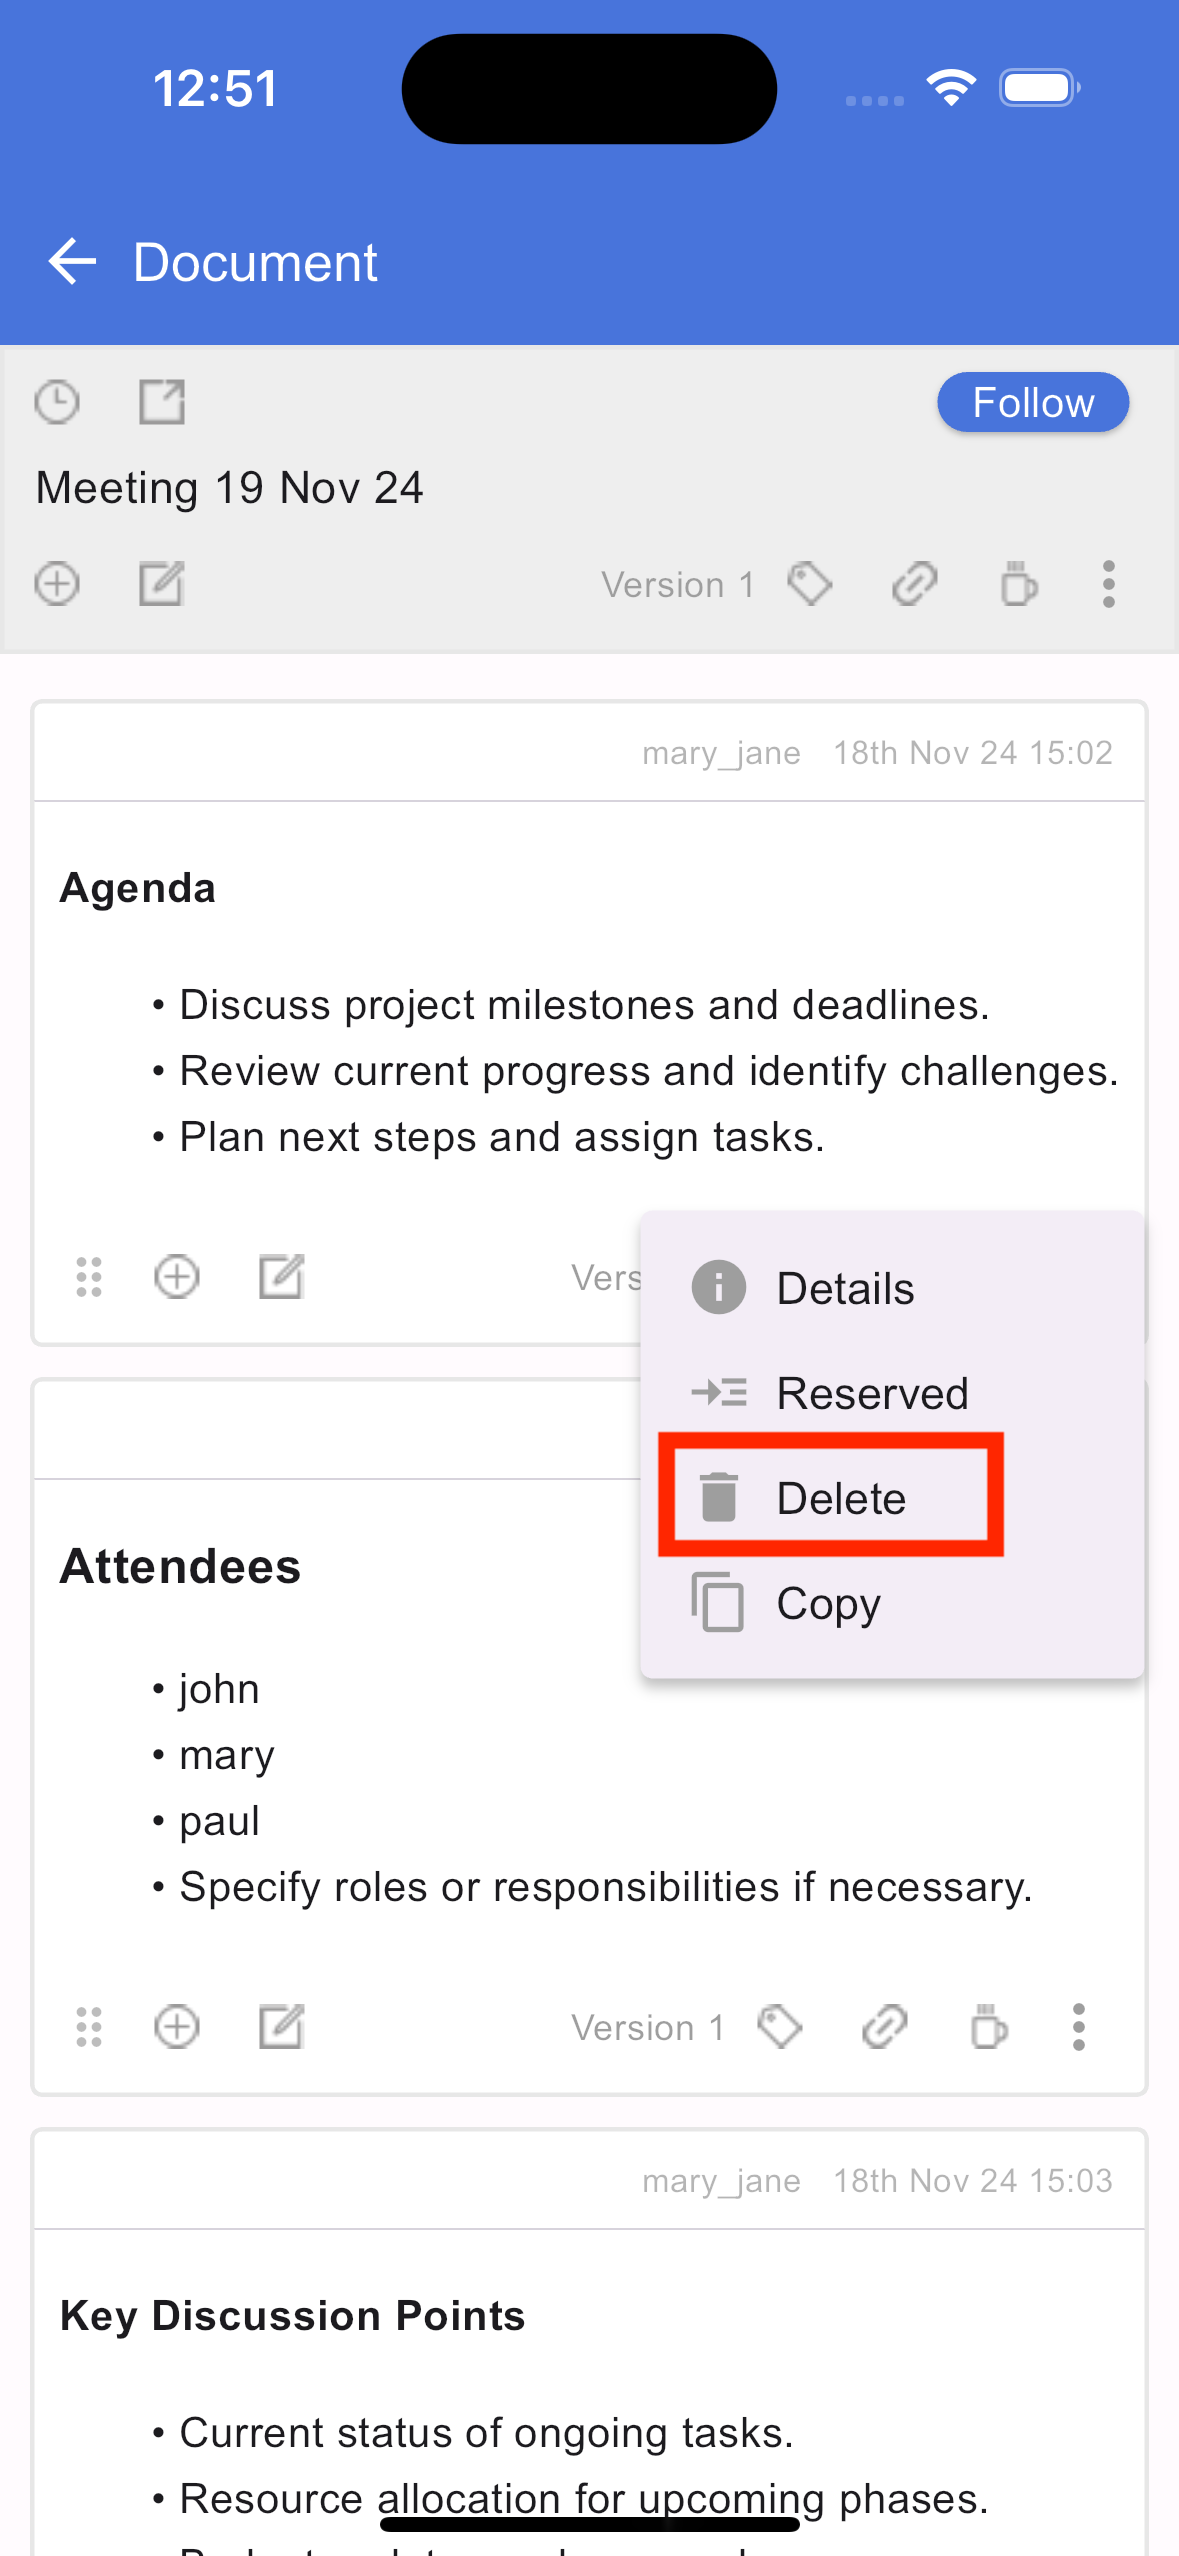
Deleting contents of section
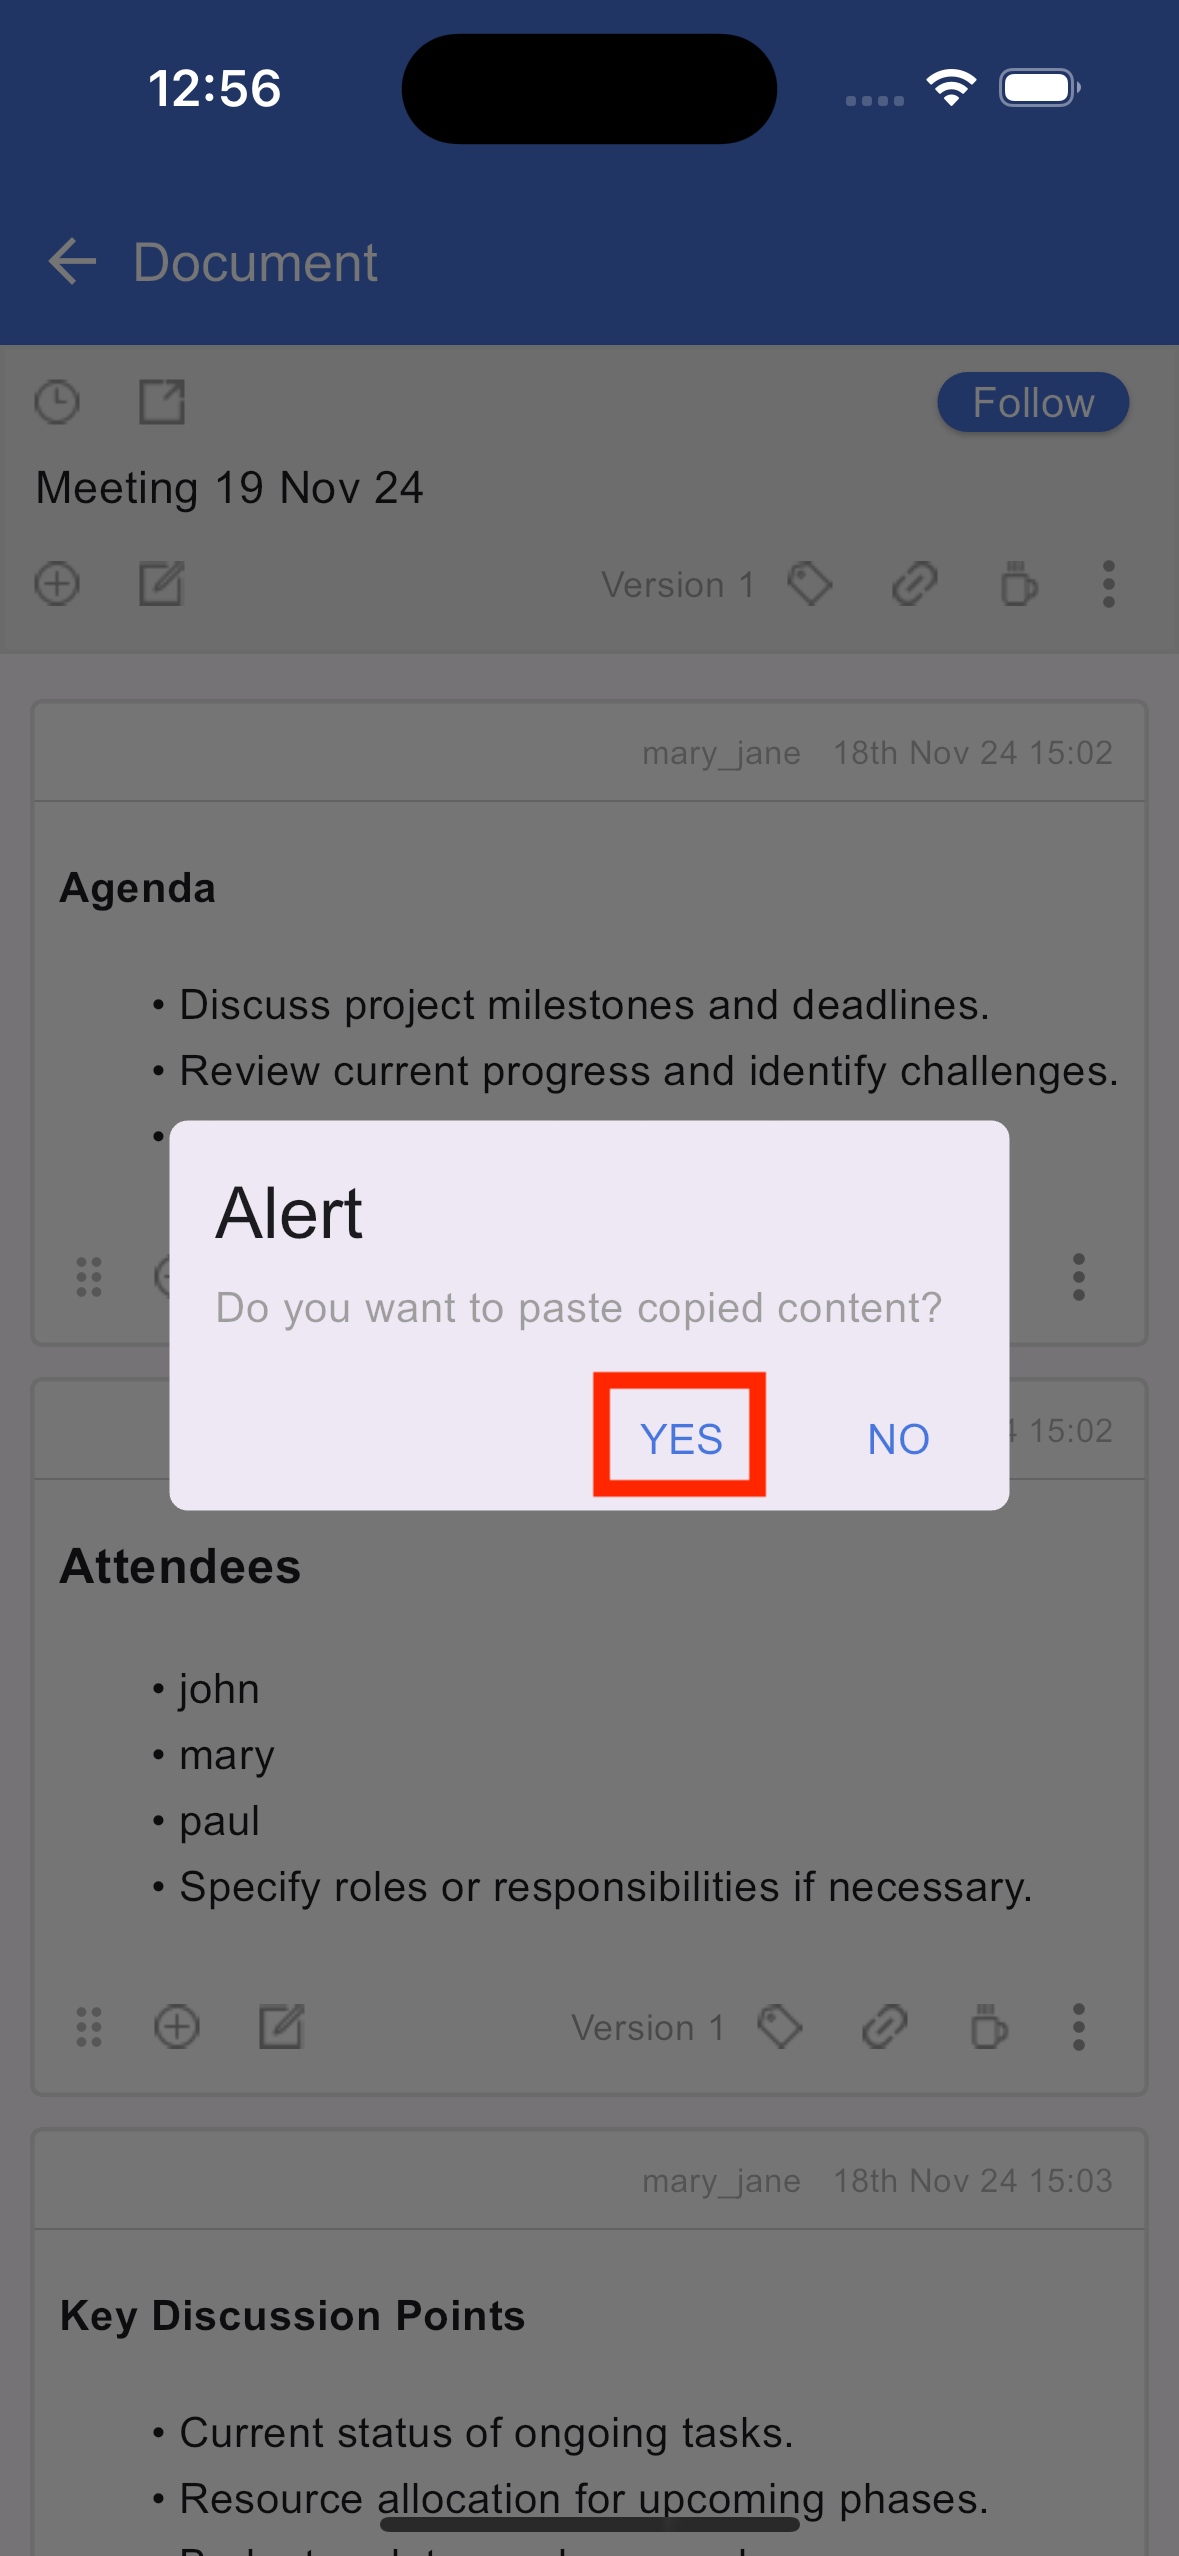
Copying and pasting a section

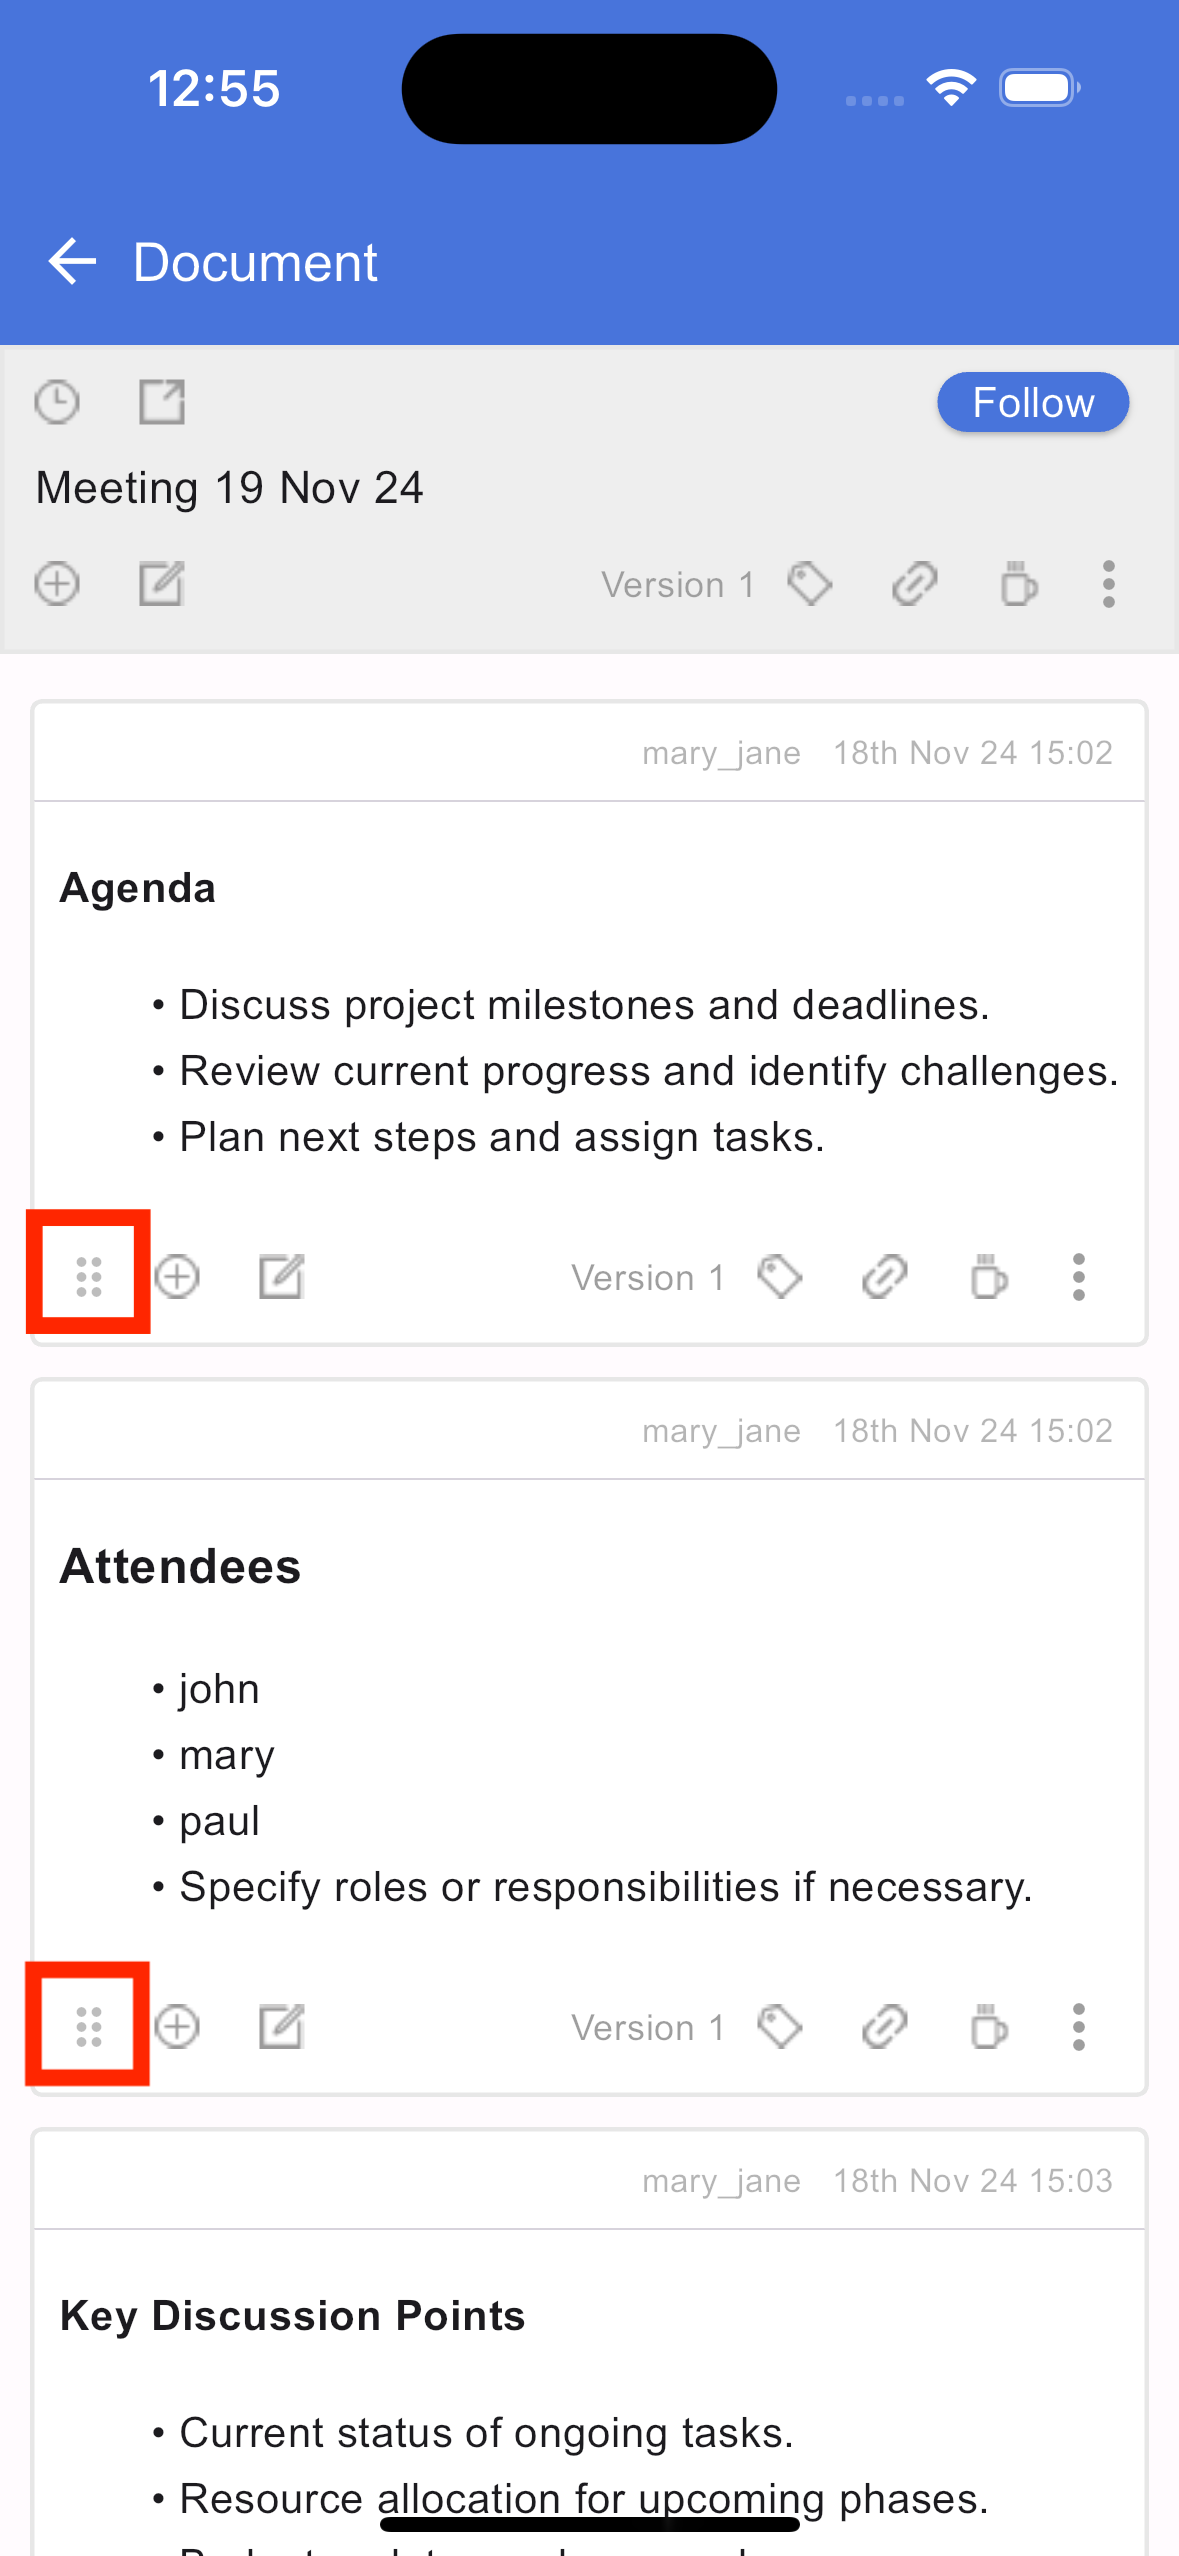
Moving a document section
If you have any further questions or need assistance, please don't hesitate to reach out to our support team. We are here to help you!